
VimとVimScriptの入門記事です。
Vimはヘルプが充実しているので、最終的にはヘルプに頼ればいいのですが、どうやったら知りたいヘルプを見られるかってのも問題の一つかなと思ってます。
入門者の助けになるように、不定期で更新していますが、てこずってます。
Contents
基本
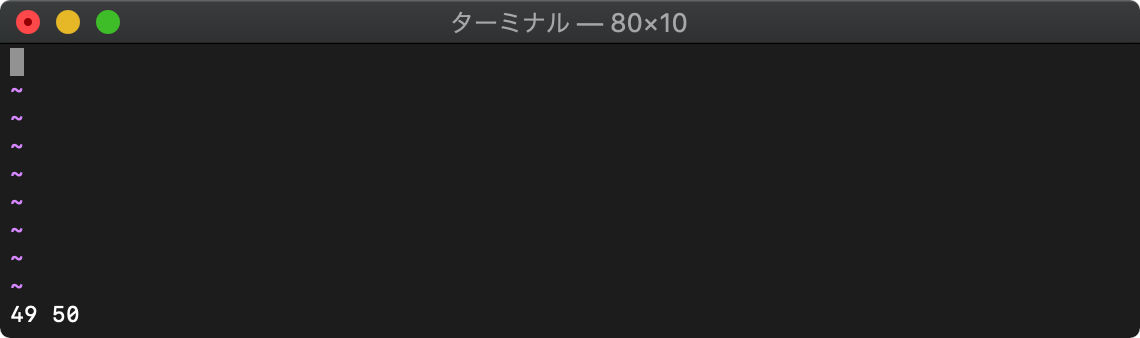
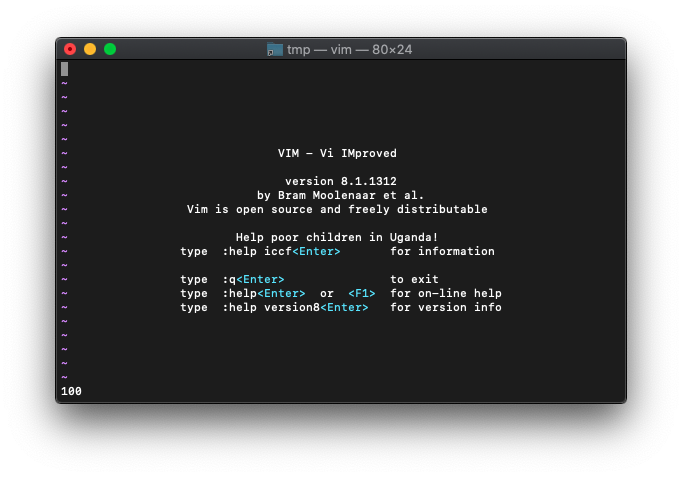
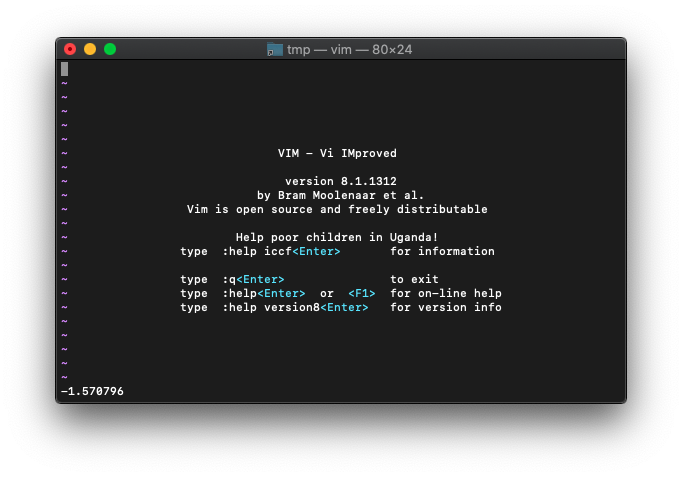
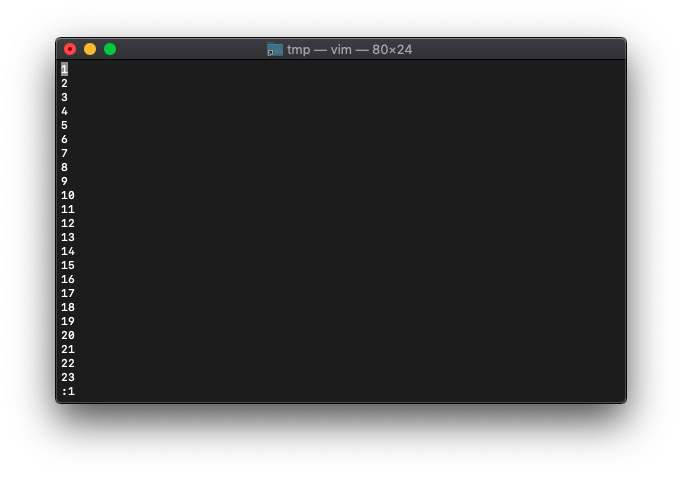
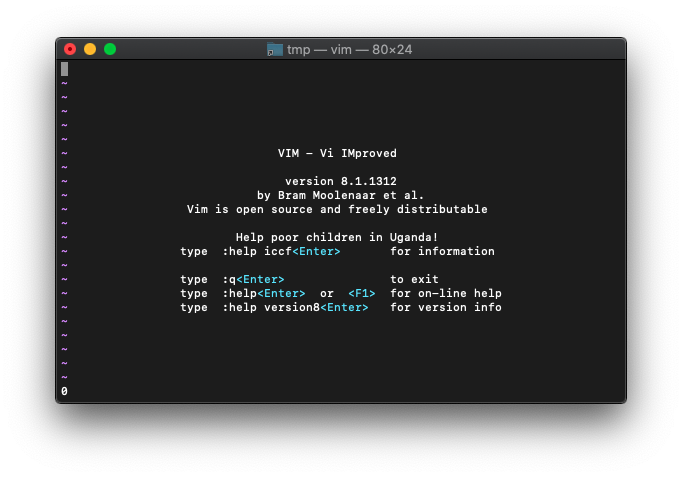
VimScriptを使うには、やはりVimの起動が必要です。
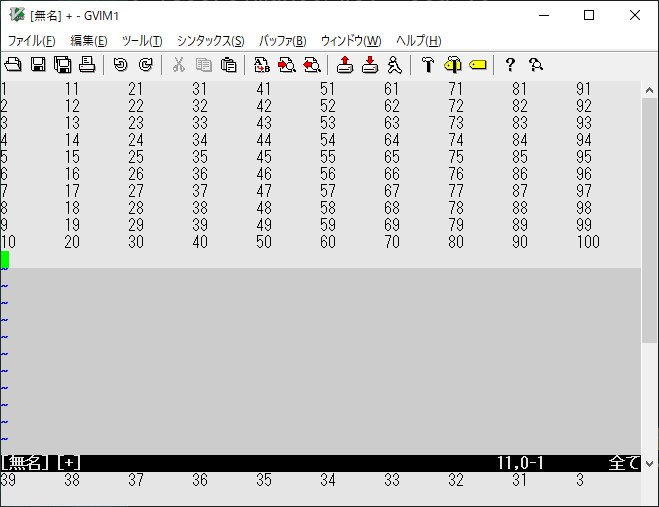
ターミナルから、vimコマンドで起動します。
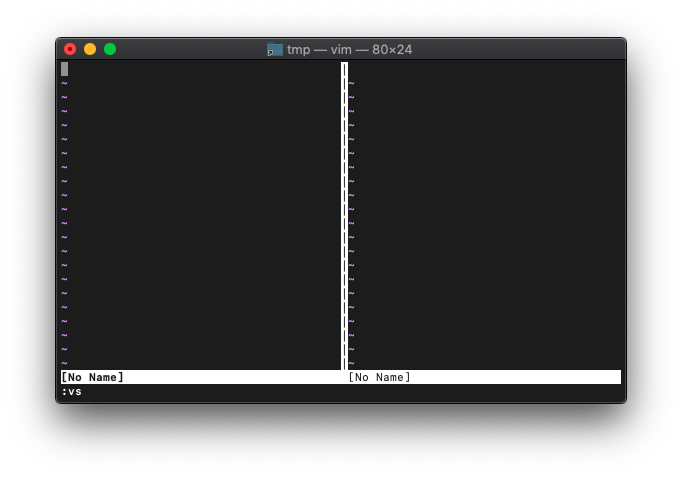
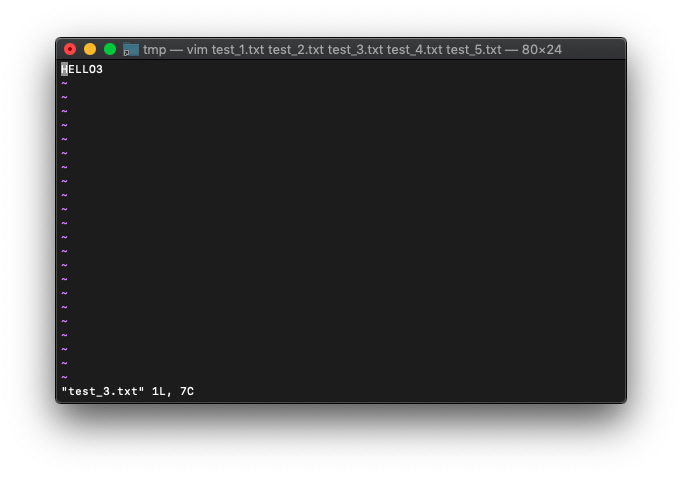
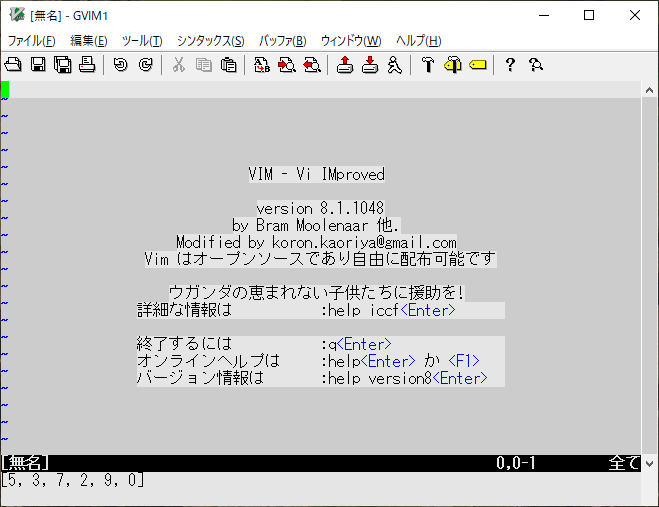
takk@makku ~ % vim
![]()
:echo (:ec) 表示
:echo 値
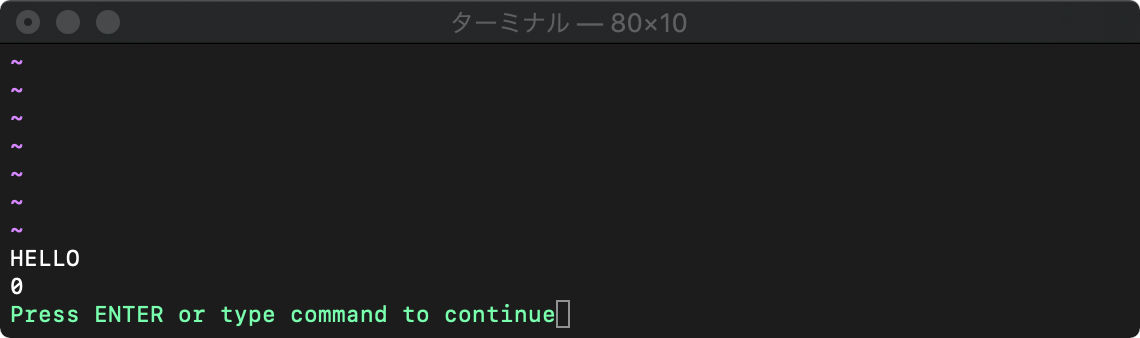
Hello Worldにあたるであろう、echoから使ってみます。
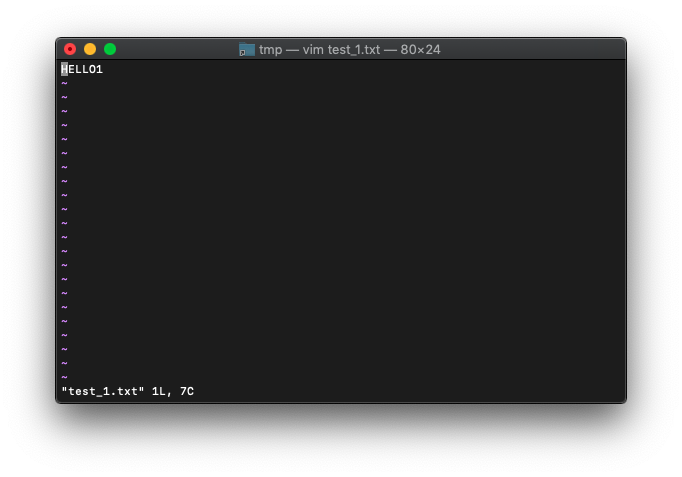
:(コロン)を入力後、続けてecho “HELLO”と入力します。
:echo "HELLO"
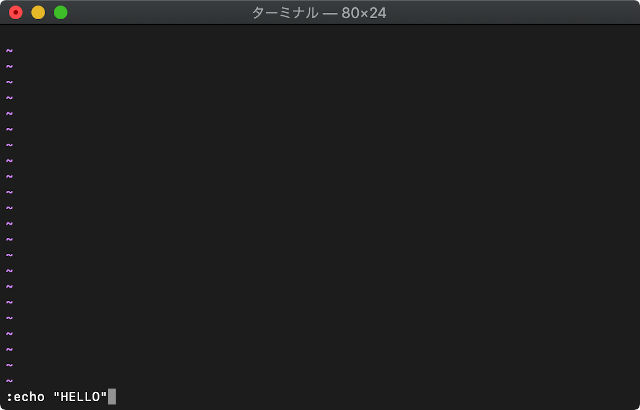
Enter押すまでは実行しません。
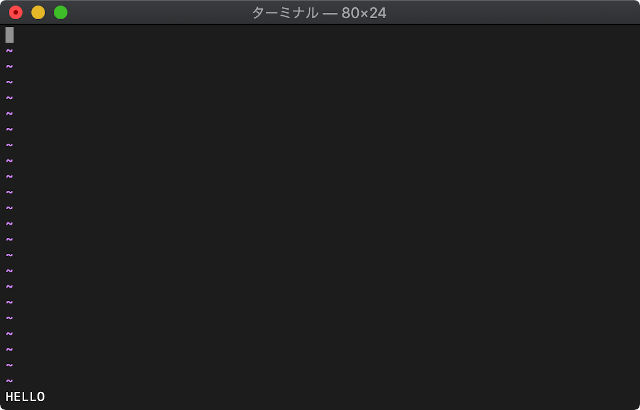
Enterを押すと、このように左下にHELLOが表示されます。
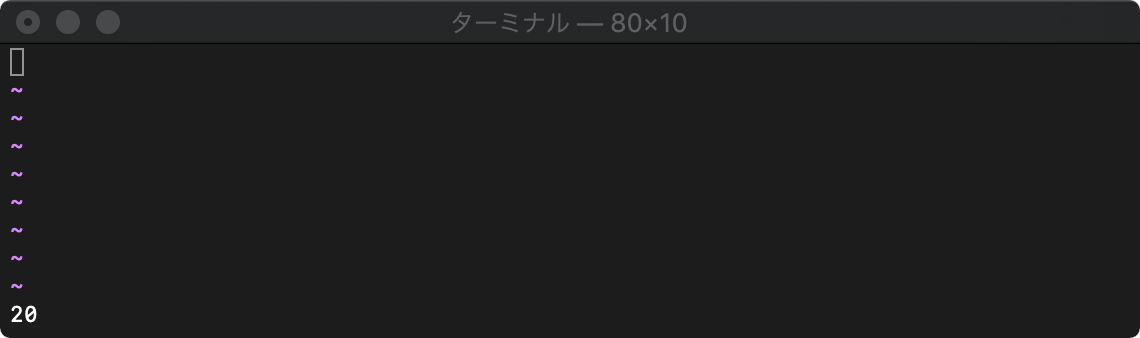
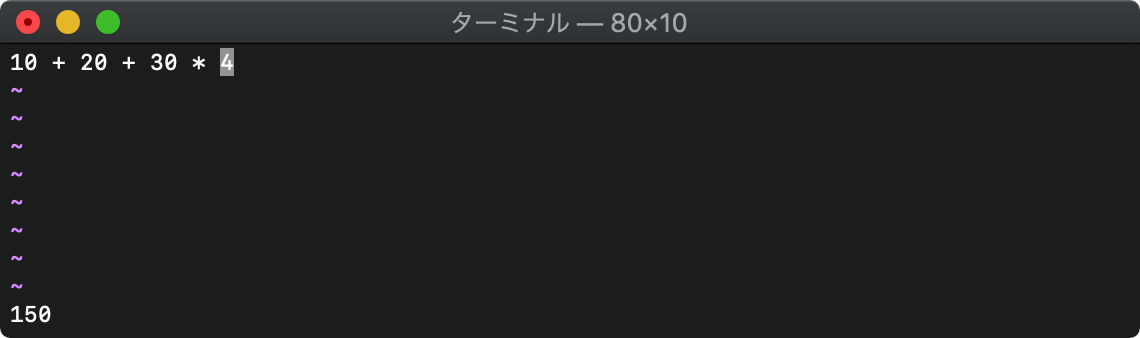
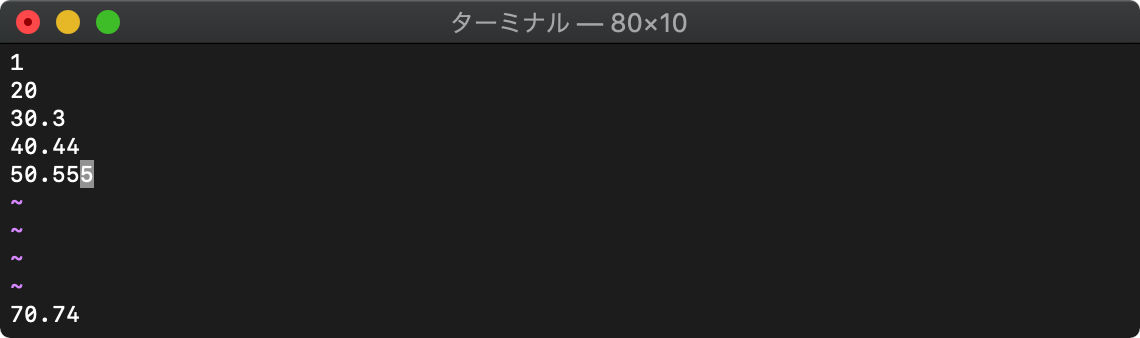
echoは数式を与えると計算結果を返します。
:echo 30+40

Enter実行。
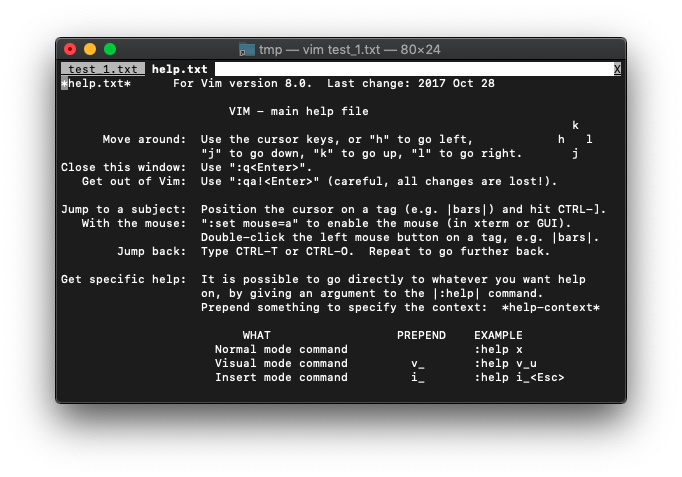
ヘルプの表示方法
:h ec
関連記事はコチラ
Vimスクリプト(echo)
変数
変数の型
変数は以下の型に分類されます。
Number 32bitまたは64bitの符号つき整数 e.g. -10 0 20
Float 浮動小数点数 e.g. -12.345
String 文字列 e.g. “HELLO”
Funcref 関数参照 e.g. function(“strlen”)
List リスト e.g. [1,2,3,[var1,var2,”string”,4]]
Dictionary 辞書 e.g. {“apple”:100, “banana”:200}
ヘルプの表示方法
:h varia
:let (:let) 変数代入
:let 変数 = 値
letで変数に代入ができます。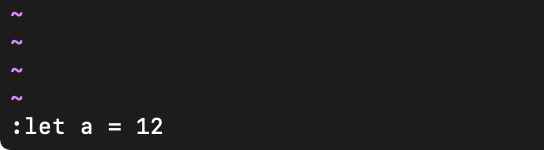
aには12が格納されていますので、12 * 12の計算です。
echoを実行すると計算結果が表示されます。
ヘルプの表示方法
:h let
:for (:for) 繰り返し
:for 変数 in リスト
:endfor
forで繰り返し制御できます。
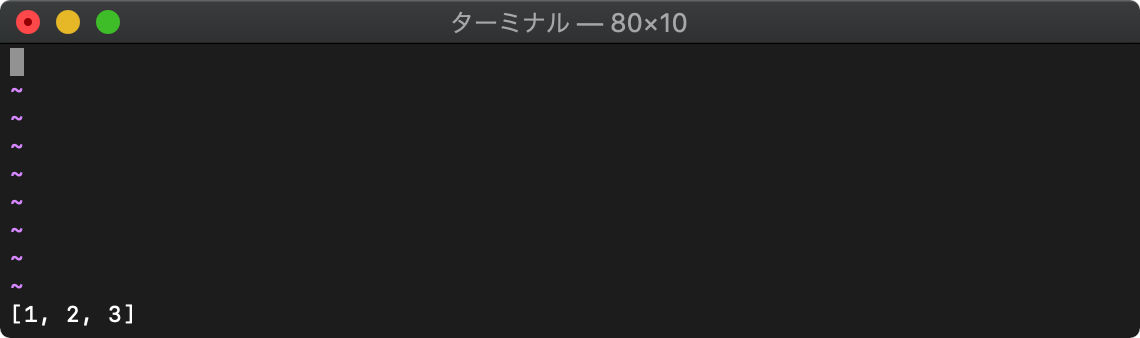
:let arr=[]
:for i in range(1,10)
:  call add(arr, i)
:  endfor
:echo arr
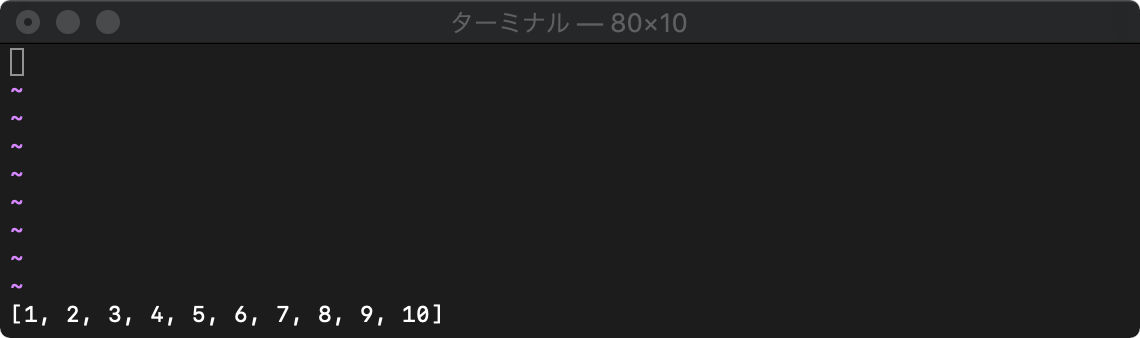
ヘルプの表示方法
:h for
function 関数
:function (:fu) 定義関数の一覧表示
:function
:fu

:function (:fu) 関数定義
:function 関数名()
関数名はアルファベット大文字から始めなければなりません。
:fu Test()
: echo "HELLO"
:endf
:echo Test()
ヘルプの表示方法
:h fu
:delfunction (:delf) 定義関数の削除
:delfunction 関数名
:delf Test

ヘルプの表示方法
:h delf
連想配列
連想配列使います。辞書ともいいますね。
連想配列の定義
:let dict={"AA":10, "BB":20, "CC":30}

連想配列の使用
定義するときは、{}を使いましたが、使用するときは配列と同じです。
:echo dict["BB"]
または、.(ドット)を使ってもアクセスできます。
:echo dict.BB
.(ドット)を使う方式だと”も[]も入力しなくて済むので4文字楽できますね。
連想配列の初期化
連想配列をクリアするには、要素のない初期化をしてやればよいです。
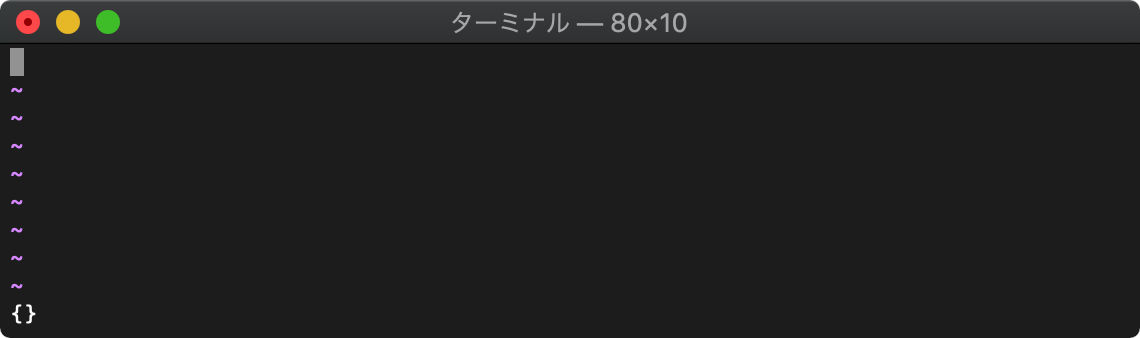
:let dict={}
:echo dict
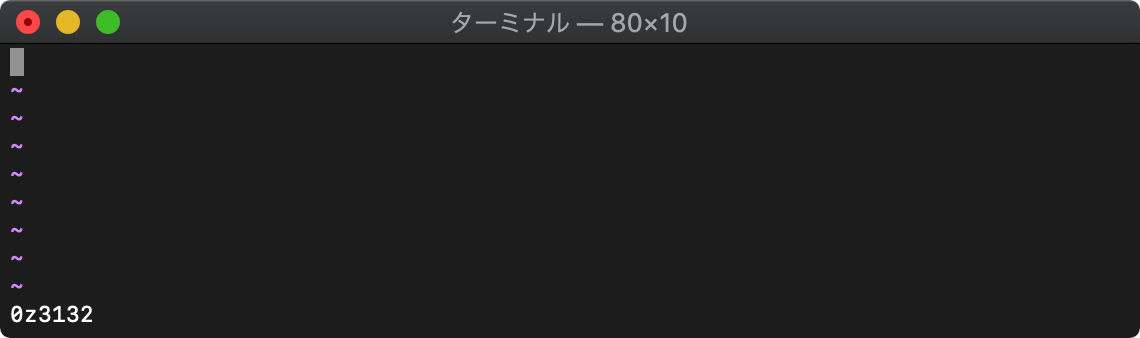
Blob Binary large Object
初期化
:let data = 0z3132
参照
:echo data[0] data[1]
関連記事はコチラ
Vimスクリプト(blob)
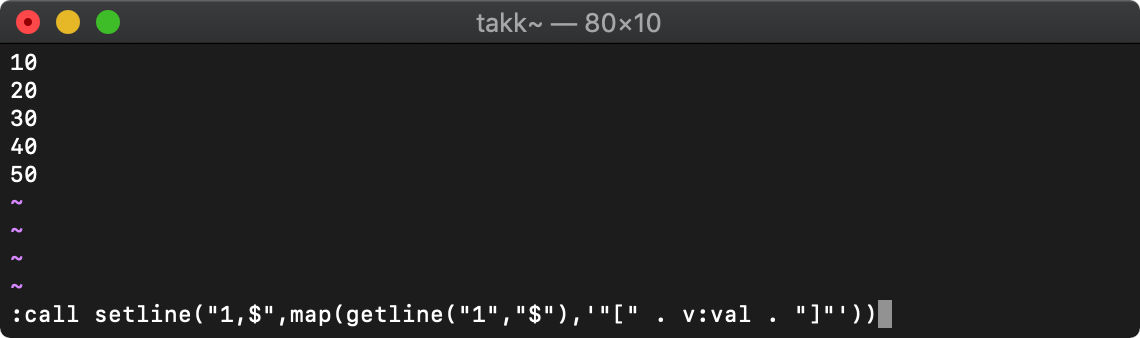
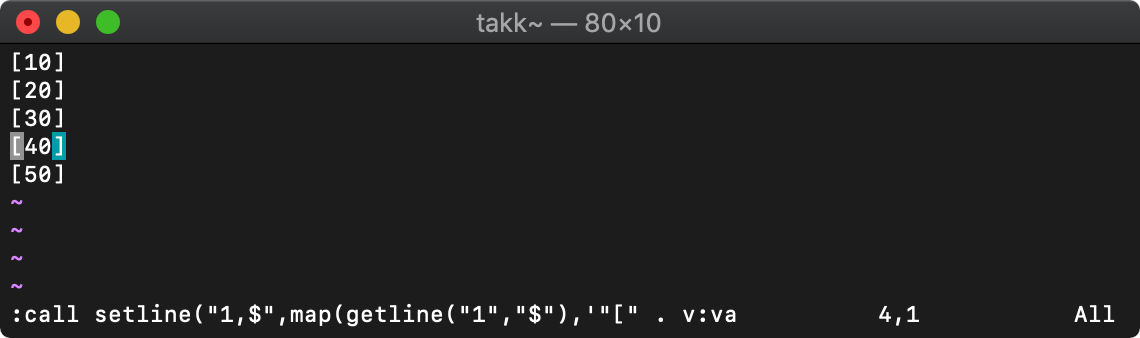
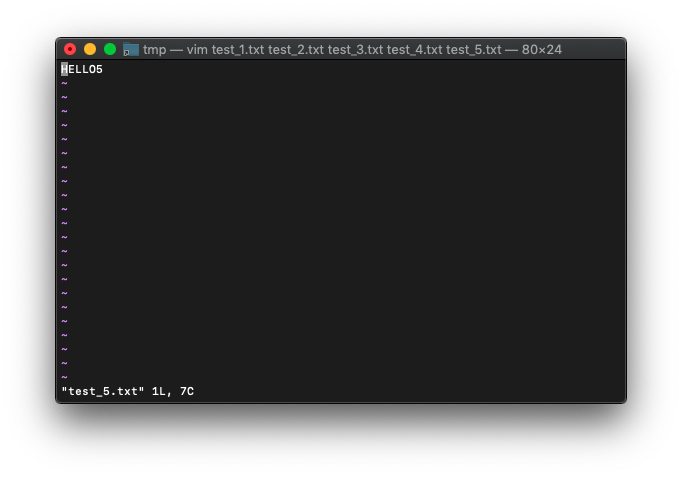
setline バッファへ文字列書き込み
setline(行指定,テキスト)
バッファの指定行へ文字列を書き込みます。
:call setline(".","HELLO")
setlineは実行すると現在行に指定した文字列を書き込みます。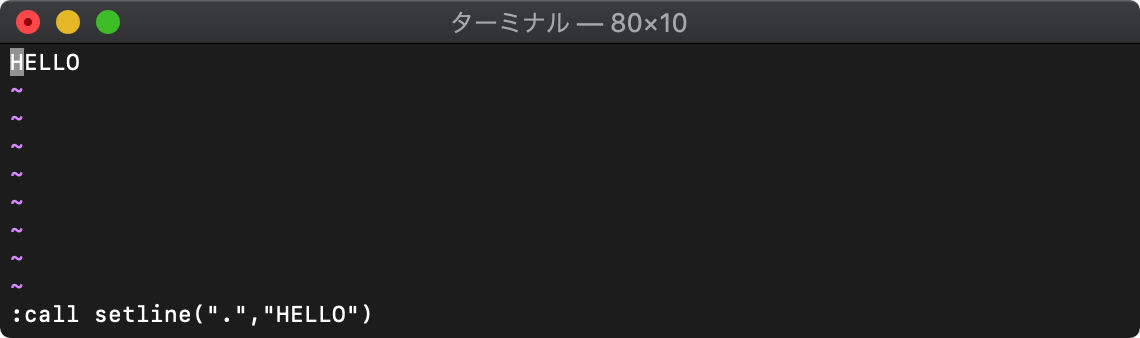
新規のバッファの1行目に文字列を書き込みました。
続けて3行目を指定して、setlineを実行してみます。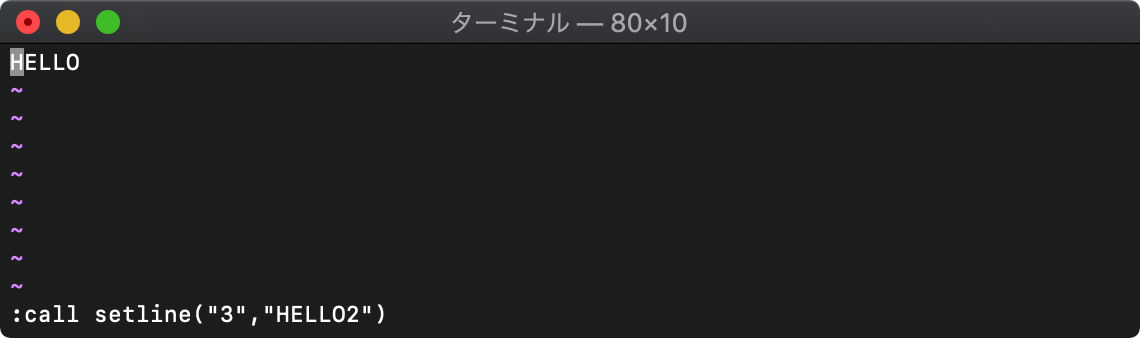
存在する行か、存在する行の次の行、の指定でかければsetlineを実行しても失敗します。
存在する行の次の行、つまり2行目を指定してもう一度setlineを実効してみます。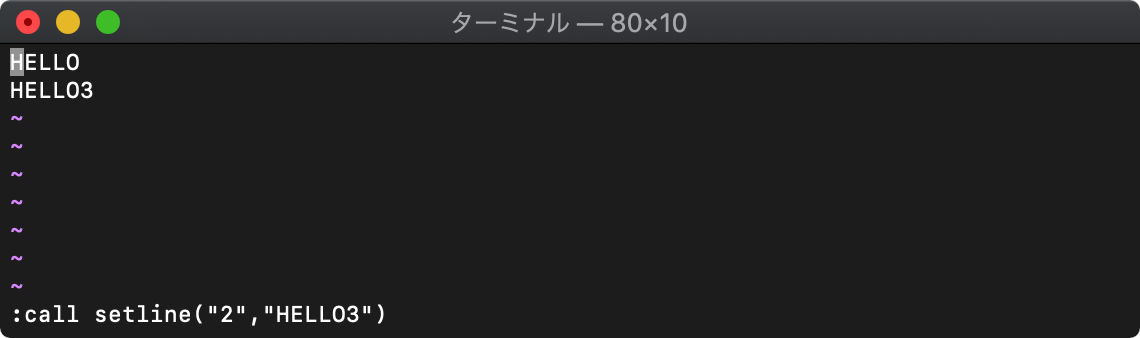
今度は実行できました。
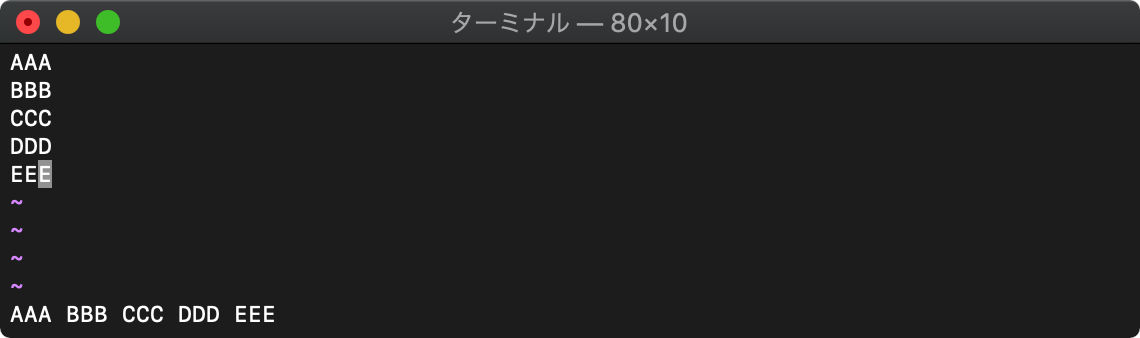
すでに文字列が書き込まれている行を指定すると、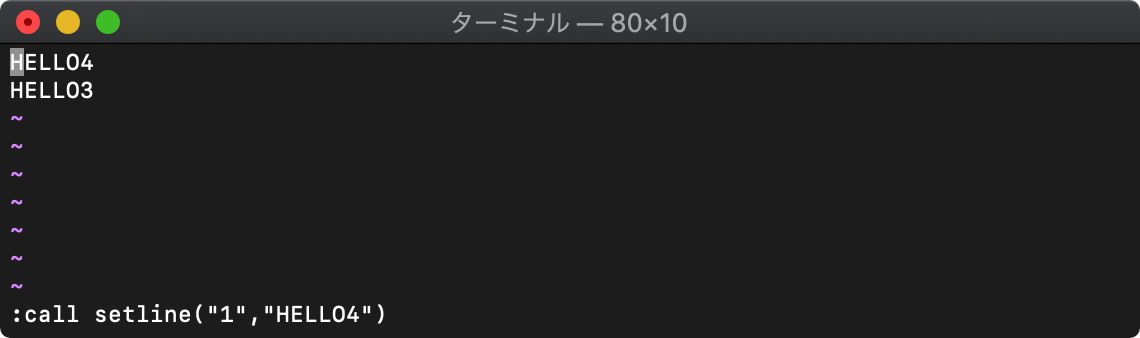
このように上書きされます。
line 行番号を取得
line(行指定 [,windid])
行番号を得ます。
カーソル行が3行目の状態で実行すると、
:echo line(".")
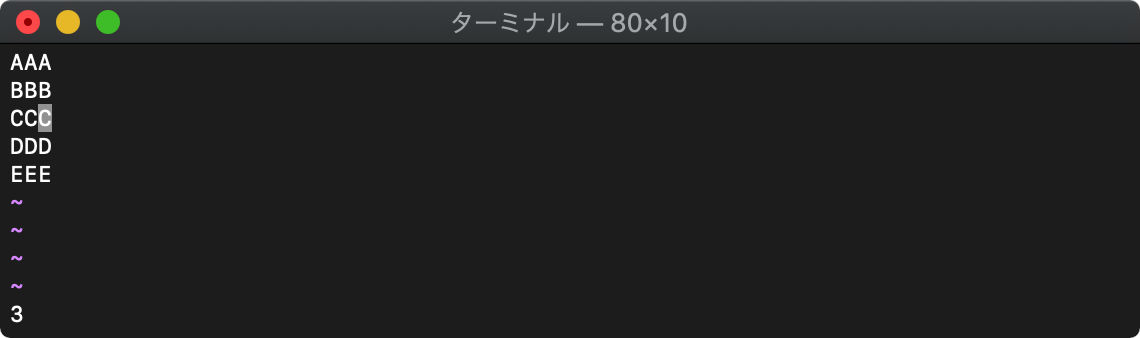
3が返ってきました。
バッファ末”$”を指定すると、
:echo line("$")
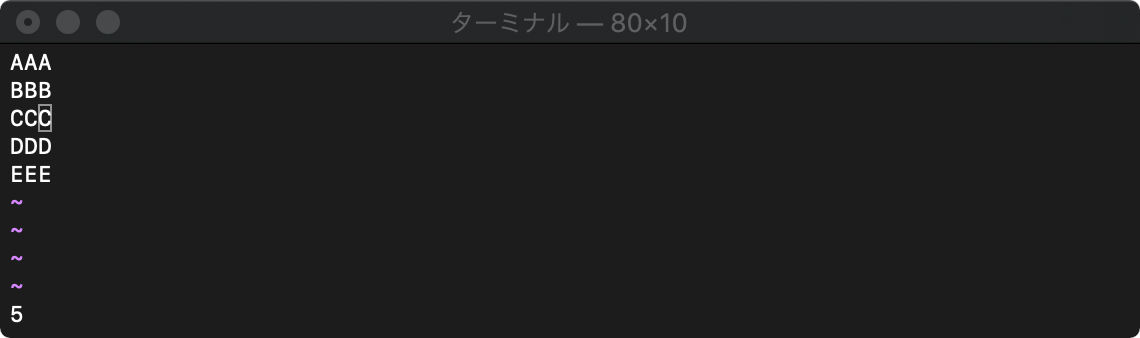
バッファ末尾行の行番号が返ってきました。
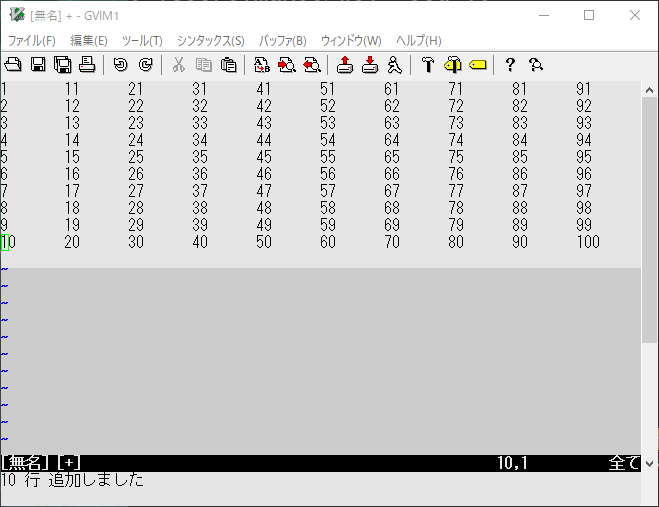
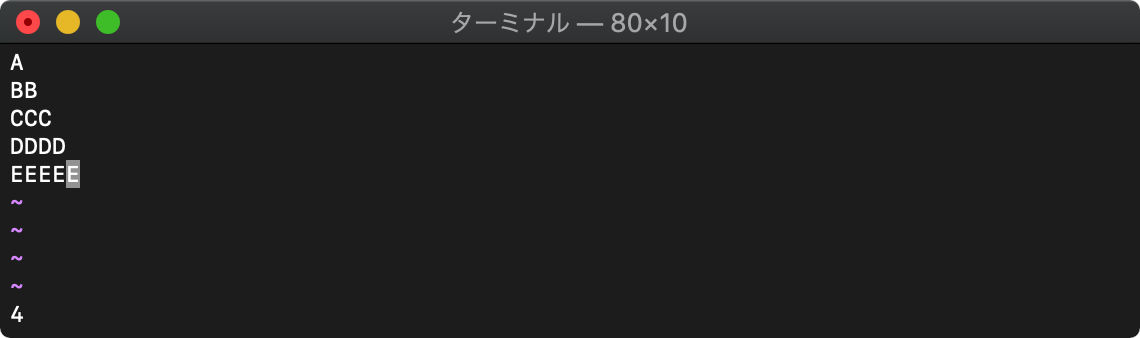
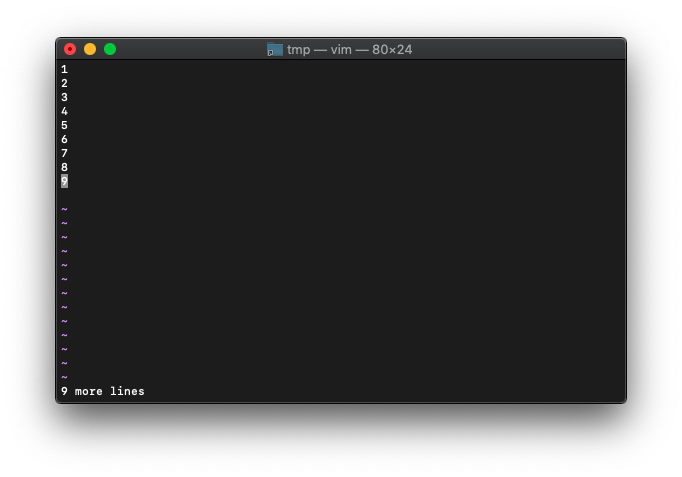
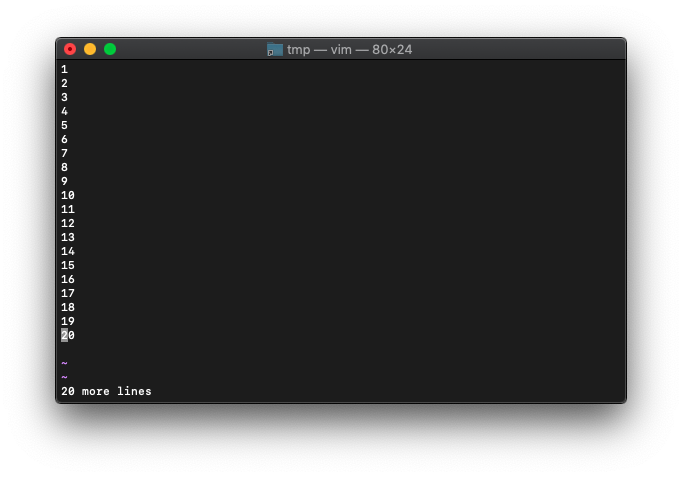
10行空行を追加します。
:norm 10o
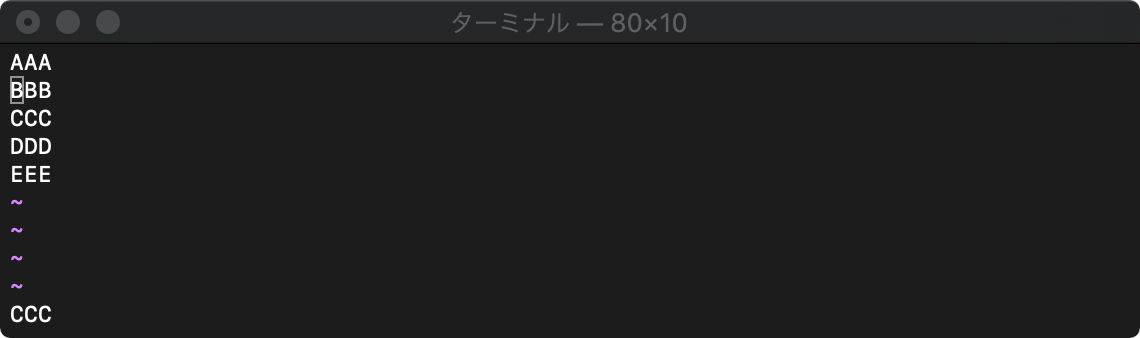
getline バッファから文字列取得
getline(行番号)
getline(行番号開始,行番号終了)
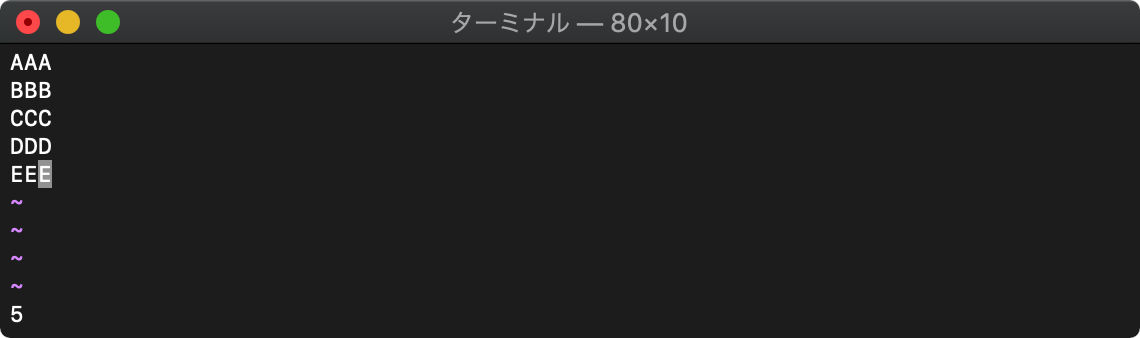
3行目の文字列取得
:echo getline("3")
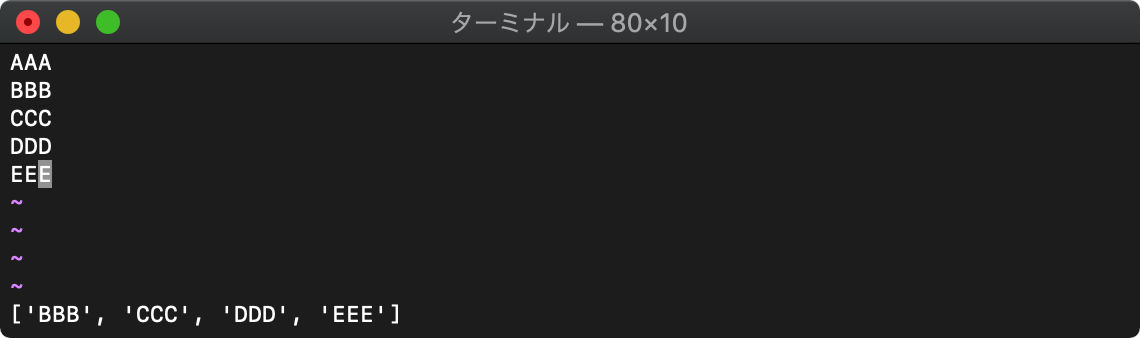
複数行の取得は、開始行と終了行の二箇所を指定すればよいです。
2行目から4行目のテキストを取得。
:echo getline("2","4")
戻り値はリストで返ります。
getlineの戻り値を変数に格納するには、letを使って代入します。
:let aaa=getline("2","4")
リストの添え字は0始まりです。
:echo aaa[1]

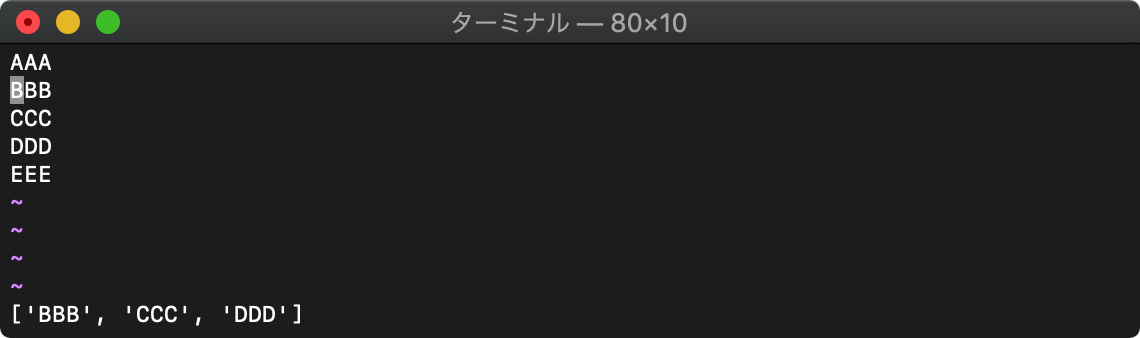
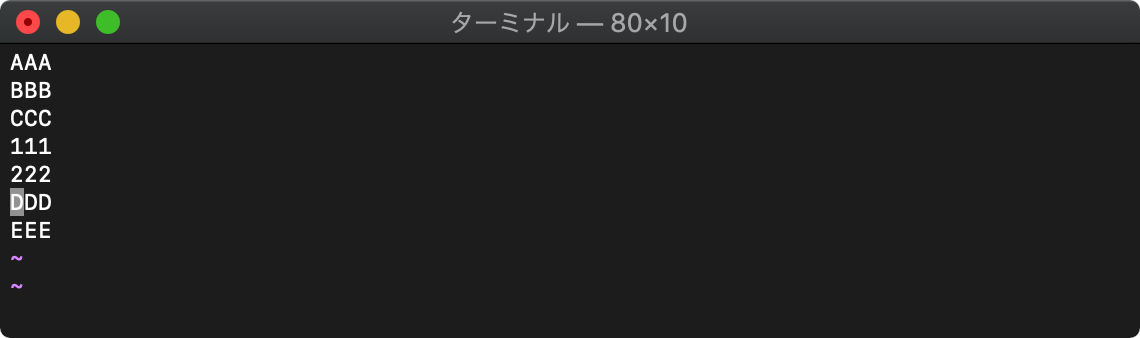
append バッファへ追記
append(行番号, 文字列、または文字列のリスト)
setlineは、指定した行を書き換えてしまいますが、appendを使えば、行の挿入ができます。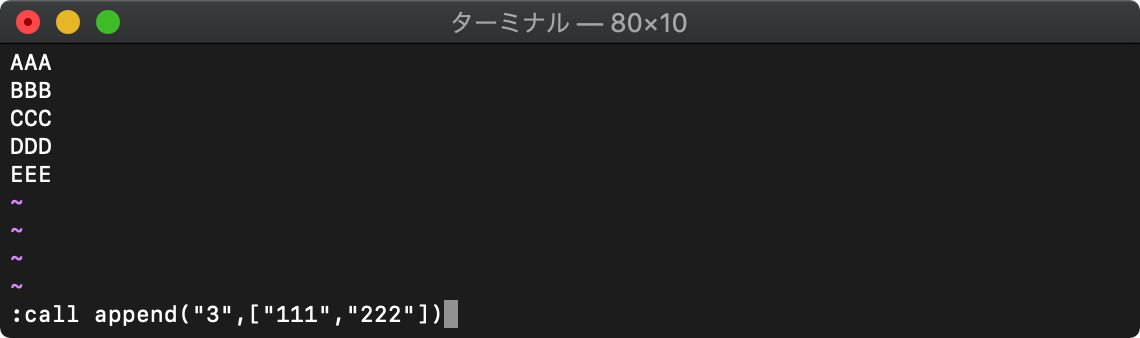
:call append("3",["111","222"])
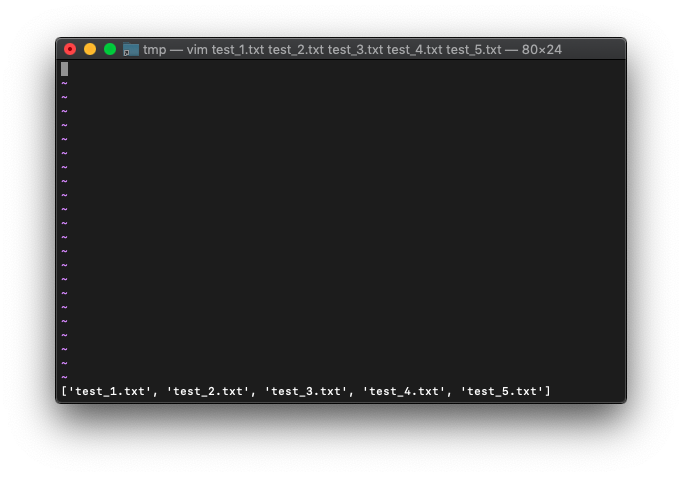
execute :コマンド実行
execute(コマンド)
:から始まるExコマンドを実行します。
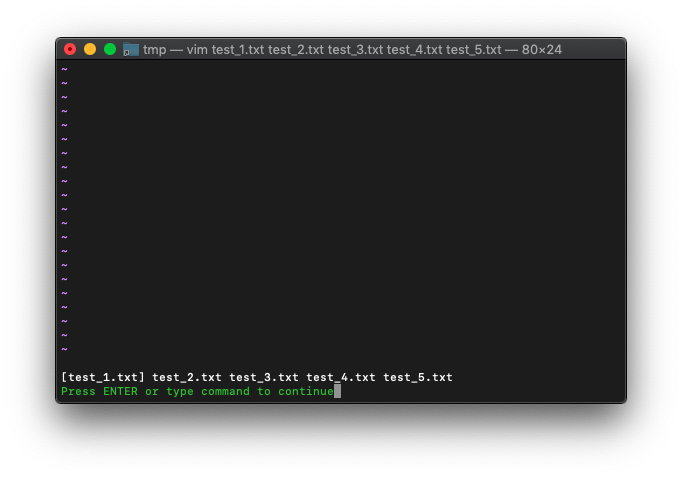
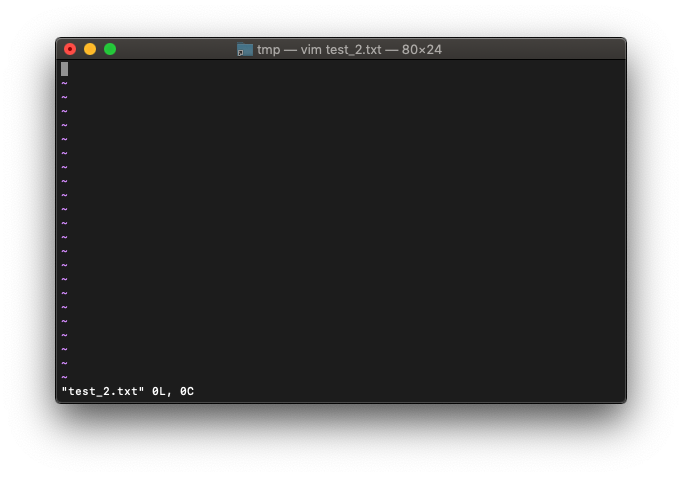
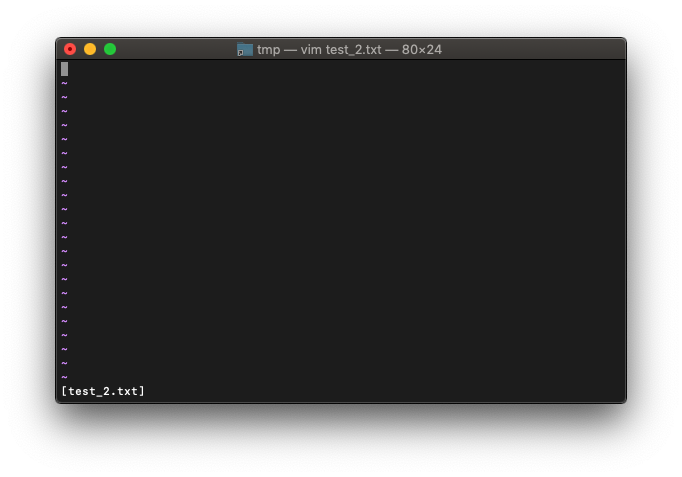
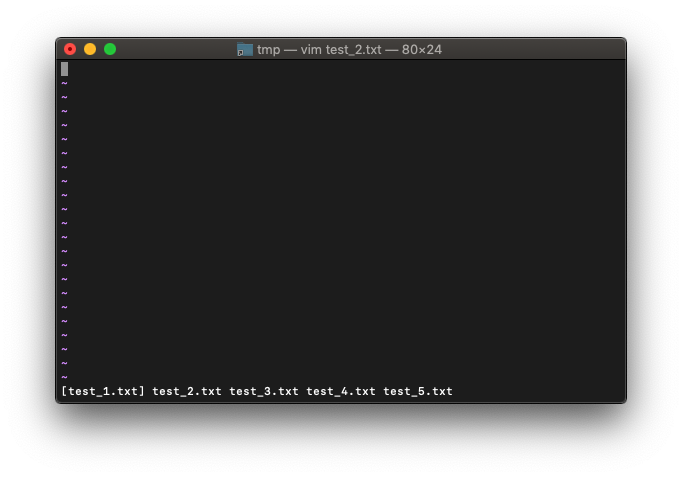
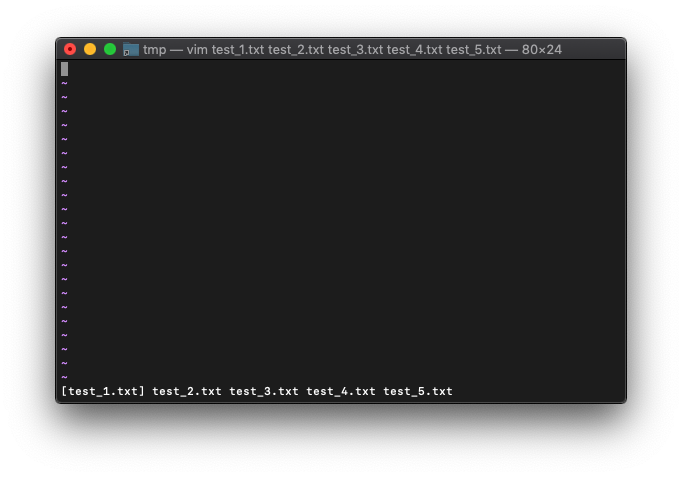
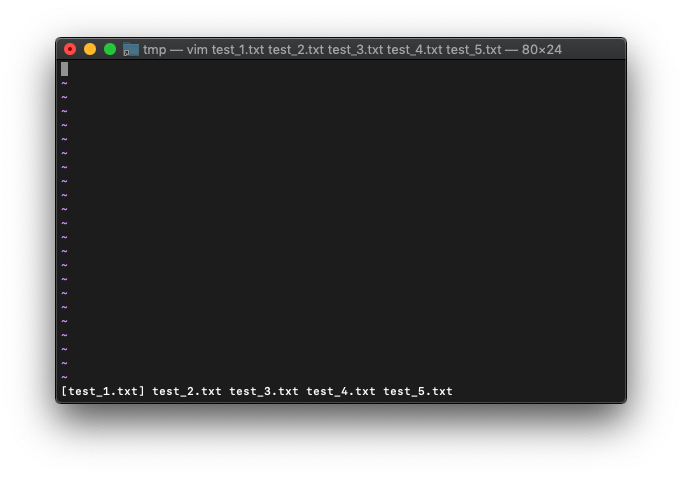
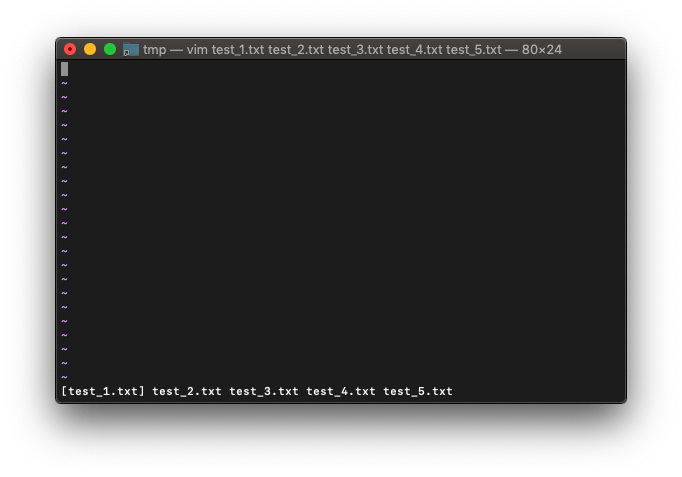
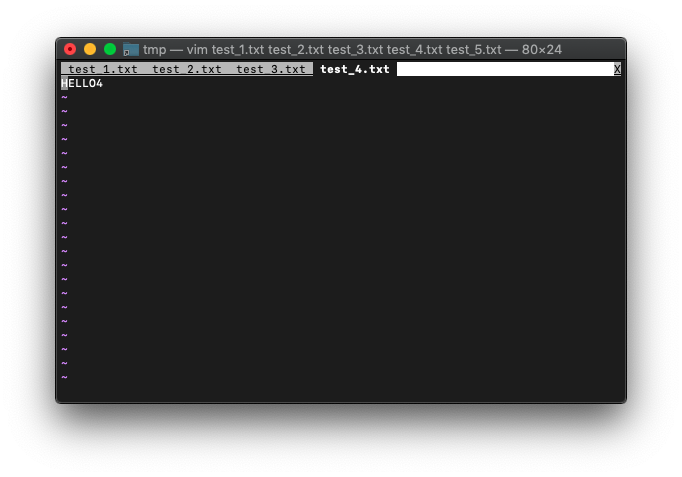
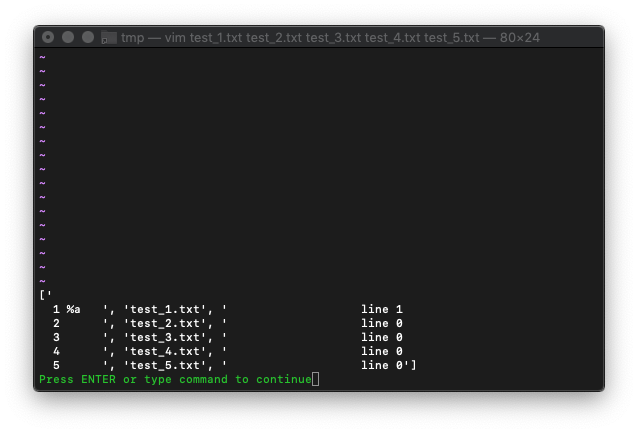
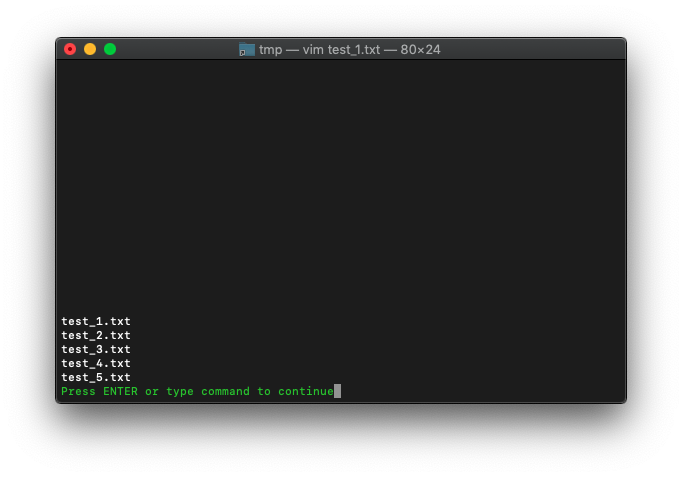
/tmp $ touch test_{1..5}.txt
/tmp $ vim test_*.txt
extecuteの結果をechoで表示
:echo execute("args")
getline setline応用
テキストの上下反転
3つの関数を組み合わせて、テキストを上下反転してみます。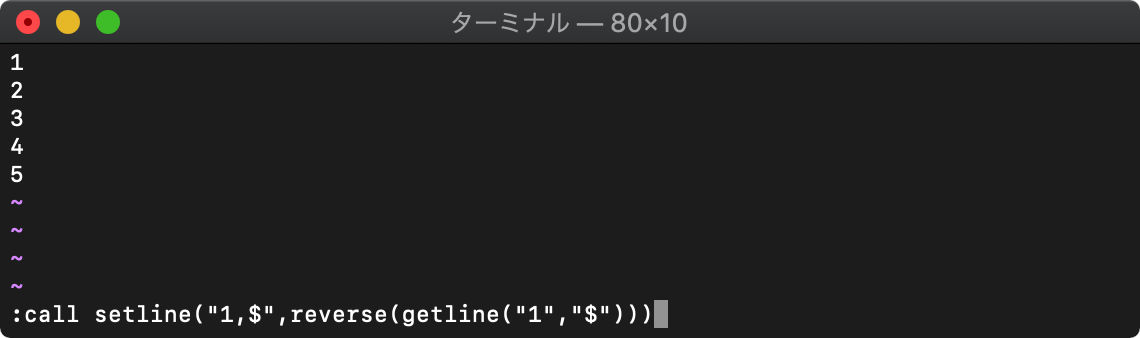
getlineでテキストを取得し、reverseで反転し、setlineでテキストに書き込みます。
テキストの左右反転
前回はテキスト上下反転を行いましたが、今回は左右反転です。
土台のテキストを作成。
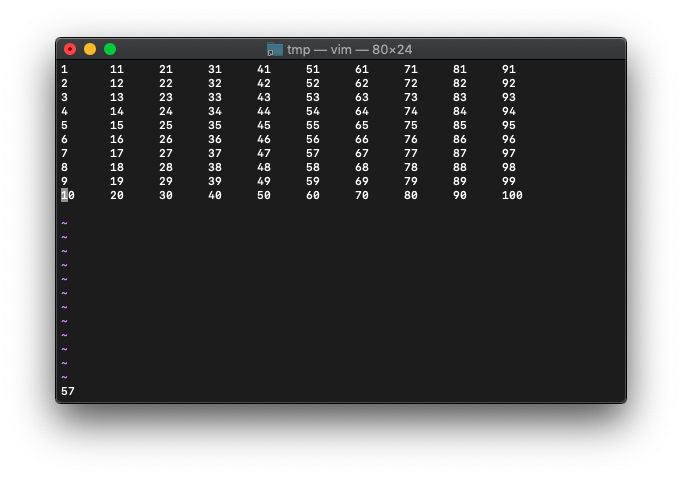
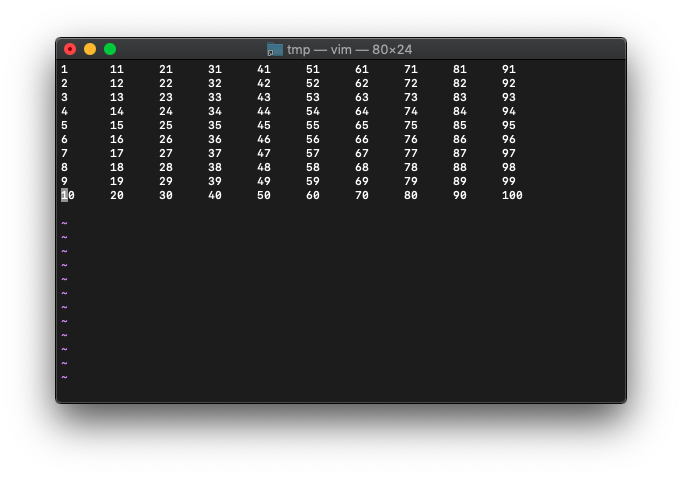
:r0!wsl seq 100 | wsl pr -t10J
このテキストを変数に格納します。
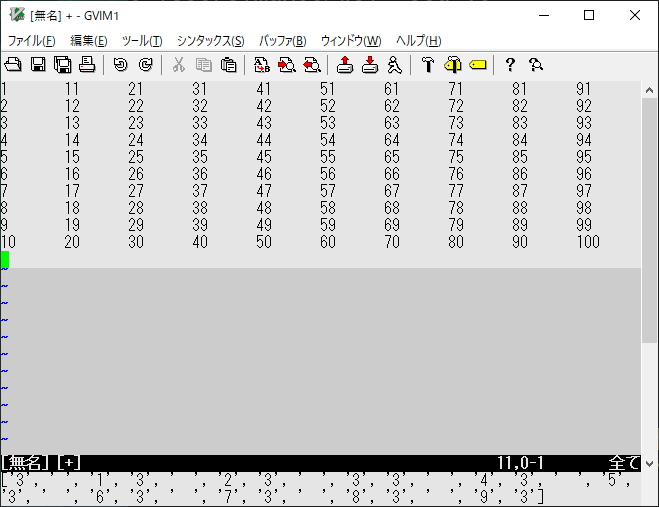
:let a=getline("w0","w$")
:echo a
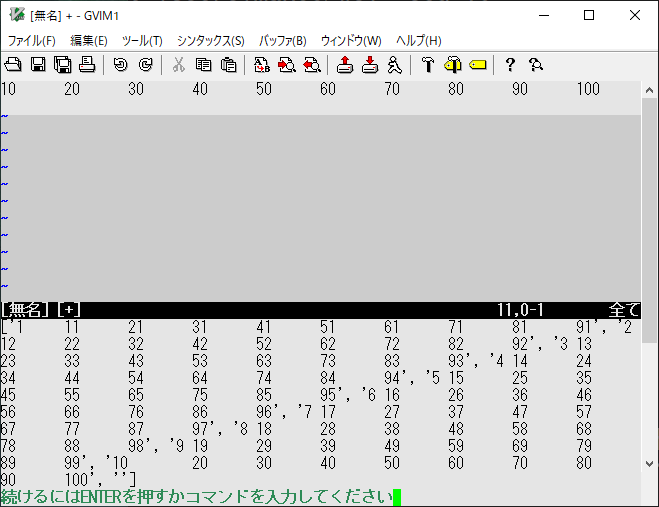
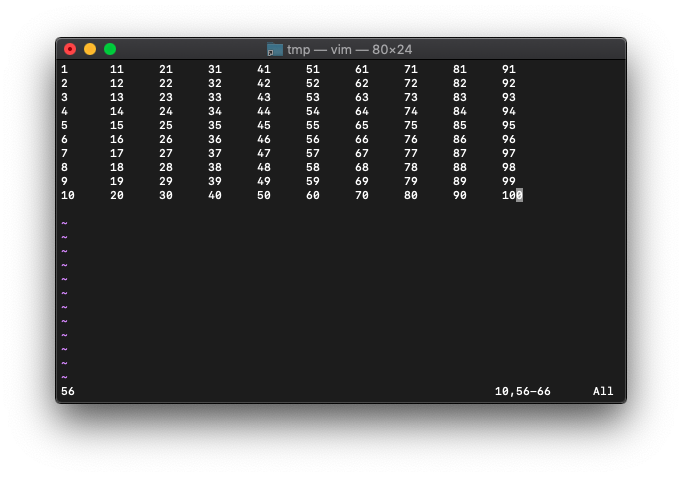
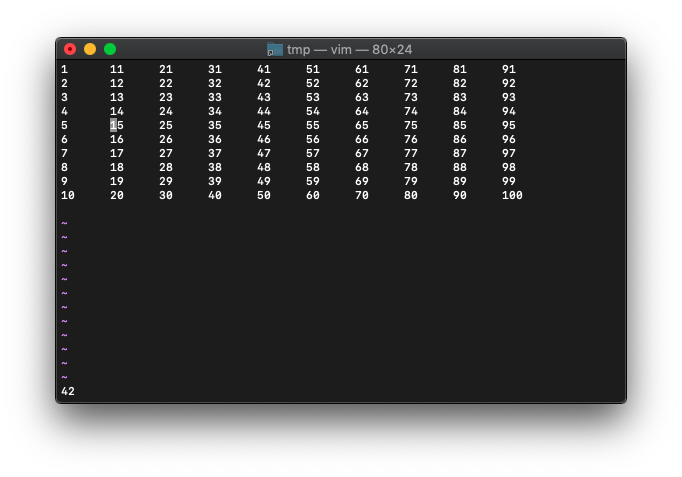
3行目を1文字毎に区切り、別変数に格納します。
:let b=split(a[2],'\zs')
:echo b
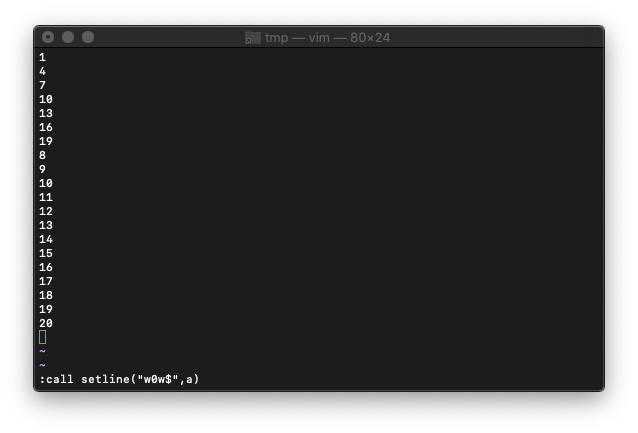
別変数に格納した文字のリストを反転、結合し、一行の文字列にします。¥
:let a[2]=join(reverse(b),"")
:echo a[2]
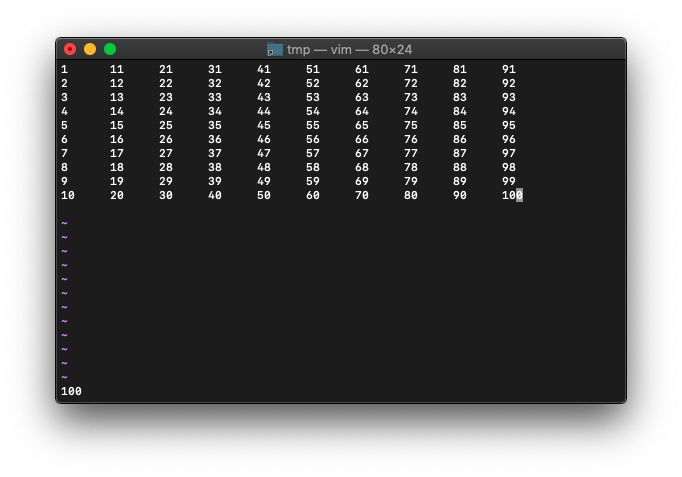
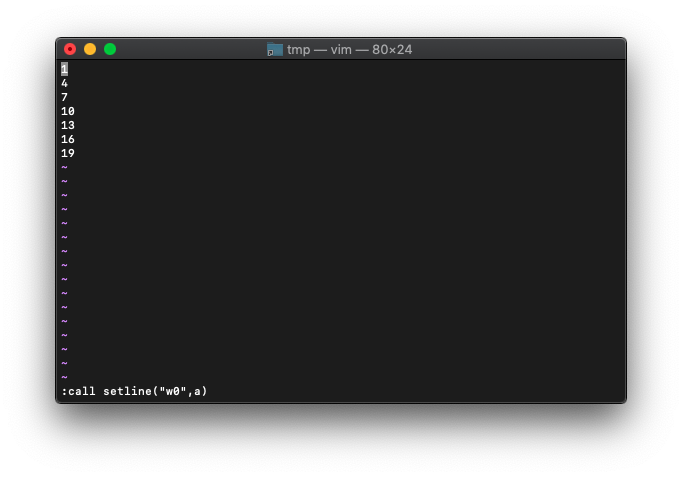
最後に、テキストを入れ替えます。
:call setline("w0w$",a)

文字列操作
.(ピリオド) 文字列連結
文字列 . 文字列
文字列どうしを、.(ピリオド)で連結できます。
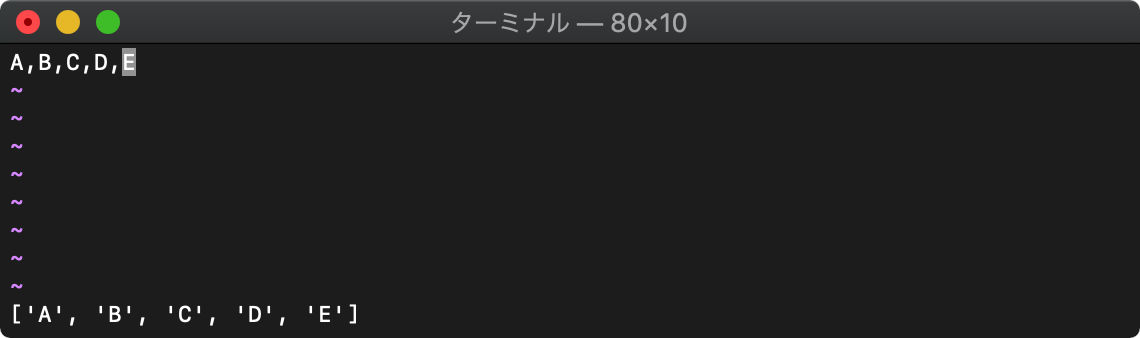
:let arr=getline("1","$")
:echo arr[2] . arr[0]

strlen 文字列長を得る
strlen(文字列)
:echo strlen(getline("4"))
eval 文字列を評価する
eval(文字列)
文字列を評価します。
:echo eval(getline("1"))
1行目の文字列を読み込んで、その文字列を評価した結果がechoされました。
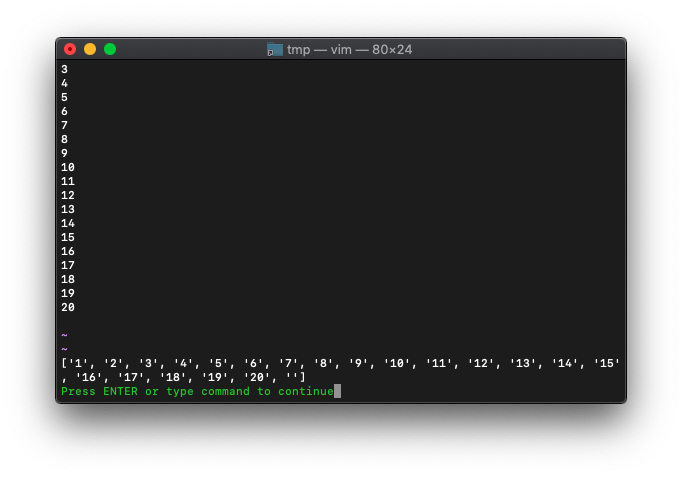
join 文字列連結
join(リスト [,セパレータ])
リストで指定した文字列をセパレータで連結します。セパレータを省略すると空白で連結します。
バッファの全域を指定して連結。
:echo join(getline("1","$"))
str2float 文字列を数値に変換
str2float(文字列)
:let arr=getline("1","$")
:echo str2float(arr[2]) + str2float(arr[3])
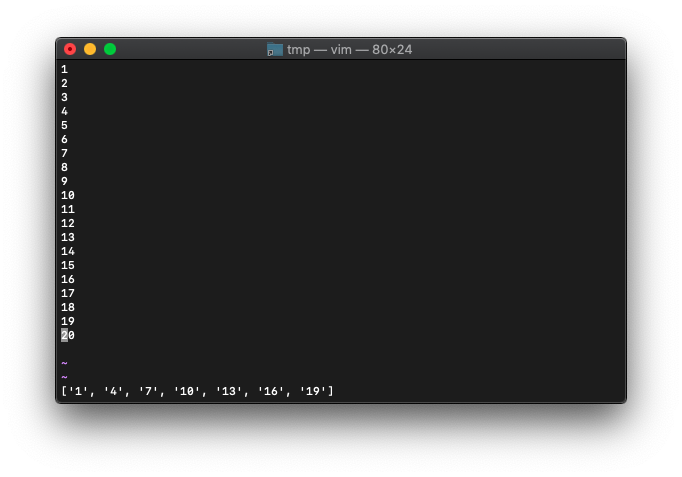
split 文字列をセパレータで分割
split(文字列 [,パターン])
split関数を使います。
:echo split(getline("1"),",")
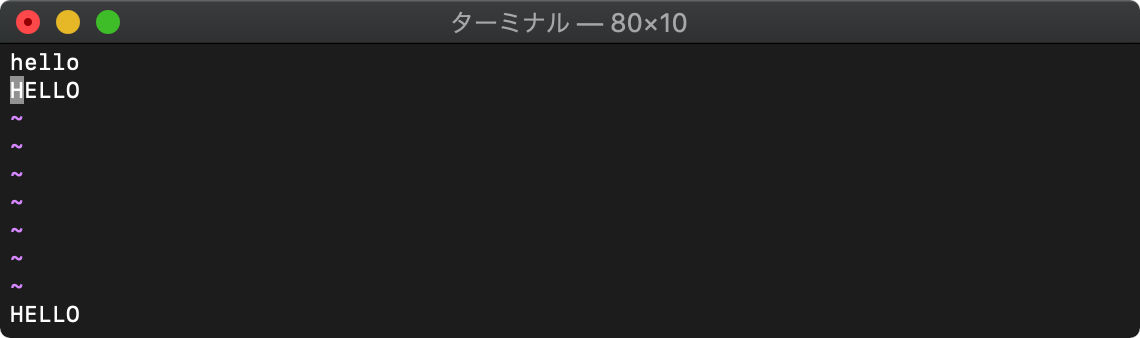
toupper 文字列を大文字へ
toupper(文字列)
:echo toupper(getline("1"))
tolower 文字列を小文字へ
tolower(文字列)
:echo tolower(getline("2"))

printf 書式付き文字列
printf(フォーマット, 表示項目…)
printfで書式付き文字列を作れます。
:let a = "HELLO"
:echo printf("[%10s]", a)

マイナスをつけると、左詰になります。
:let a = "HELLO"
:echo printf("[%-10s]", a)

文字数で切り詰め。
:let a = "ABCDEFGHIJKLMNOPQRSTUVWXYZ"
:echo printf("[%.5s]", a)
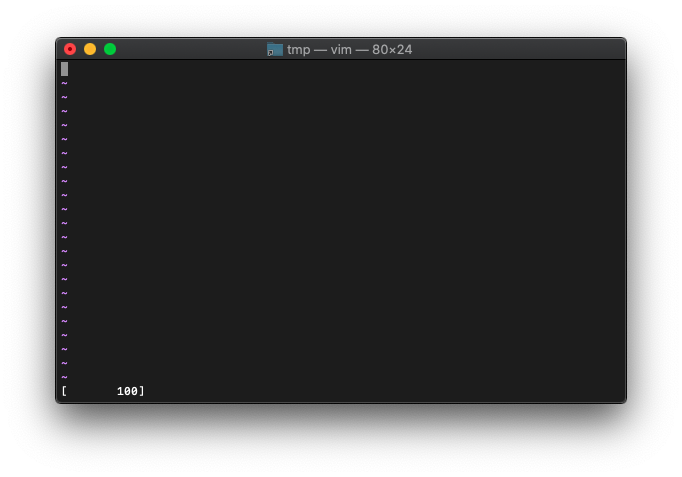
:let a=100
:echo printf("[%d]",a)

まあ普通に表示されますね。
計算した結果はどうでしょうか。
:let a=100
:echo printf("[%d]",a * a)

桁指定してみます。右詰。
:let a=100
:echo printf("[%10d]", a)
左詰。
:let a=100
:echo printf("[%-10d]", a)

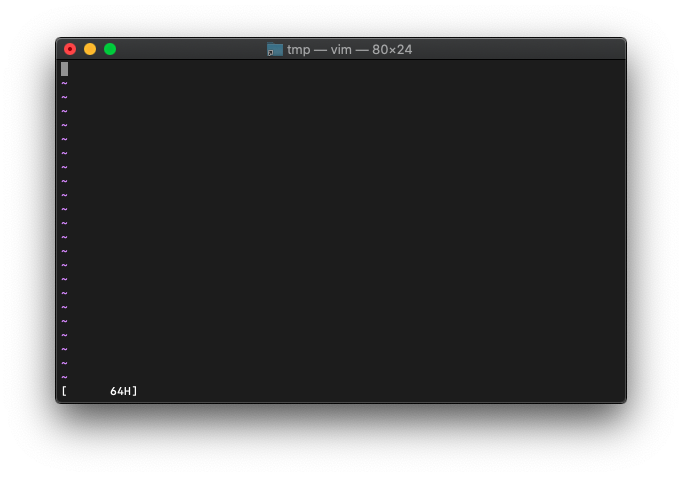
16進数。
:let a=100
:echo printf("[0x%x %xH]", a, a)

8桁にしてみます。
:let a=100
:echo printf("[%8xH]", a)
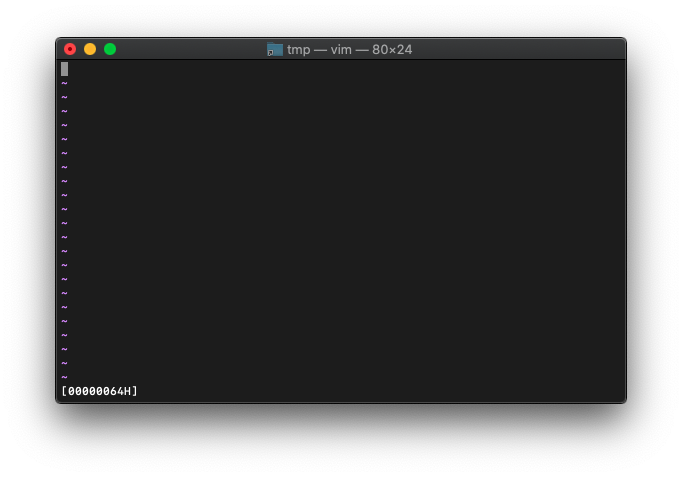
アドレス表示風に0埋めの8桁にしてみます。 8の前に0をつけるだけです。
:let a=100
:echo printf("[%08xH]", a)

大文字で表示。
:let a=100
:echo printf("[%08XH]", a)
8進、2進の書式です。
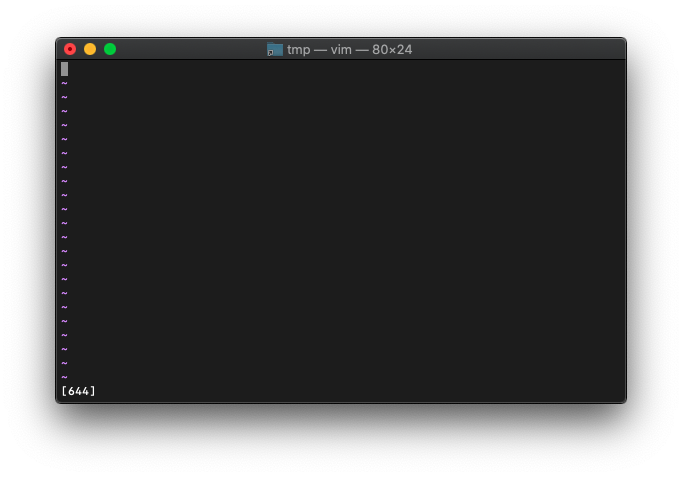
:echo printf("%o %o %o %o %o", 5, 6, 7, 8, 9)
桁数指定。
:echo printf("[%03o]", 0644)
2進数。
:let a=9
:echo printf("[%04b]", a)

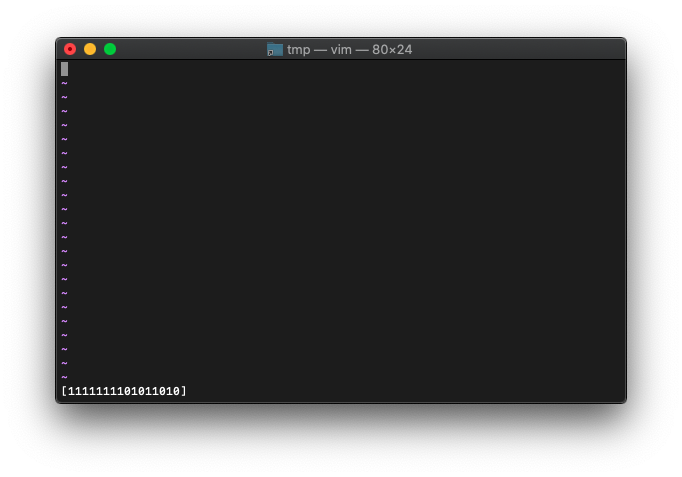
:let a=0xff5a
:echo printf("[%016b]", a)
floatです。
:let a=23.45
:echo printf("%3.5f", a)

変数を整数にすると、
:let a=23
:echo printf("%3.5f", a)

特に問題なく小数点入りで表示されますね。
整数部は省略できるか。
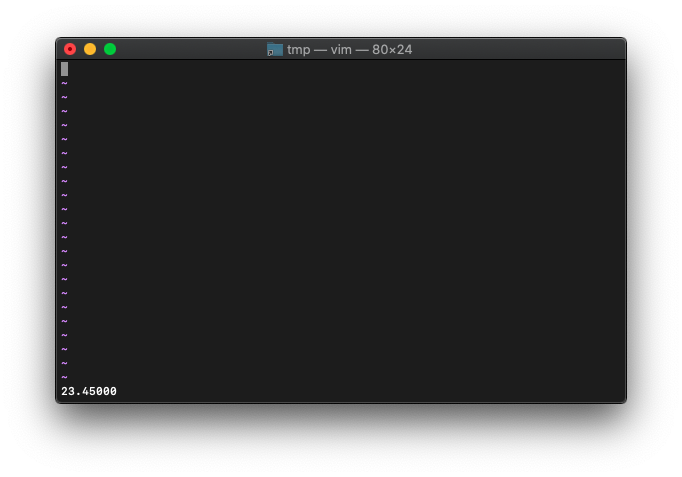
:let a=23.45
:echo printf("%.5f", a)
リスト
リストの定義
リストは[]を括り、各要素は,(カンマ)で区切ります。
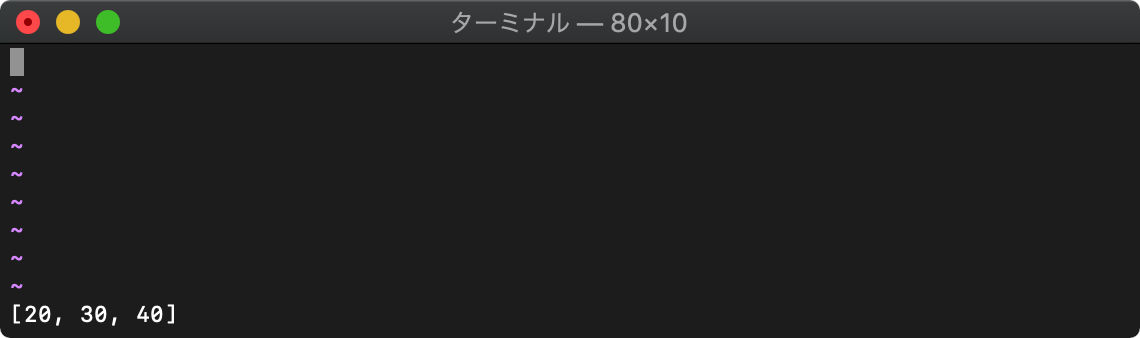
:let a = [10,20,30]
リスト内の各要素を、ばらばらの変数に格納したい場合は、リストで受けることもできます。
:let [a1,a2,a3] = a
:echo a2

リストの範囲アクセス
:let a = [10,20,30,40,50]
:echo a[1:3]
add リストに追加
add(リスト,追加要素)
:let arr = [1,2]
:call add(arr,3)
len リストの要素数
len(リスト)
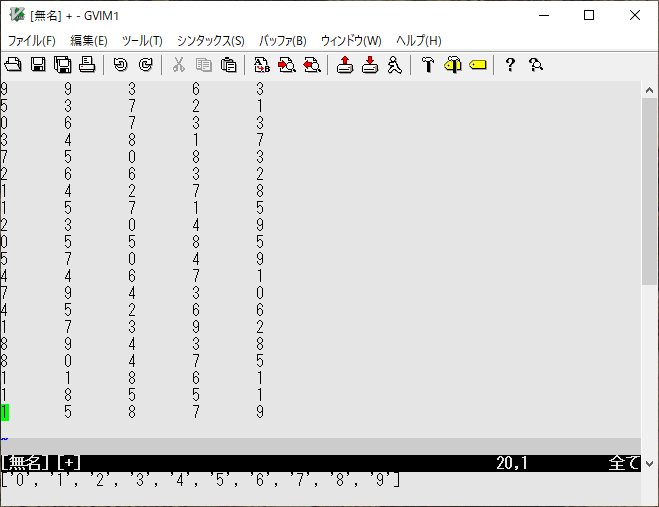
:echo len(getline("1","$"))
remove 要素の削除
remove(リスト, インデックス, [, end])
0始まりのインデックスを指定してリストの要素削除します。
:let arr=getline("1","5")
:call remove(arr,0)
:echo arr
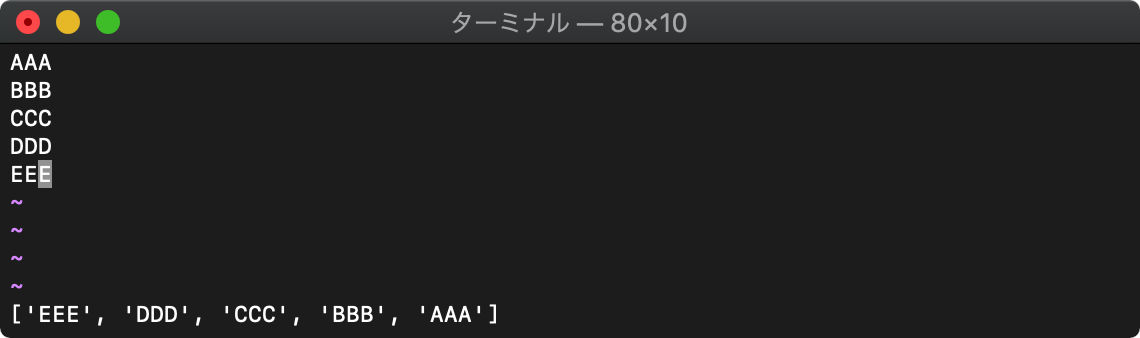
reverse リストを逆順にする
reverse(リスト)
:echo reverse(getline("1","$"))
insert 要素の追加
insert(リスト,追加要素 [,インデックス])
リストに要素の追加をします。
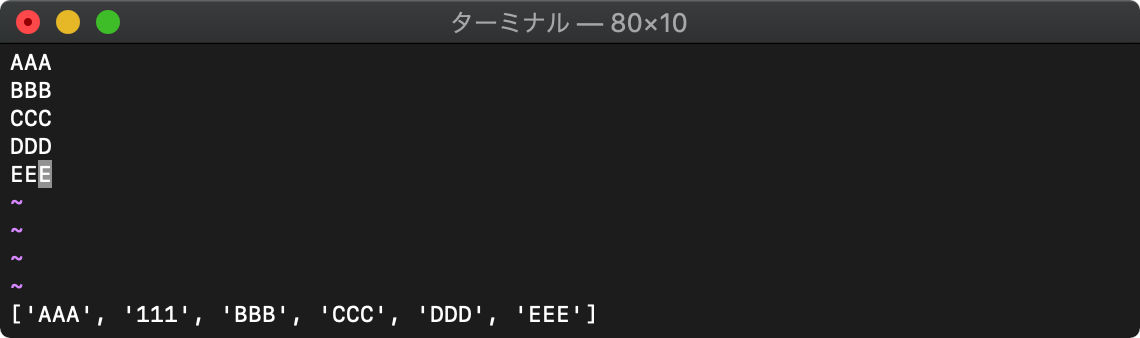
:let arr=getline("1","$")
:call insert(arr,"111",1)
:echo arr
リストのコピー
変数名だけコピー
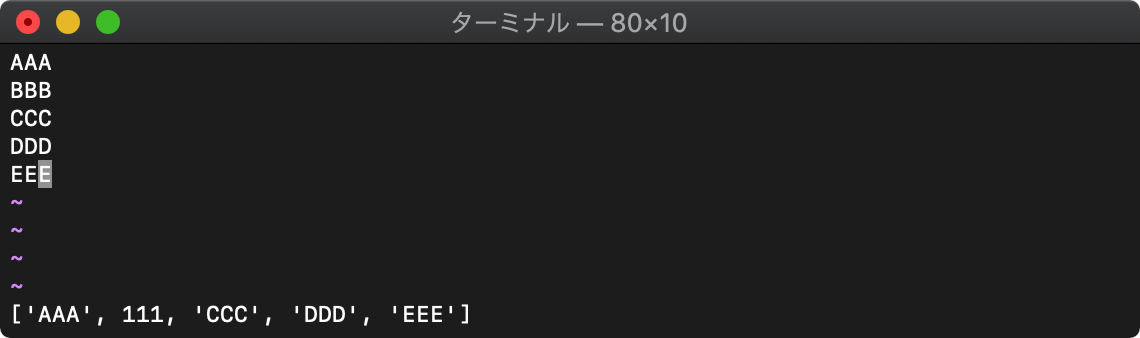
:let arr=getline("1","$")
:let arr2 = arr
:let arr2[1] = 111
:echo arr
copy リスト内もコピー
copy(リスト)
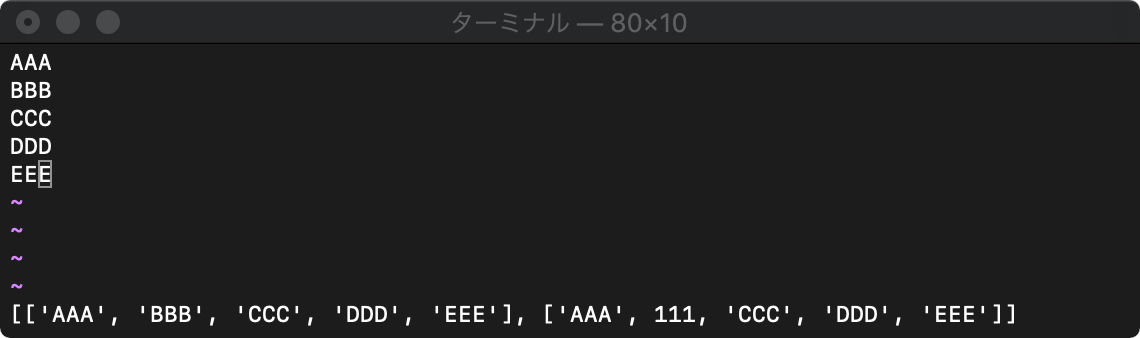
:let arr=getline("1","$")
:let arr2 = copy(arr)
:let arr2[1] = 111
:echo [arr,arr2]
deepcopy リストのリストもコピー
deepcopy(リスト)
copyはリスト中のリストの実体はコピーされません。
:let a=[1,[2,3]]
:let b=copy(a)
:let a[0]=100
:let a[1][0]=200
:echo a b
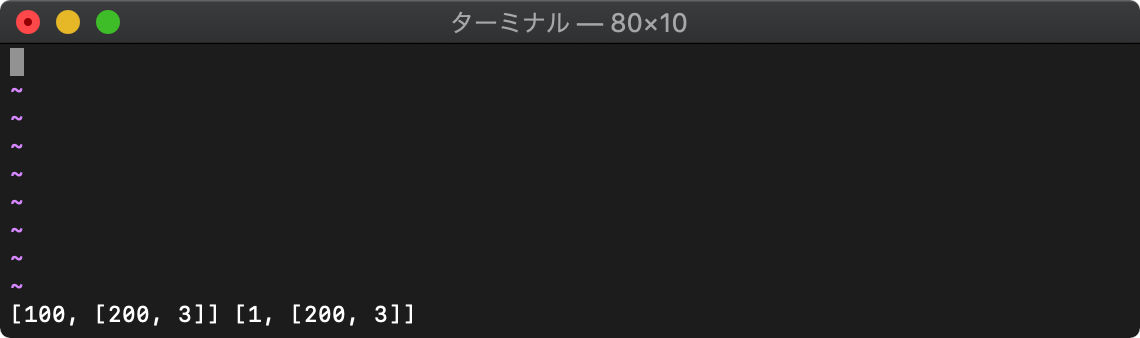
左がaで、右がbですが、a[1]とb[1]の値が同じになってますね。
リストのリストをコピーするには、deepcopyを使います。
:let a=[1,[2,3]]
:let b=deepcopy(a)
:let a[0]=100
:let a[1][0]=200
:echo a b
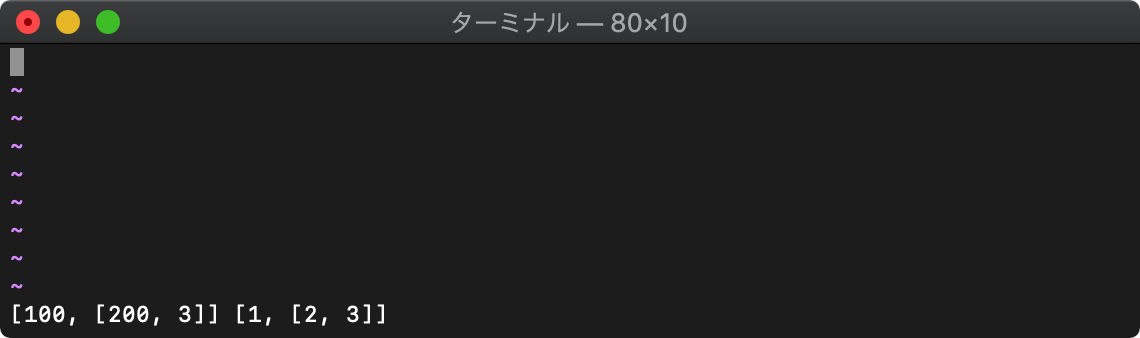
リストは再起的にコピーされるため、どれだけリストを内包していても、完全に別リストになります。
map
map(リスト,文字列)
mapで処理するリストの各要素は、v:val変数に格納されます。
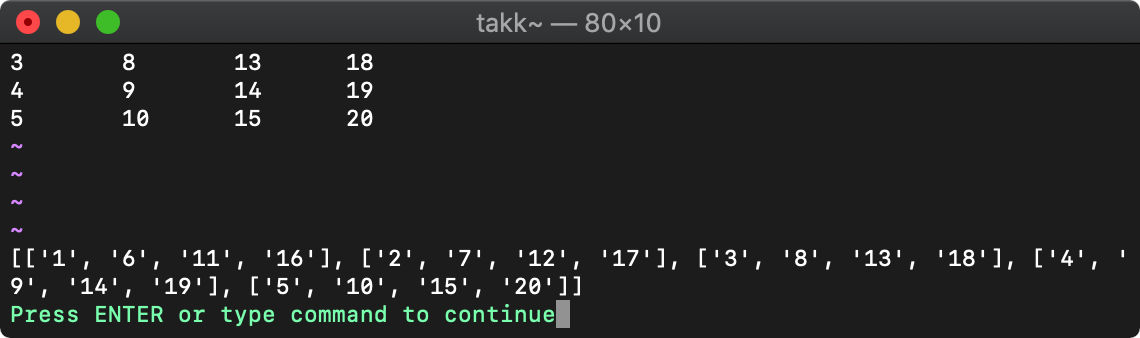
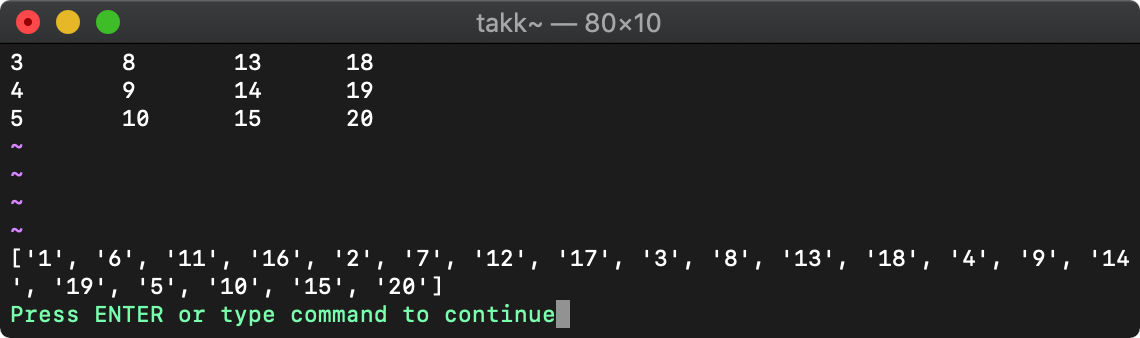
extend
リストを拡張します。
リストの入れ子を平坦にする例。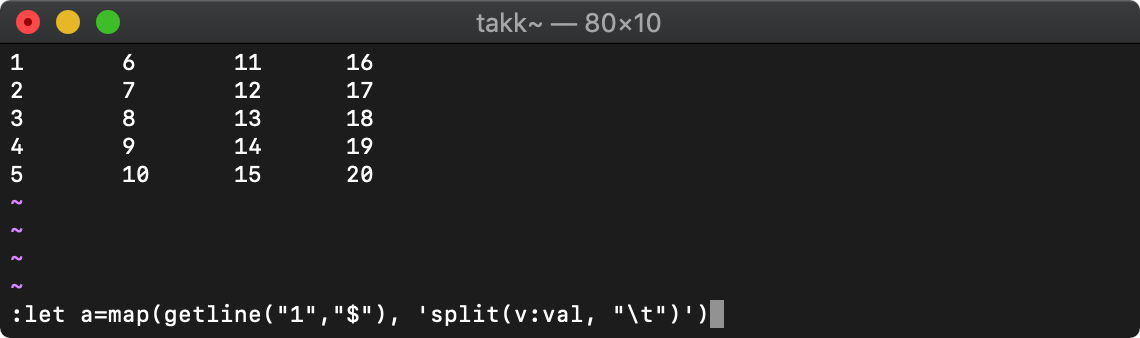
:echo a
:let b=[]
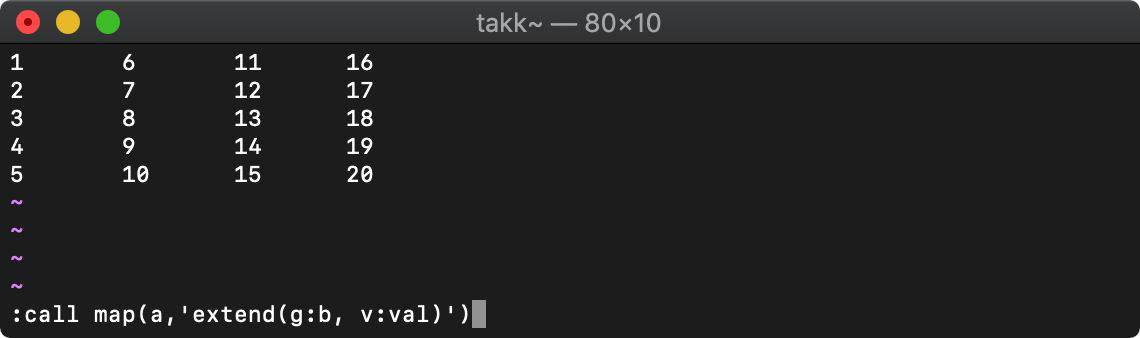
:echo b
計算関数
or ビット演算
or(値,値)
2値をorします。
1 + 1は、(移行+は、論理和の意味)
:echo or(1,1)
1ですね。
1+2は、
:echo or(1,2)

3になりました。
31+3は、
:echo or(31,3)

31になりました。
31は、2進数で、
1111 1111
3は、
0000 0011
31と3を上下に並べると、
1111 1111
0000 0011
上段が全部1なので、論理和しても、全部1ですね。合ってます。
and ビット演算
and(値,値)
2値をANDします。
論理積1・1の計算をします。
:echo and(1,1)

当然1です。
次は、10・5
echo and(10,5)

0になりました。
10と5は、それぞれ2進数で表すと、
1010
0101
上下が1の列がないので、オール0で正解です。
:echo and(127,100)
100です。
2進数で確認してみます。
0111 1111
0110 0100
合ってますね。
invert NOTビット演算
invert(値)
NOTします。
50を2進数で表示すると、
:let a=50
:echo printf("%b",a)

110010ですね。
これをinvert()で実行すると、
:echo printf("%b",invert(a))
1がたくさん並んでいますが、右の方をみると、
001101になってます。
並べて確認してみます。
110010
001101
abs 絶対値
abs(式)
:echo abs(1.234)

1.234と表示されました。
そのままですね。
マイナス値を与えてみます。
:echo abs(-1.234)

マイナスが取れました。
変数で指定してみます。
:let a = -1.23456789

桁が多いので桁落ちして格納されたかもしれません。確認してみます。
-1.234568になってますね。
この変数を、absにかけてみます。
:echo abs(a)
マイナスが外れて、1.234568になりました。
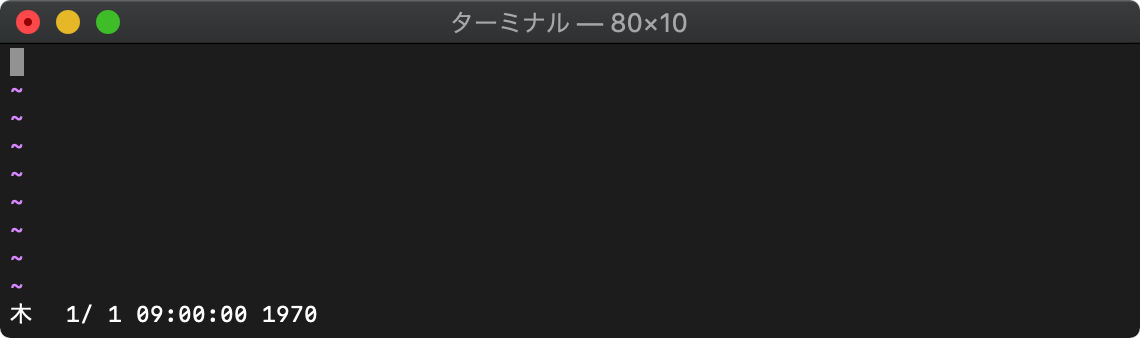
acos
acos(式)
:echo acos(-1)

3.141593が表示されました。桁落ちしてるんですね。
-1.0を指定してみます。
:echo acos(-1.0)

同じですね。
次は、1を指定。
:echo acos(1)

0.0が返りました。
asin
asin(式)
:echo asin(0.0)

結果は0.0です。
:echo asin(0.5)

0.523599。
:echo asin(1.0)

1.570796が返りました。PI/2ですね。
:echo asin(-1.0)

-1.570796が返りました。
atan
atan(式)
:echo atan(0)
0.0が返りました。
:echo atan(0.5)

結果は0.463648。
:echo atan(1.0)
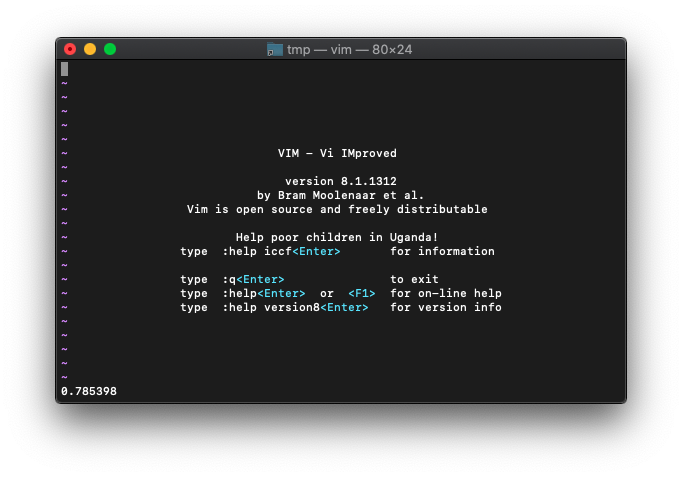
0.785398。
:echo atan(3.141592/2.0)
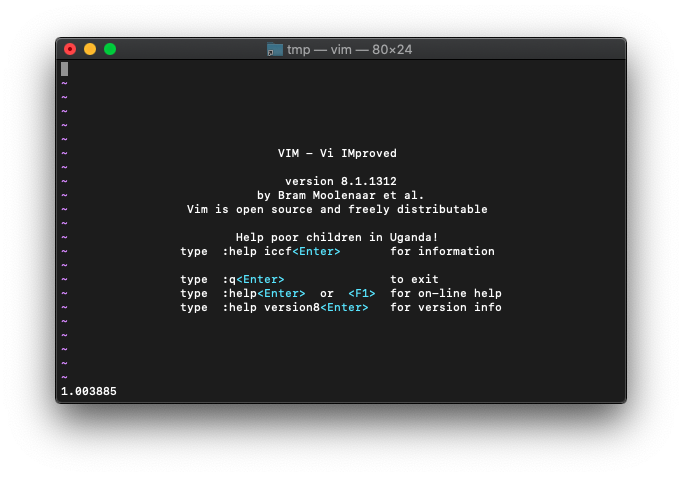
1.003885。
あれ1ちょうどじゃないんですね。atanってなんだったかな。
atan2
atan2(式)
:echo atan2(0)
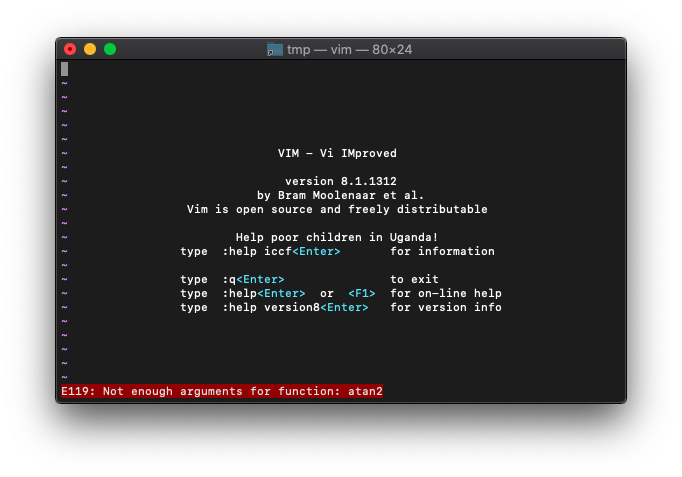
エラーになりました。引数は一つじゃなくて、二つですね。
:echo atan2(0,0)
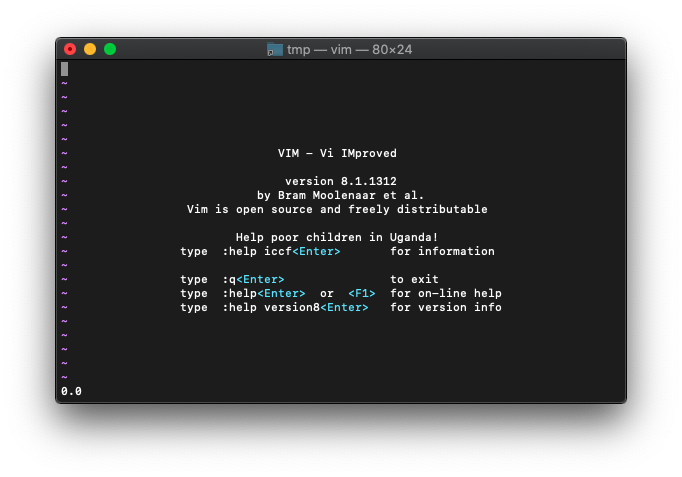
結果は0.0。
:echo atan2(-1,0)
結果は-1.570796。
:echo atan2(1,-1)
 ヘルプの説明どおり、2.356194が返りました。
日付と時刻
localtime 現在日時取得
localtime()
:echo strftime("%c", localtime())
strftime 日付時刻書式に変換
strftime(フォーマット, [,日時])
:echo strftime("%c", 0)
getftime ファイルのタイムスタンプ取得
getftime(ファイル名)
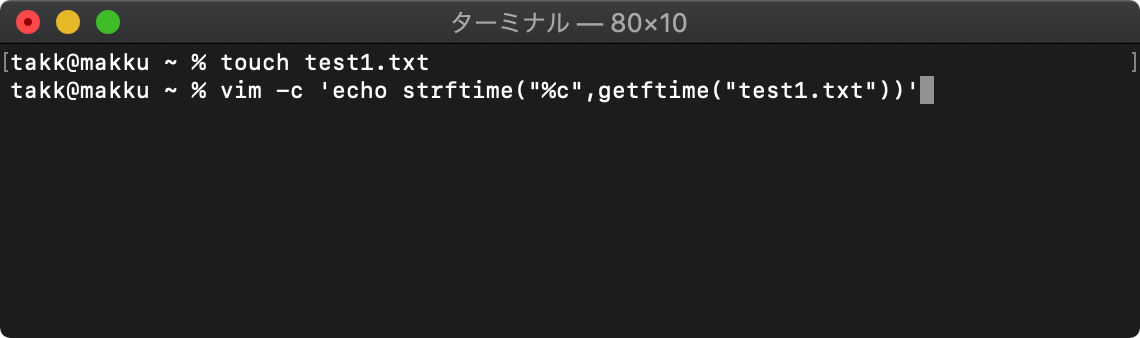
/tmp $ touch test1.txt
/tmp $ vim -c 'echo strftime("%c",getftime("test1.txt"))'
バッファ関連
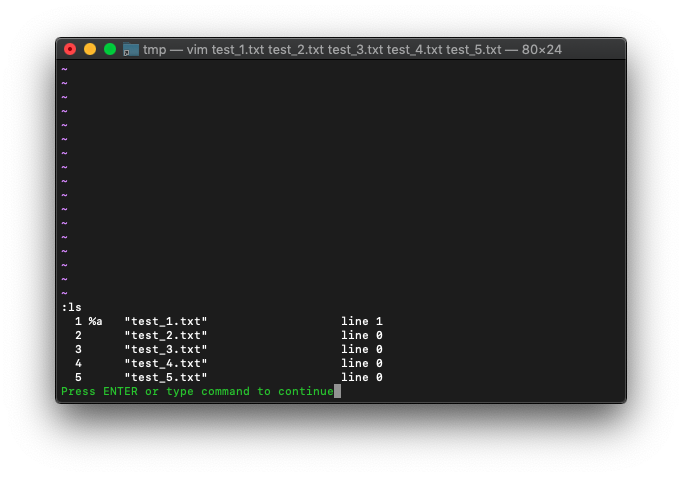
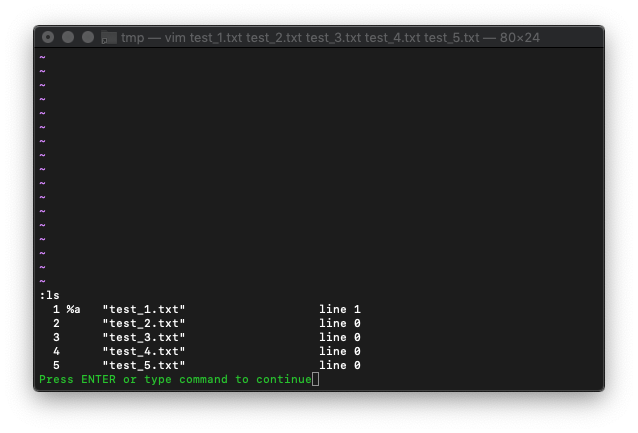
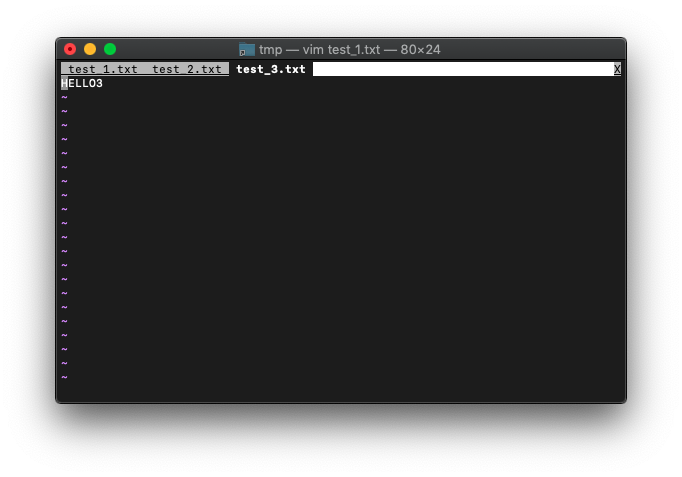
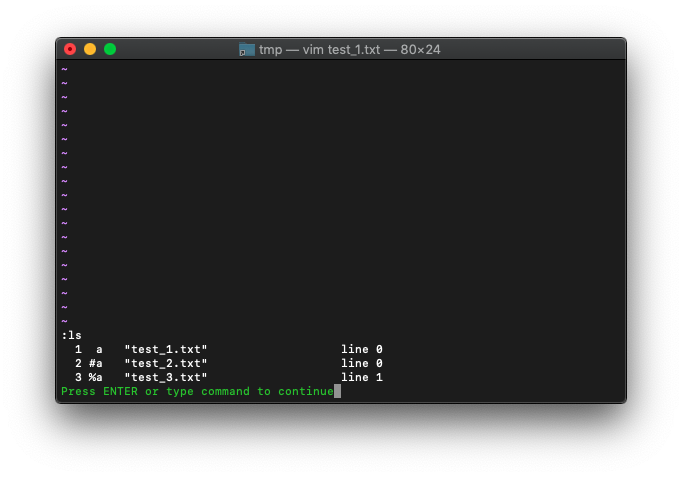
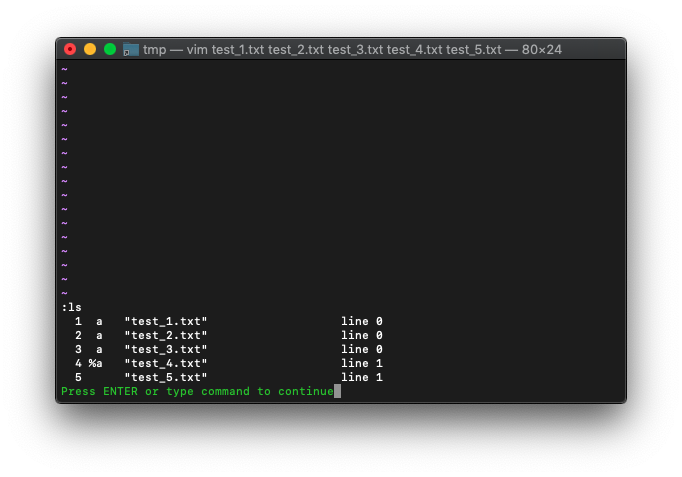
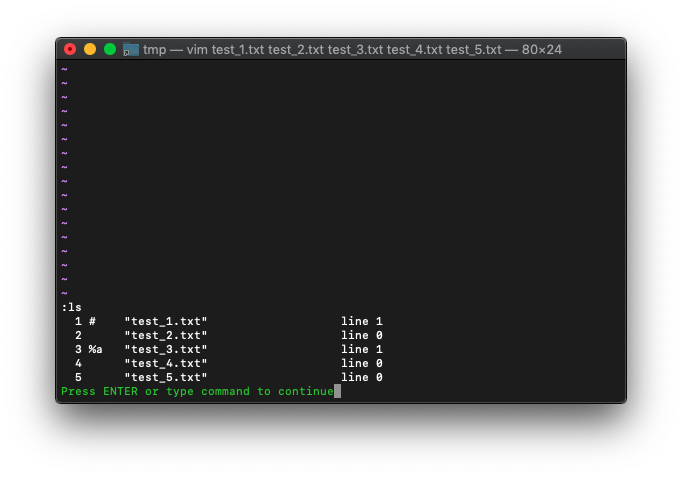
:ls バッファ一覧表示
バッファの一覧を表示します。
:ls
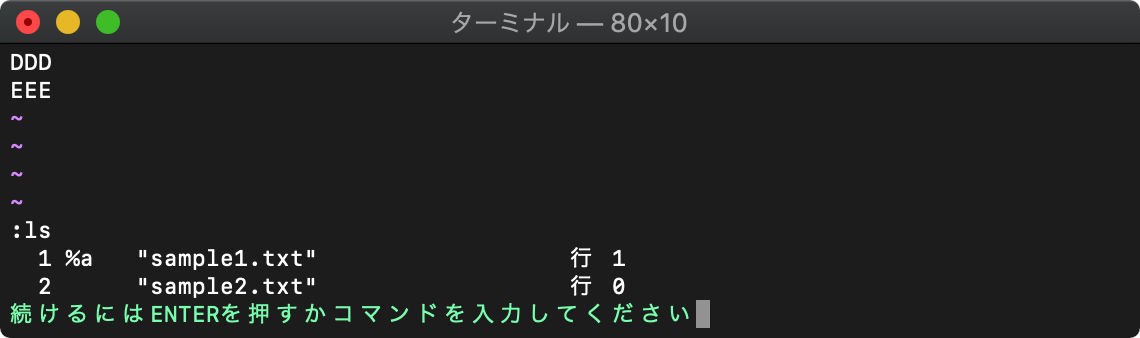
一番左の数字はバッファ番号です。
バッファ名=ファイル名です。
%がついているのがカレントバッファです。
:b (buffer) バッファの切り替え
:数字b :b数字 バッファ番号指定
:bufferコマンドで、バッファ切り替えできます。省略して:bが使えます。
例えば2番目のバッファに切り替えるには、
:b2
番号の指定は、bの前でも動作は同じです。
:4b

:(コロン)の入力を省略したい場合は、
数字を押してから
2<C-^>
:bfirst (:bf) :blast (:bl) 先頭、末尾バッファ
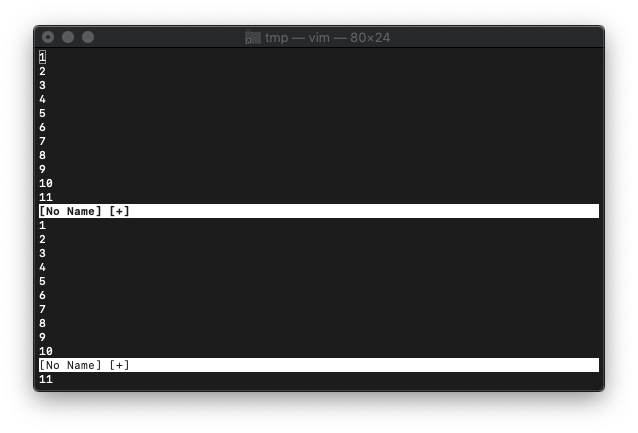
arglistの先頭のファイルを選択するのに:firstを使いましたが、buffer-listの先頭を選択するには、:bfirstを使います。bが先頭につくだけですね。ですので最後のファイルを選択するコマンドは:blastになります。
:bfirst :blast使ってみます。
:ls
カレントバッファは、buffer-listの最初にあります。カレントバッファを最後のバッファにしてみます。
:bl
次は最初のバッファ。
:bf

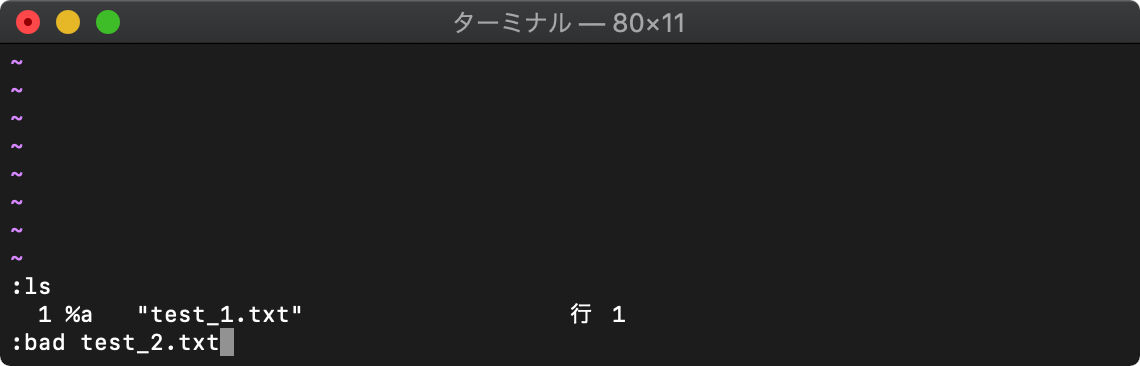
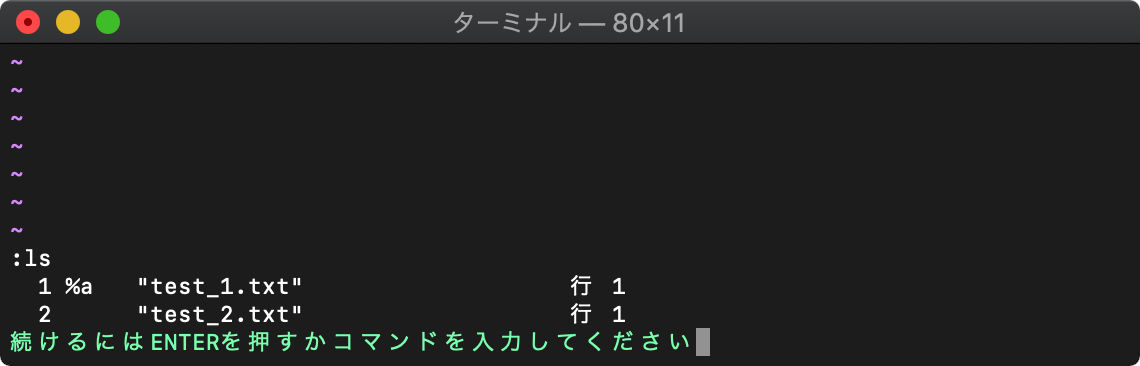
:badd (:bad) ファイルをバッファへ追加
指定した1ファイルを読み込んでバッファへ追加します。
:bdelete (:bd) バッファリストからバッファ削除
:bd番号で、指定した番号のバッファを削除します。
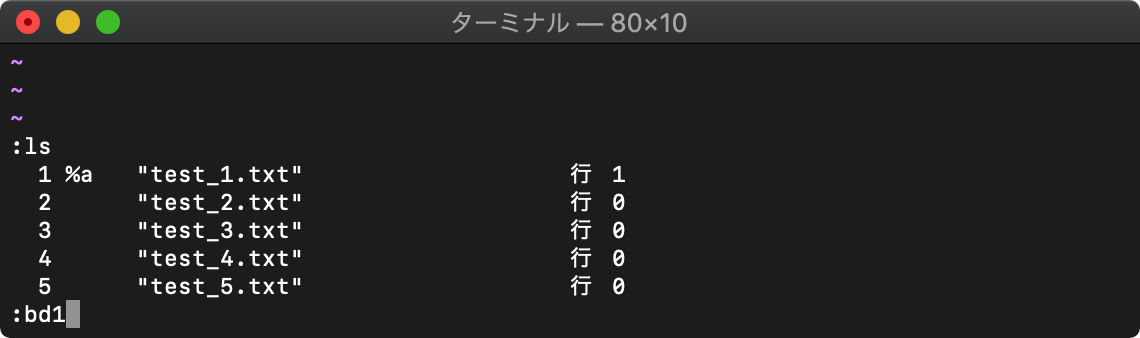
:bd1
1番のバッファが削除され、カレントバッファが2番のバッファになります。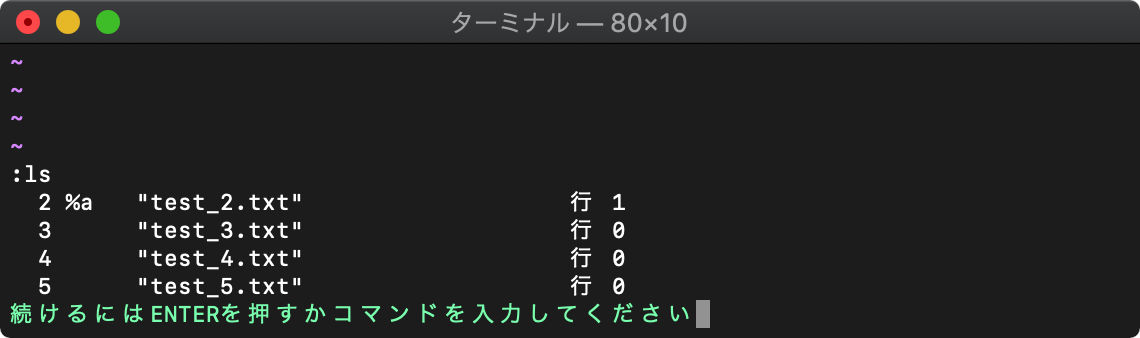
:bwipeout (:bw) バッファ削除
:bdeleteはバッファリストから削除するコマンドでしたが、:bwipeoutは、バッファ自体も削除するコマンドです。
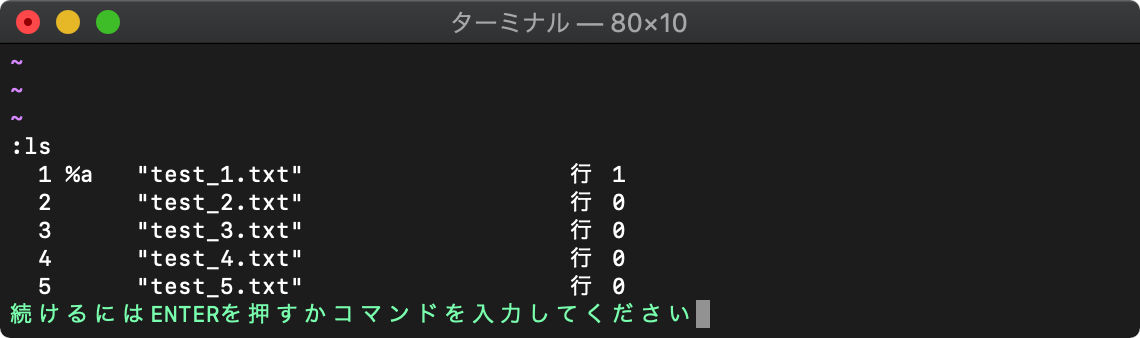
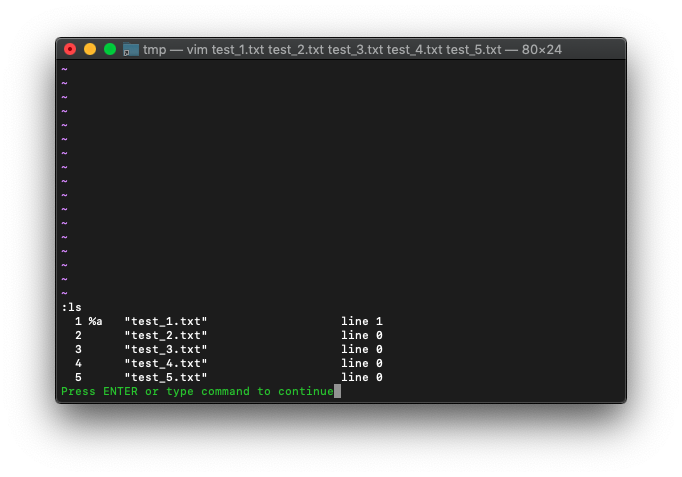
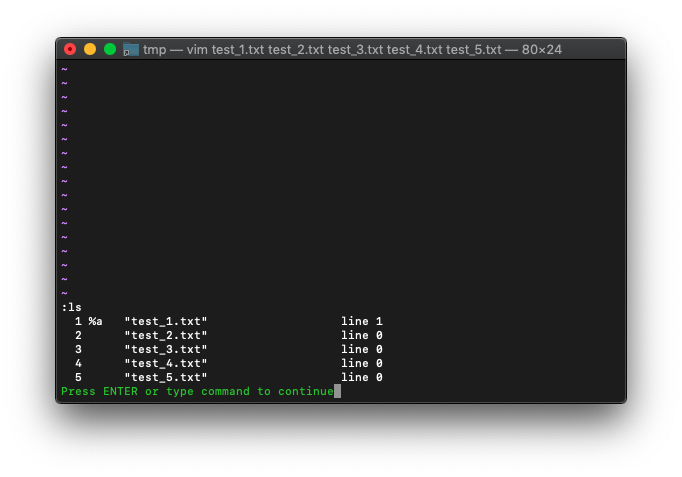
:bufdo (:bufdo) 各バッファで実行
buffer-listの中の全てのバッファへの編集だけでなく、rangeを指定することで、特定のバッファのみに絞り込んで編集ができます。
使ってみます。
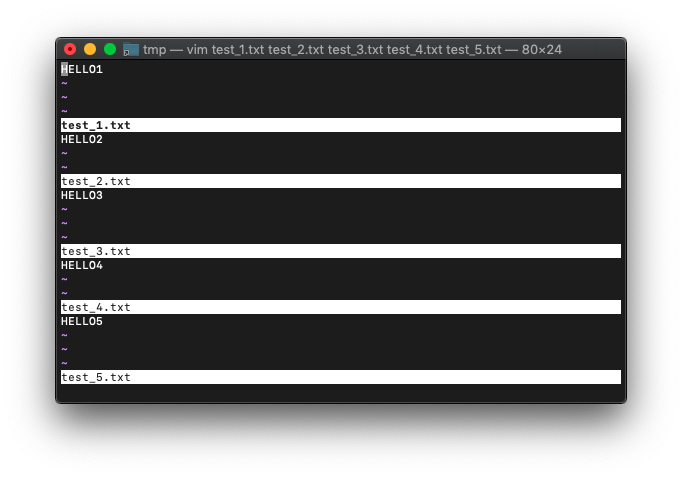
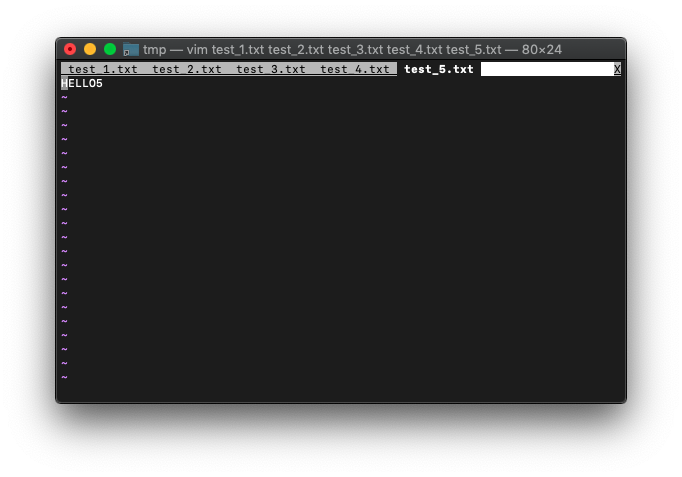
/tmp $ for i in {1..5};do echo HELLO$i>test_$i.txt;done
/tmp $ vim test_*.txt
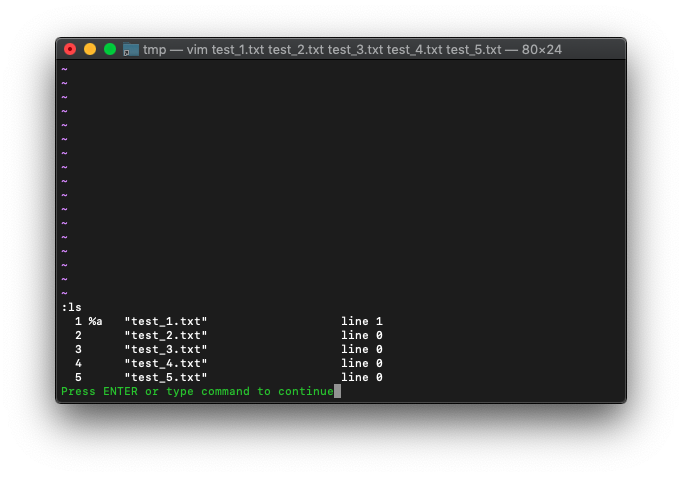
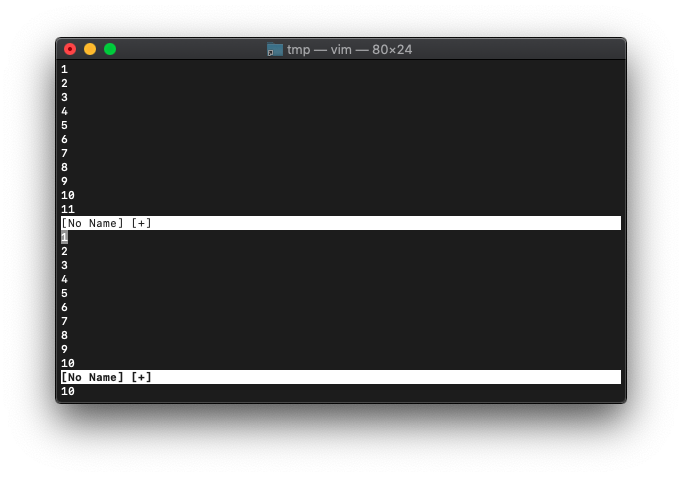
上記のように起動した後、lsを確認。
:ls
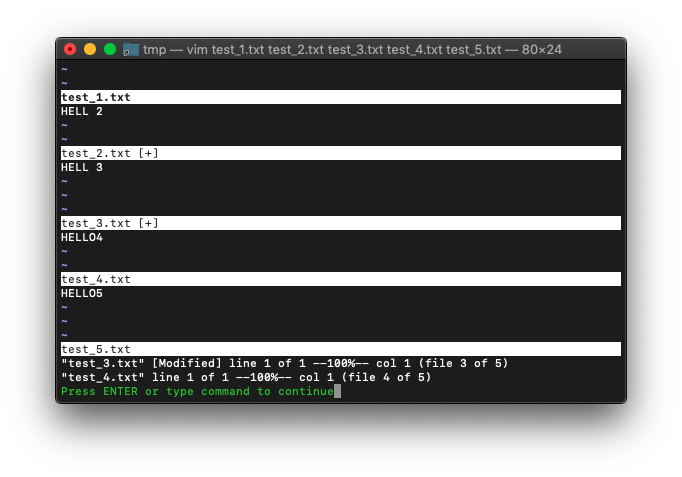
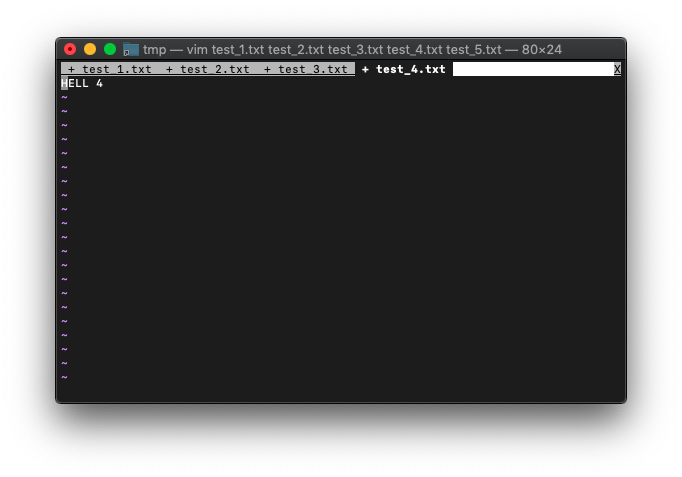
:ballで全てのバッファをスプリット表示しておきます。
:ball
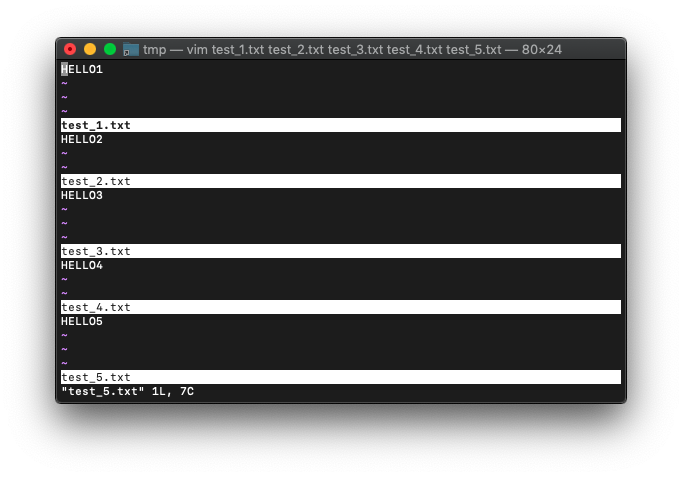
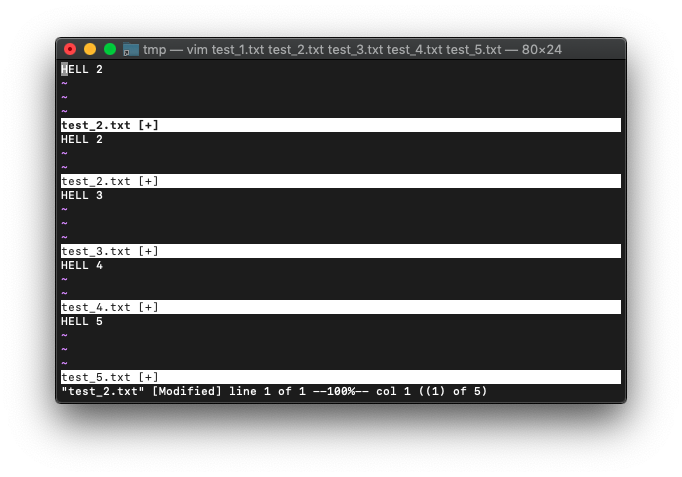
:bufdoを使って、”HELLO”を”HELL “に置換してみます。
:bufdo! s/HELLO/HELL /

全バッファ置換されました。

bufdoで置換を実施しただけなので、各バッファはファイルへの保存はしてない状態のはずです。
:bmodifiedで編集中のファイルへ切り替わるか確認してみます。
:bmodified

一番上の窓のバッファがtest_1.txtに変更されました。編集中のバッファのうち先頭のバッファ、つまりtest_1.txtに
切り替わったってことですね。
もう一度、実行してみます。
:bmodified!
一番上の窓が、test_2.txtに切り替わりました。
全ファイルが保存されていない状態です。一旦終了して再起動してみます。
:qa!
/tmp $ vim test_*.txt
ballします。
:ball
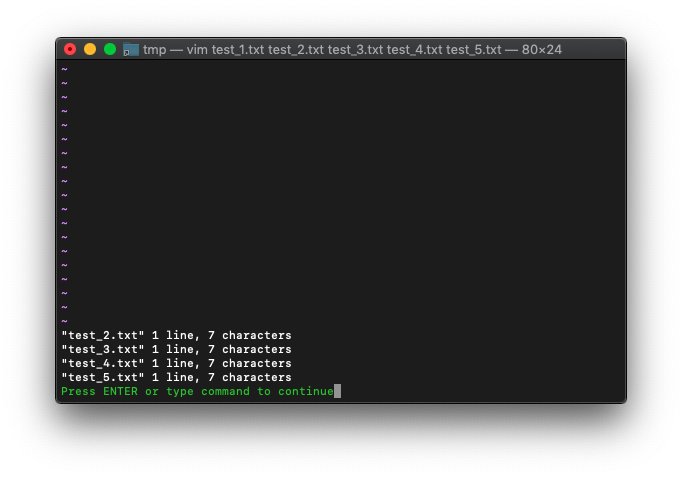
次は範囲を指定して:bufdoを使ってみます。
まず複数ファイル作成してVim起動。
/tmp $ for i in {1..5};do echo HELLO$i>test_$i.txt;done
/tmp $ vim test_*.txt
buffer-listを確認。
:ls
2と3のバッファを置換してみます。
:2,3bufdo! s/HELLO/HELL /
全バッファ見てみます。
:ball

2と3のバッファが置換されてますね。
:bmodified (:bm) 変更バッファをカレントにする
変更したバッファをカレントバッファにします。
以下のように各バッファで画面スプリットしておき、
1番のバッファのみ修正します。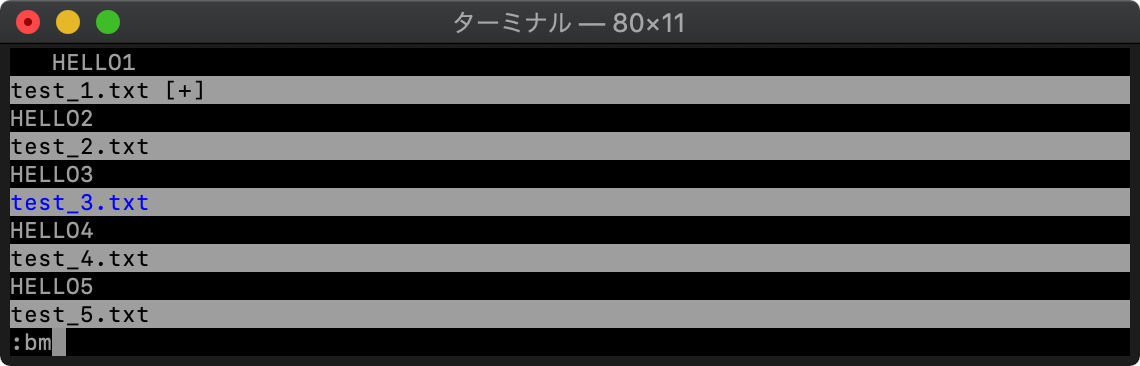
3番目のウィンドウに移動して、:bmを実行すると、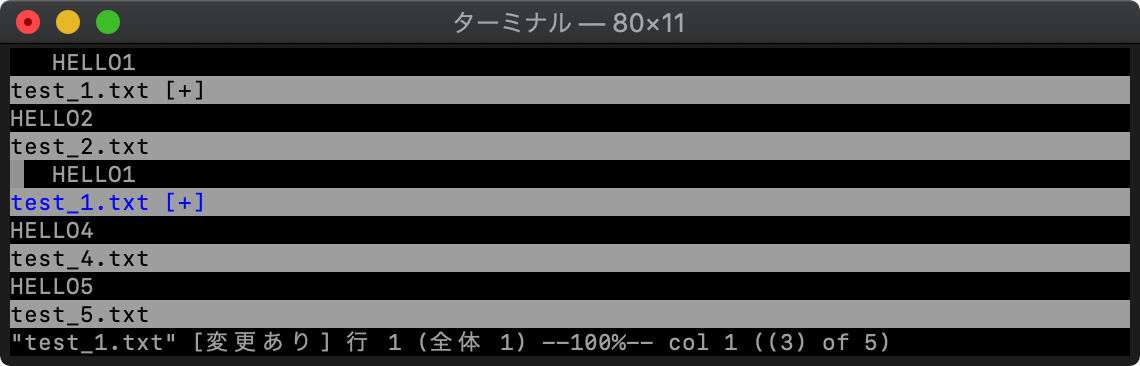
3番目のウィンドウが、1番のバッファになります。
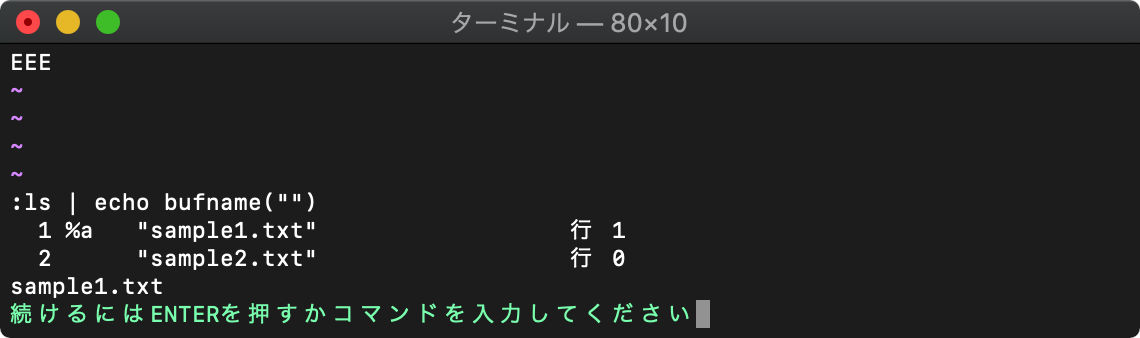
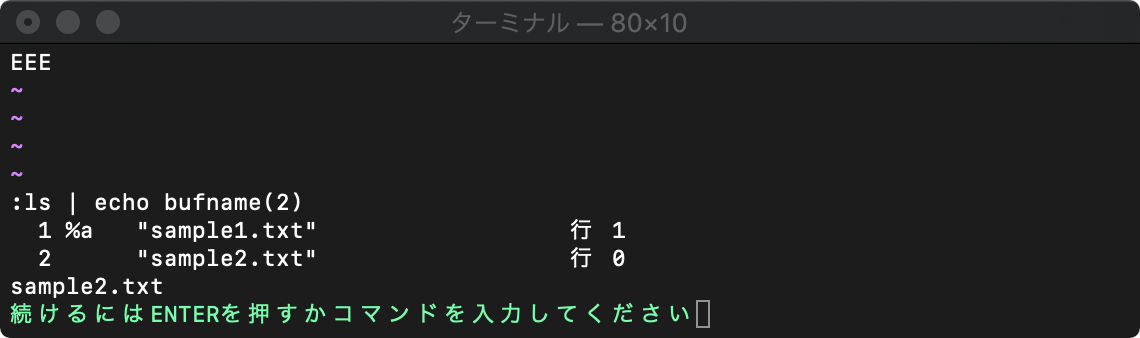
bufname バッファ名取得
現在のバッファ名を返します。
bufname(“”) 現在のバッファを指定
:ls | echo bufname("")
bufname(番号) バッファ番号で指定
:ls | echo bufname(2)
bufexists バッファの存在チェック
指定したバッファが存在するかチェックします。画面に表示されていなくても存在していればTRUE(1)が返ります。
:ls | echo bufexists("sample3.txt")
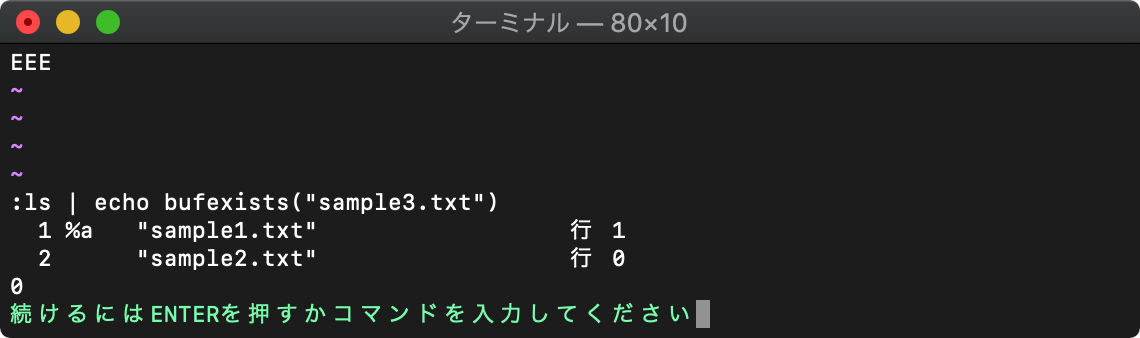
sample3.txtというバッファは存在しないので、FALSE(0)が返りました。
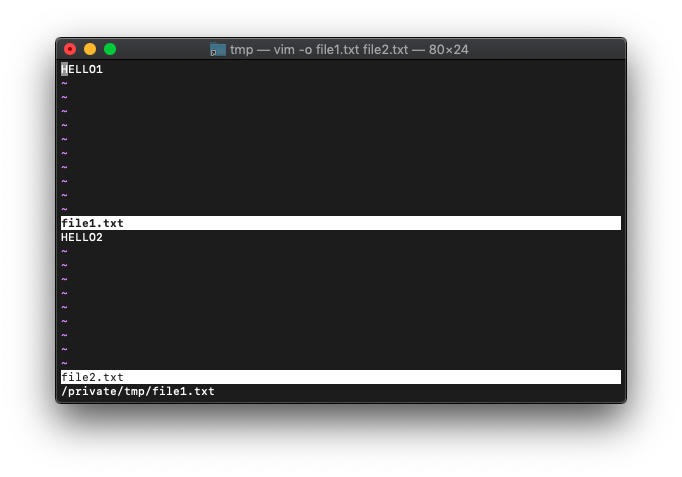
getbufinfo バッファ情報を取得
バッファの情報を得る関数 getbufinfoを使ってみます。
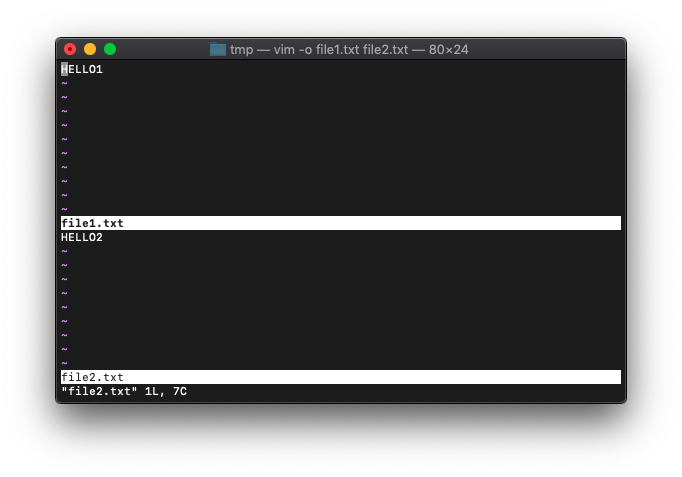
/tmp $ vim -o file*.txt
:echo getbufinfo(1)
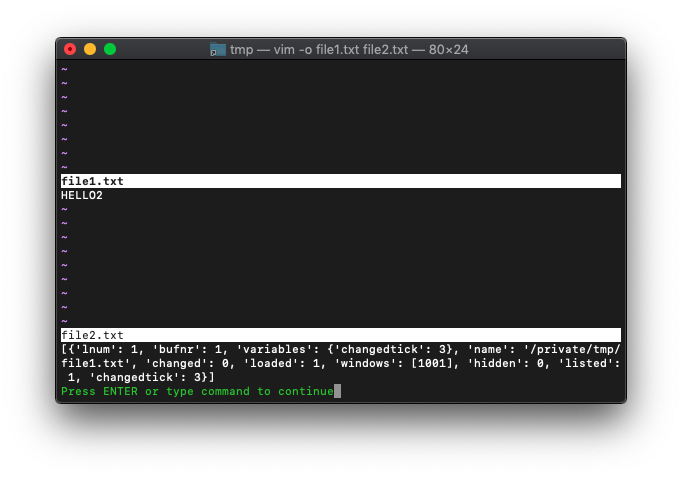
連想配列になってますね。
ヘルプを見ると、キーはこれだけあるようです。
bufnr           buffer number.
changed         TRUE if the buffer is modified.
changedtick     number of changes made to the buffer.
hidden          TRUE if the buffer is hidden.
listed          TRUE if the buffer is listed.
lnum            current line number in buffer.
loaded          TRUE if the buffer is loaded.
name            full path to the file in the buffer.
signs           list of signs placed in the buffer.
                Each list item is a dictionary with
                the following fields:
                    id    sign identifier
                    lnum  line number
                    name  sign name
variables       a reference to the dictionary with
                buffer-local variables.
windows         list of |window-ID|s that display this
                buffer
popups          list of popup |window-ID|s that
                display this buffer
nameだけ取り出してみましょう。
:echo a[0].name
複数のバッファの情報が取り出せるようにリストで返ってくるんですね。
ウィンドウ関連
バッファ(buffer)は、ファイルのテキストのこと(in-memory)
そして、ウィンドウ(window)は、バッファを覗くための窓。
windowは、一つのバッファに幾つあっても良いです。
buffer/file
 +--------+
 |        |
+----------+
||        || window
+----------+
 |        |
 |        |
 |        |
+----------+
||        || window
+----------+
 |        |
 |        |
 +--------+
バッファとファイルの関係は、一対一です。
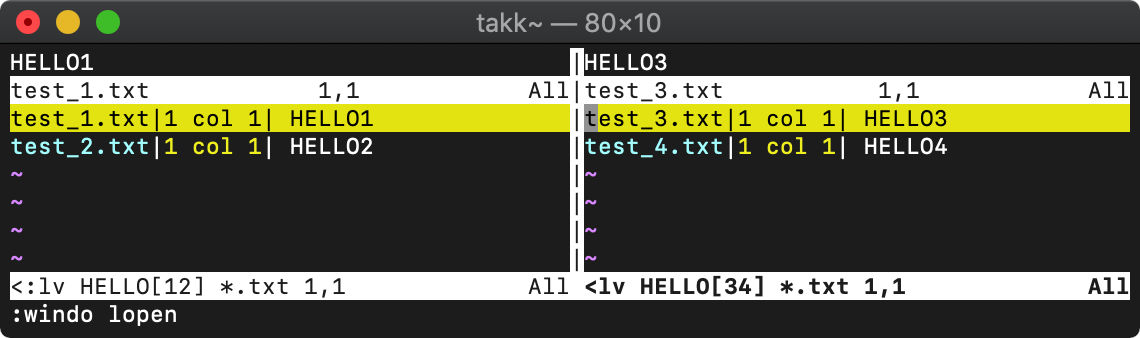
:windo 各ウィンドウで実行
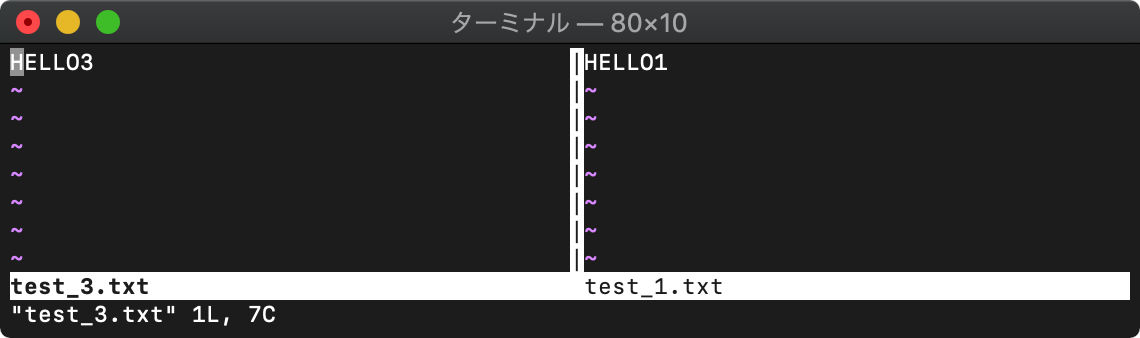
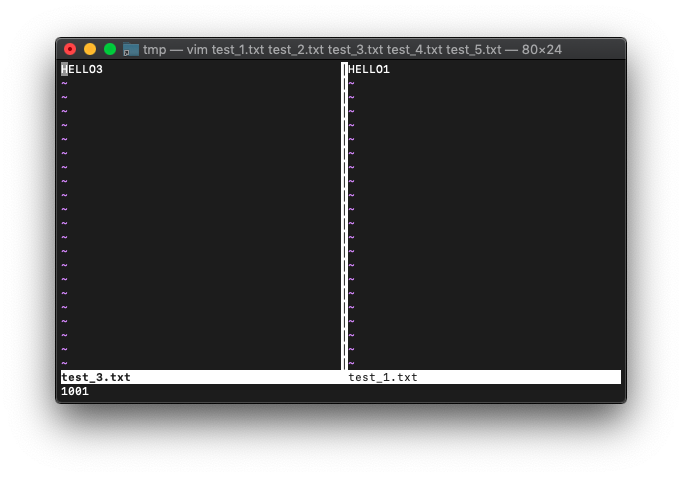
/tmp $ for i in {1..5};do echo HELLO$i>test_$i.txt;done
/tmp $ vim test_*.txt
起動直後はtest_1.txtのみが見えています。
test_3.txtのウィンドウも開きます。
:vs test_3.txt
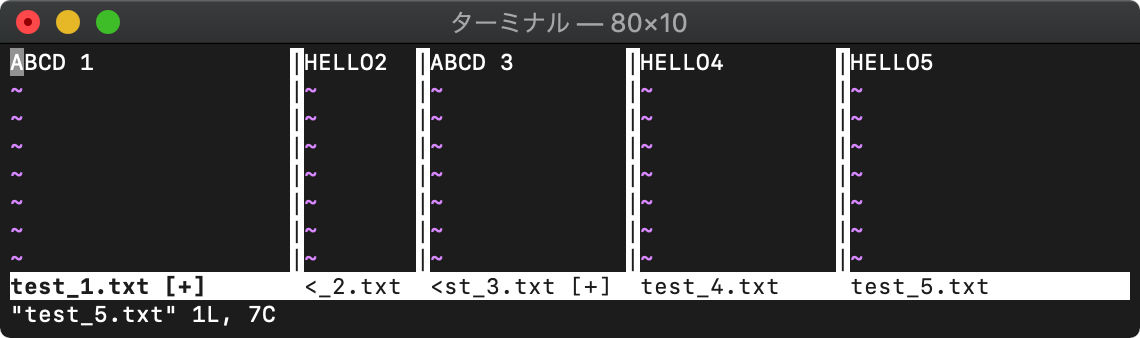
各ウィンドウ(test_1.txtとtest_3.txt)内の文字列を置換。
:windo! s/HELLO/ABCD /

全バッファ見てみます。
:vert ball
VimScript win_getid
win_getidを使います。ヘルプから。
:h win_getid
win_getid([{win} [, {tab}]])                            *win_getid()*
                Get the |window-ID| for the specified window.
                When {win} is missing use the current window.
                With {win} this is the window number.  The top window has
                number 1.
                Without {tab} use the current tab, otherwise the tab with
                number {tab}.  The first tab has number one.
                Return zero if the window cannot be found.
引数は省略するとカレントウィンドウのIDを返してくるようです。
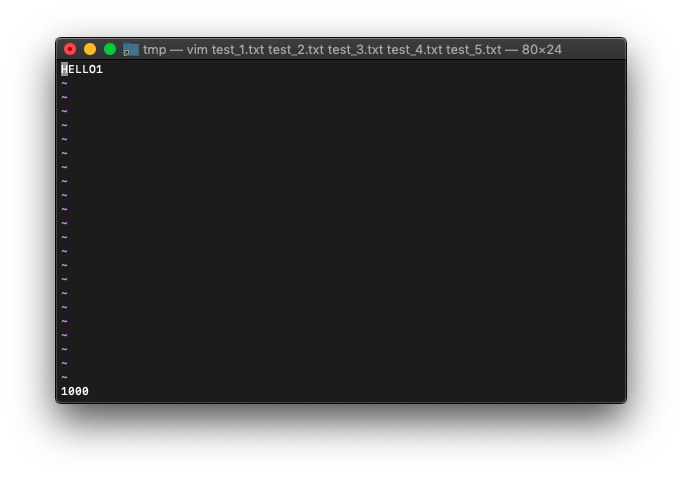
では使ってみます。何もファイルを指定せずVimを起動します。
/tmp $ vim
win_getidの戻り値をechoで表示。
:echo win_getid()
1000番が返ってきました。
スプリットした場合のウィンドウIDはどうなるでしょうか。
:vnew
:echo win_getid()

:echo win_getid()
最初のバッファは1000番のままですね。
別バッファでも別ウィンドウIDが振られていることを理解しました。
バッファ別に振られるなら、別タブでも当然、別ウィンドウIDになるはずですが、一応確認してみます。
何もファイルを指定せずVimを起動します。
/tmp $ vim
ウィンドウIDを確認。
:echo win_getid()
1000番が割り振られています。
次に:tabnewして、win_getidします。
:tabnew
:echo win_getid()
1001番です。ウィンドウが増えるたびに増えていくのでしょう。
タブを削除(バッファを削除)した場合はどうなるでしょうか。
:bwipeoutしてから再度:tabnewしてみます。
:bwipeout
:tabnew
:echo win_getid()

1002番が割り振られました。
バッファ番号と同じように、同じ番号は割り振られないようですね。
複数バッファを開いたときに、それぞれのウィンドウIDがどのように割り振られるのか確認してみます。
/tmp $ rm test*
/tmp $ for i in {1..5};do echo HELLO$i>test_$i.txt;done
/tmp $ vim test_*.txt

ウィンドウは一つだけですね。ってことは、1000番が割り振られているはずです。
:echo win_getid()

1000番です。
次は、画面スプリットして別バッファを開いてみます。
test_3.txtを開きます。
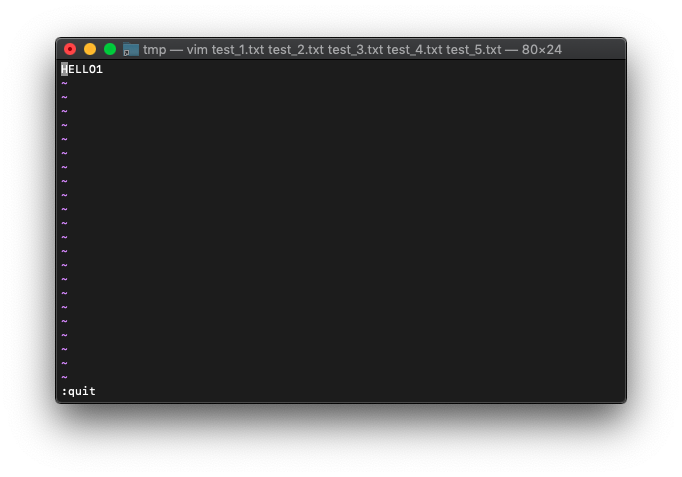
:vs test_3.txt
:echo win_getid()
スプリットして開いたバッファを閉じます。
:quit
再度、画面スプリットして別バッファを開きます。
test_2.txtにしましょう。
:vs test_2.txt
:echo win_getid()
1002です。
さらに、画面スプリットしてみます。
test_3.txt
:vs test_3.txt
:echo win_getid()
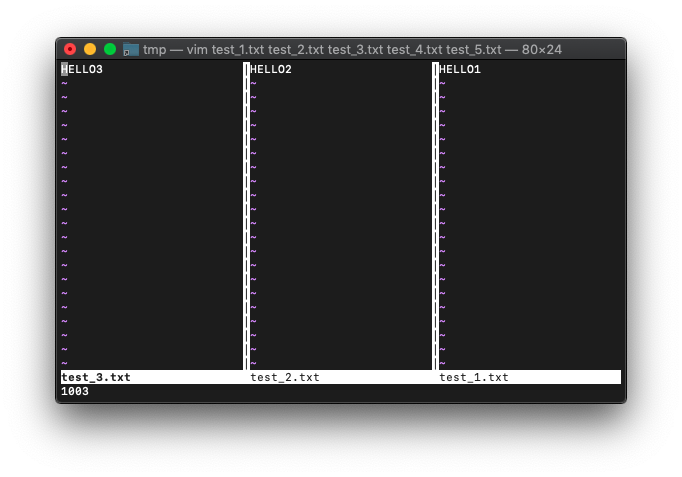
一度割り振られたウィンドウIDは使われないみたいですね。
VimScript win_gotoid
ウィンドウIDが理解できてきたので、次はwin_gotoid使います。
ヘルプです。
win_gotoid({expr})                                      *win_gotoid()*
                Go to window with ID {expr}.  This may also change the current
                tabpage.
                Return 1 if successful, 0 if the window cannot be found.
成功すると1、失敗すると0が返るんですね。
使ってみます。
/tmp $ rm test*
/tmp $ for i in {1..5};do echo HELLO$i>test_$i.txt;done
/tmp $ vim test_*.txt
:echo win_getid()
win_gotoで今見えているウィンドウのID、1000を指定してみましょう。
戻り値を見るためにechoを使います。
:echo win_gotoid(1000)
1が表示されたので、成功ですね。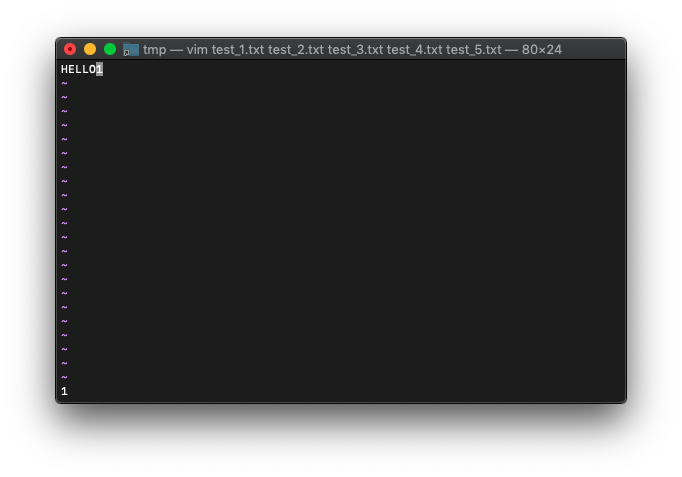
次は、存在しないウィンドウIDを指定してみます。1005を指定してみます。
:echo win_gotoid(1005)

0が表示されたので、失敗です。
win_gotoidを使ってタブを切り替えてみます。
/tmp $ rm test*
/tmp $ for i in {1..5};do echo HELLO$i>test_$i.txt;done
/tmp $ vim -p test_*.txt
:echo win_getid()
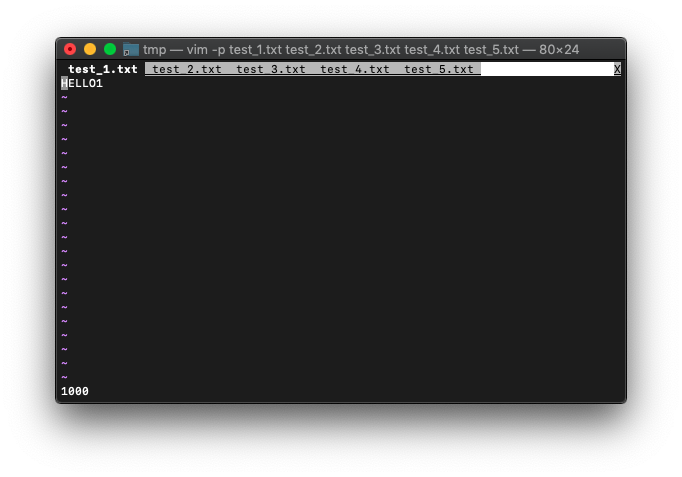
win_gotoidで他タブに切り替えることができるでしょうか。
:call win_gotoid(1001)
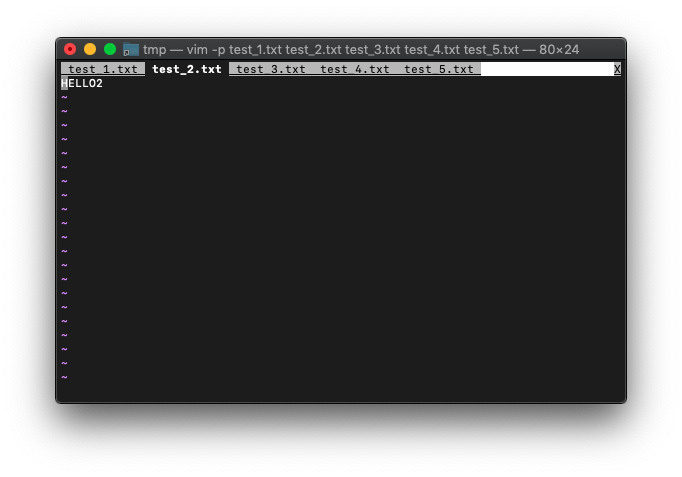
見事にタブが切り替わりました。
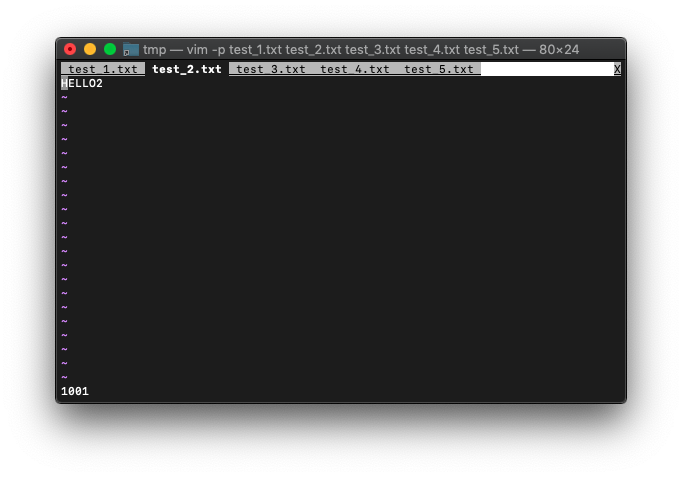
ウインドウIDを確認します。
:echo win_getid()
wincol カレントウィンドウのカーソルカラム位置
カレントウィンドウのカーソルのカラム位置を返してくれます。
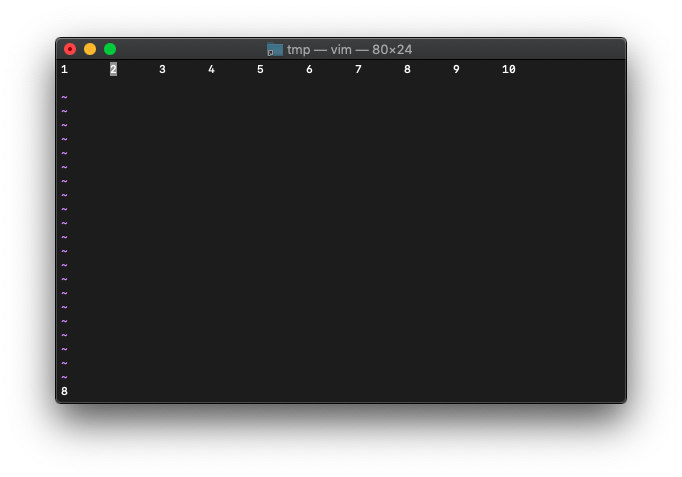
引数を指定せずにVim起動。
/tmp $ vim
適当に文字列を作ります。
:0r!seq 10 | pr -t10

カーソルは、行頭にあります。wincolを実行すると何が返ってくるでしょうか。
:echo wincol()

1が返ってきました。
wを押して、カーソルを移動し、wincolを実行してみます。
:echo wincol()
8が返ってきました。
col カーソルカラム位置
適当に文字列を作ります。
:0r!seq 10 | pr -t10
そのままのカーソル位置で、col実行。
:echo col(".")

1ですね。
wを5回押して6の位置にカーソルを移動して、col実行。
:echo col(".")
カーソル位置33が返ってきました。
colの”.”以外を使った動きも確認していきます。
引数を指定せずにVim起動。
/tmp $ vim
適当に文字列を作ります。
:0r!seq 100 | pr -t10

“$”を使ってみます。
:echo col("$")
57と表示されました。
これって、改行も含めた位置でしょうか。
確認するため、 $キーで、カーソルを行末へ移動。
:echo col(".")
56が返りました。
winline カレントウィンドウのカーソル行位置
winline()
カーソル行を返す。
カーソルを3行めに移動します。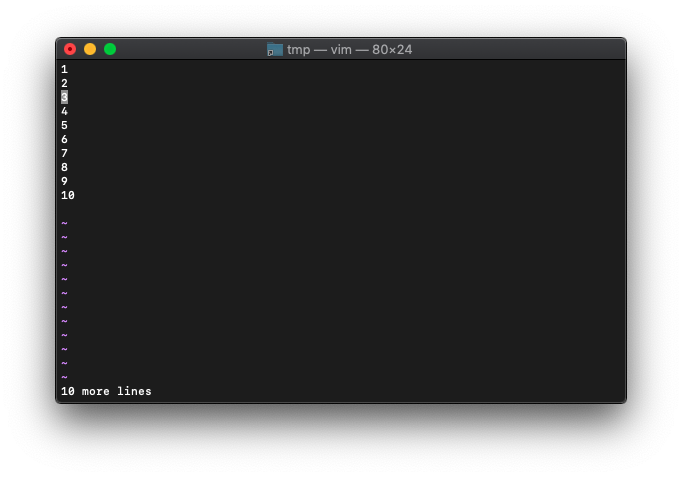
:echo winline()
3が返りました。
今フォーカスしているウィンドウのカーソル位置が返ります。
VimScript winheight
winheight使います。
ヘルプ
winheight({nr})                                         *winheight()*
                The result is a Number, which is the height of window {nr}.
                {nr} can be the window number or the |window-ID|.
                When {nr} is zero, the height of the current window is
                returned.  When window {nr} doesn't exist, -1 is returned.
                An existing window always has a height of zero or more.
                This excludes any window toolbar line.
まずは引数を指定せずに実行してみます。
/tmp $ vim
:echo winheight()
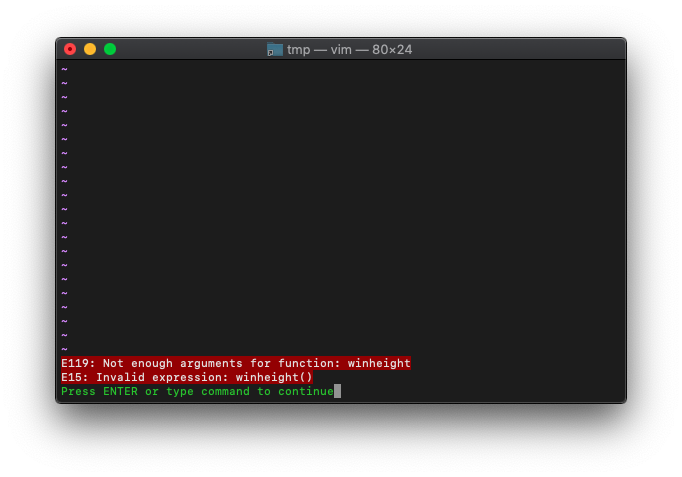
エラーになりました。
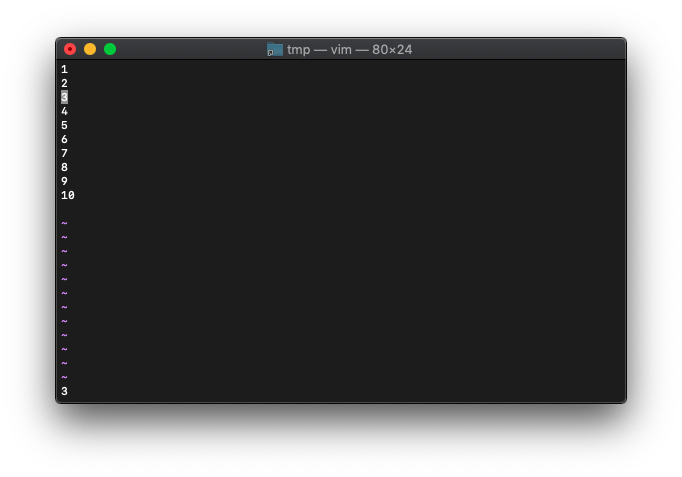
{nr}は省略できないんですね。0を指定すればcurrent windowになるようです。
:echo winheight(0)
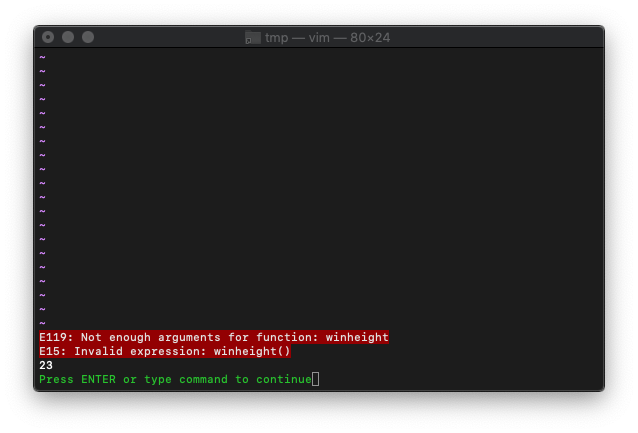
23と返ってきましたが、合ってるでしょうか。
番号を表示してみます。
:0r!seq 100
:1
23行ですね。
次は、上下で画面スプリットしてみます。
:sp
それぞれwinheightを実行してみましょう。
上の画面から
:echo winheight(0)
11が返りました。
Ctrl-wwで下の画面にフォーカス。
:echo winheight(0)
10が返りました。
VimScript winwidth
今回はwinwidthです。
winwidth({nr})                                          *winwidth()*
                The result is a Number, which is the width of window {nr}.
                {nr} can be the window number or the |window-ID|.
                When {nr} is zero, the width of the current window is
                returned.  When window {nr} doesn't exist, -1 is returned.
                An existing window always has a width of zero or more.
/tmp $ vim
:echo winwidth(0)
80が返ってきましたが、タイトルバーにあるように80×24なので、widthは80文字ですね。
左右で画面スプリットします。
:vs
それぞれのwinwidthを確認。
:windo winwidth(win_getid())
それぞれのウィンドウ幅が返ってきました。
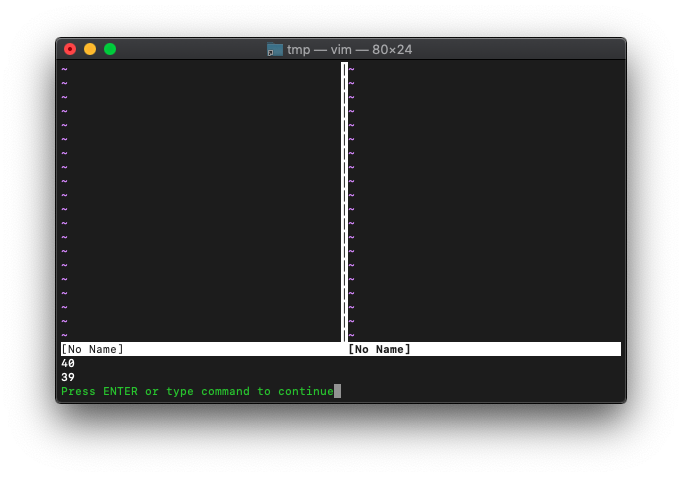
VimScript wincount
wordcount使います。
wordcount()                                             *wordcount()*
                The result is a dictionary of byte/chars/word statistics for
                the current buffer.  This is the same info as provided by
                |g_CTRL-G|
                The return value includes:
                        bytes           Number of bytes in the buffer
                        chars           Number of chars in the buffer
                        words           Number of words in the buffer
                        cursor_bytes    Number of bytes before cursor position
                                        (not in Visual mode)
                        cursor_chars    Number of chars before cursor position
                                        (not in Visual mode)
                        cursor_words    Number of words before cursor position
                                        (not in Visual mode)
                        visual_bytes    Number of bytes visually selected
                                        (only in Visual mode)
                        visual_chars    Number of chars visually selected
                                        (only in Visual mode)
                        visual_words    Number of words visually selected
                                        (only in Visual mode)
とりあえず無名バッファを起動して確認。
/tmp $ vim
:echo wordcount()
各項目全部0です。
HELLOと書いてみます。
:echo wordcount()

それらしい数値になりました。
数字ではどうでしょう。HELLOの代わりに12345に書き換えます。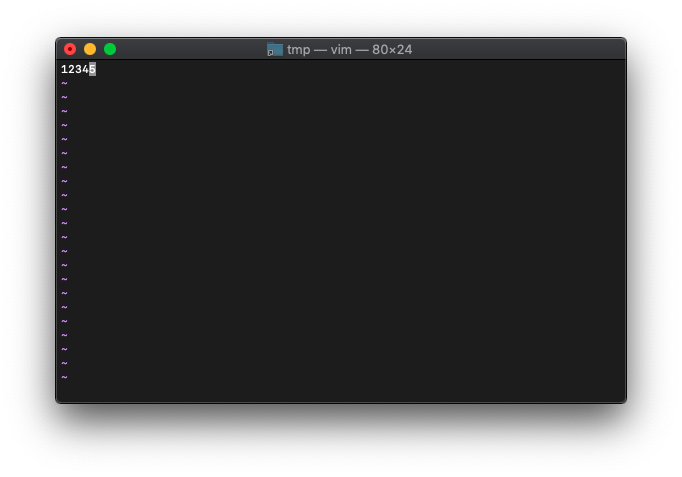
:echo wordcount()

数字に変えても同じでした。
引数なしで起動。
/tmp $ vim
実験用テキストを作ります。
:0r!seq 100 | pr -t10
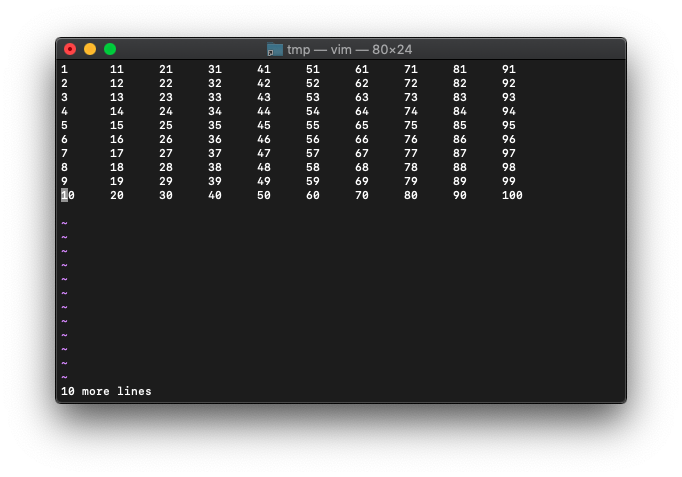
word数をカウントしてみます。
1から100までの数を並べただけなので、100になるはずです。
:echo wordcount().words
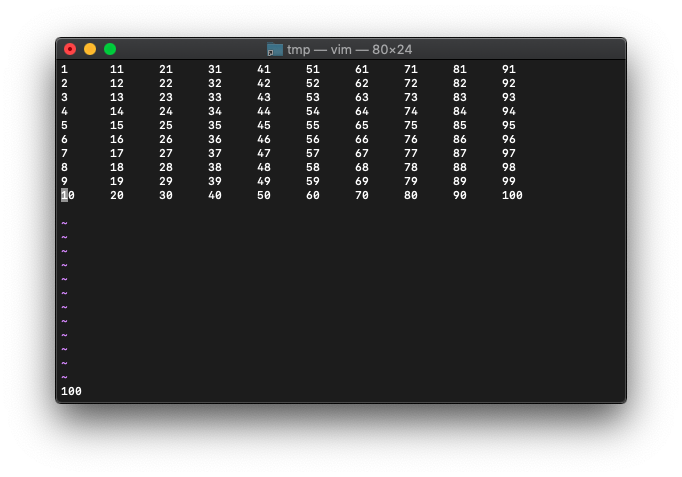
100と表示されました。
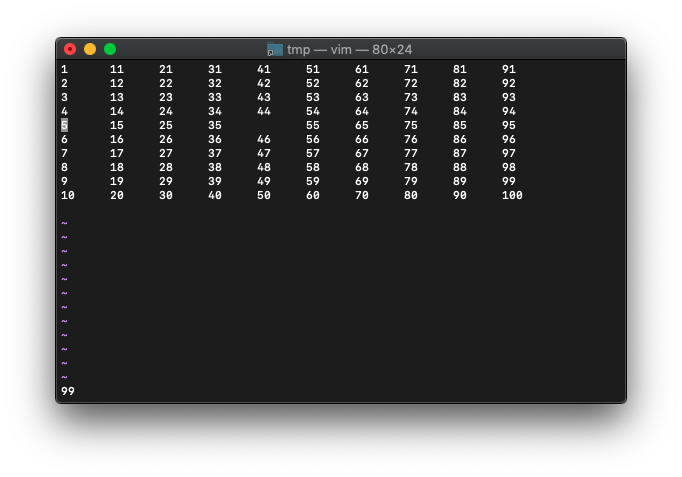
1個だけ消してみます。
:%s/45//
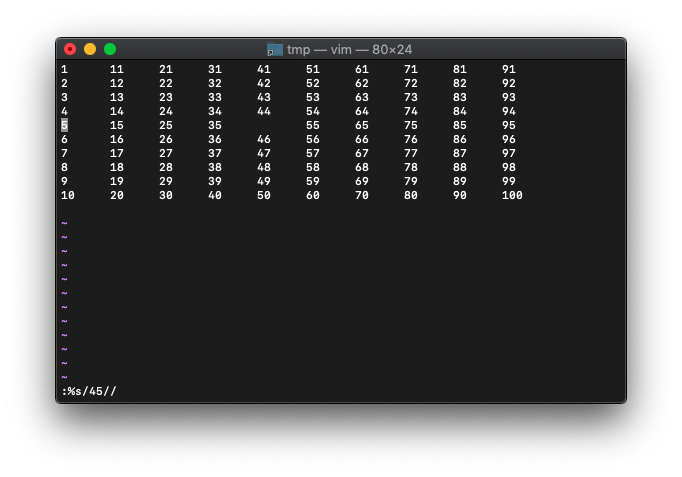
45を消してみました。
再度word数をカウントしてみます。
:echo wordcount().words
cursor_wordsです。
引数なしで起動して、実験用テキストを作ります。
/tmp $ vim
:0r!seq 100 | pr -t10
「:5」と入力して、5行目の行頭にカーソル移動後、cursor_wordsを表示してみます。
:echo wordcount().cursor_words

41と表示されました。
次にwキーを押して、カーソルを単語ひとつ右へ移動してみます。
再度cursor_wordsを表示してみます。
:echo wordcount().cursor_words
42になりました。
カーソル位置のwordを含んで、カーソル以前にどれだけwordがあるかカウントしてくれてるようです。
ggで、カーソルを、1行目の行頭に移動後、cursor_wordsを確認してみます。
:echo wordcount().cursor_words

1ですね。
次は、「:10」、$キーで、10行目の行末。
:echo wordcount().cursor_words
想定どおり100が返りました。
実験用テキストを作ります。
/tmp $ vim
:0r!seq 9
word数は、
:echo wordcount().words
当然9ですね。
byte数は、各行改行を入れて+1するので、9 x 2 = 18が返るはず。
:echo wordcount().bytes

あれ19になってます。
もしや、10行あるでしょうか。行番号表示してみます。
:set nu
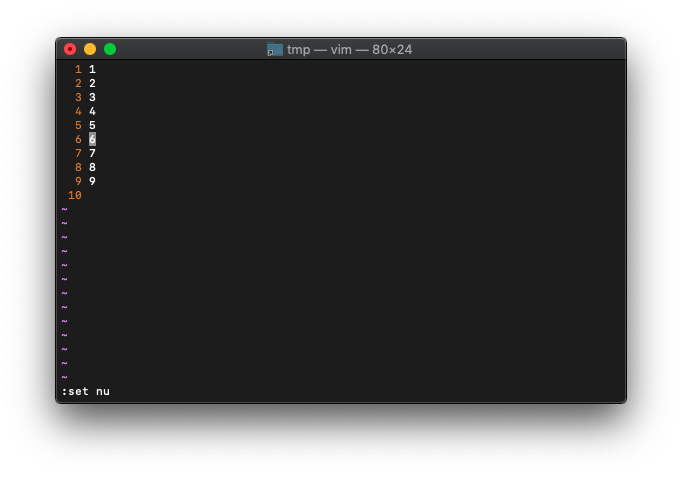
10行目があります。
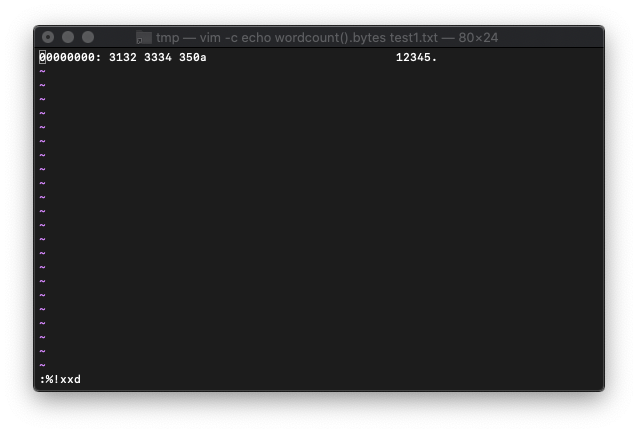
xxdを使って、メモリダンプを確認してみます。
:%!xxd
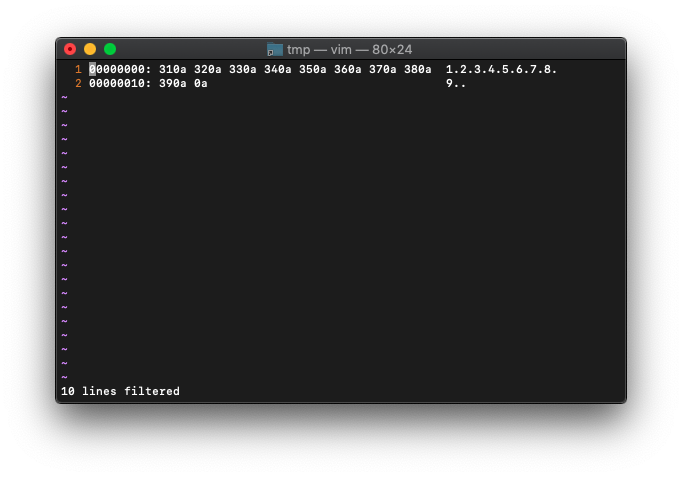
最後の改行を含んで、19byteのようです。
実験用テキストを作ります。
/tmp $ vim
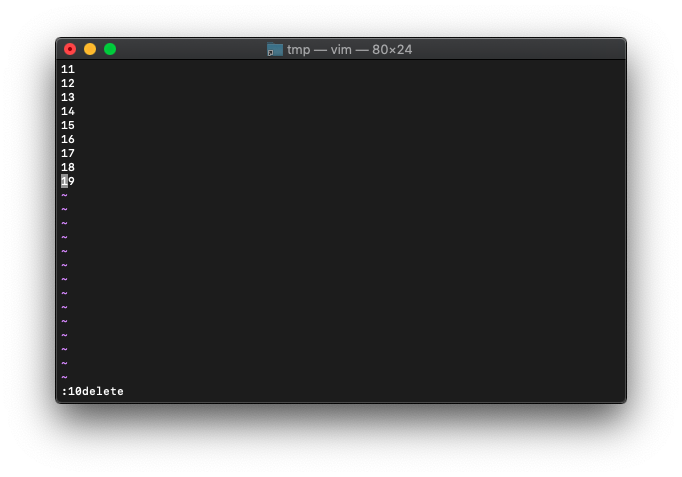
:0r!seq 11 19
さらに10行目を削除
:10delete
byte数をカウントします。1行、改行を含めて3byteなので、3 x 9 = 27byteですね。
:echo wordcount().bytes

想定どおり27です。
空白はbyte数にカウントされるでしょうか。 数字の間に空白を入れてみます。
:%s/\v(.)/\1 /
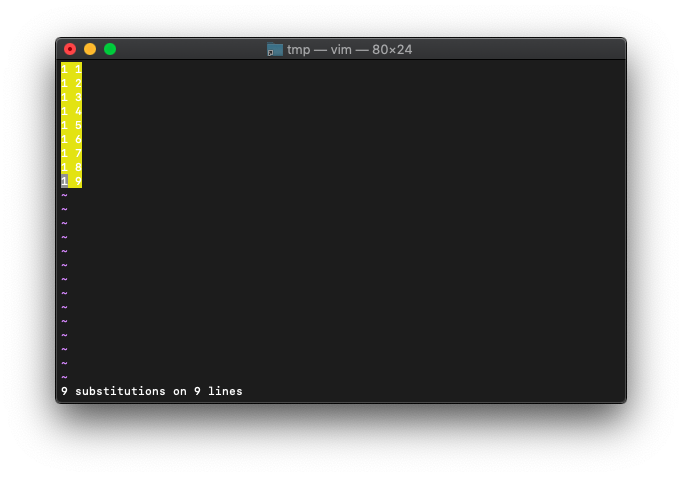
見づらいのでハイライトはオフします。
:noh
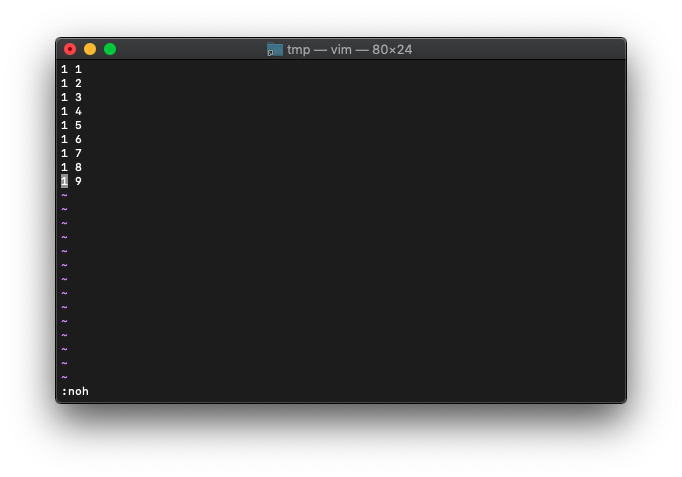
では、byte数カウントします。
:echo wordcount().bytes
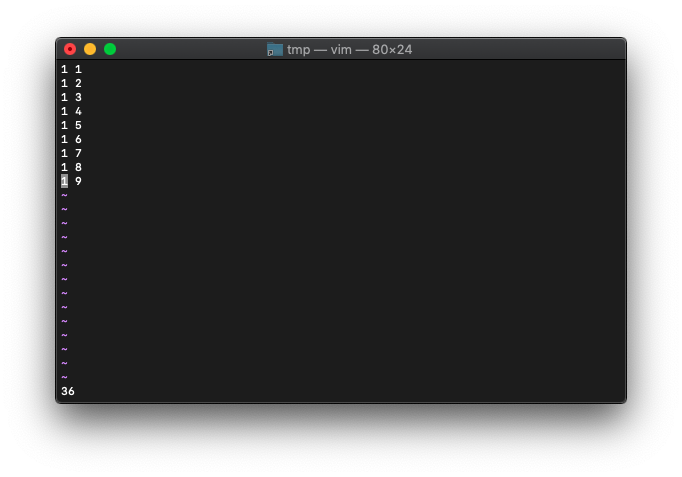
36と表示されました。空白もbyte数に含まれるってことですね。
ってことは、単にファイルサイズですね。
cursor_bytesを使います。
引数なしで起動して、実験用テキストを作ります。
/tmp $ vim
:0r!seq 11 19
さらに10行目を削除して、各行に空白を追加。
:10delete
:%s/\v(.)/\1 /
この状態でbytesを確認すると、
:echo wordcount().bytes

36ですね。
「gg」で先頭行の行頭にカーソルを移動します。そしてcursor_bytesを確認。
:echo wordcount().cursor_bytes
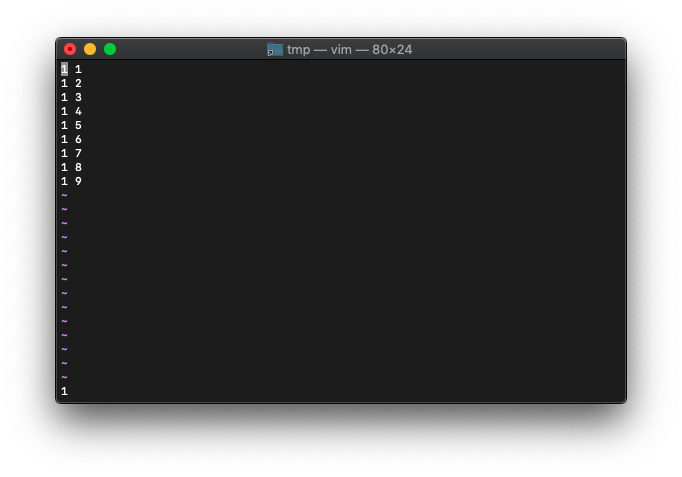
1ですね。
次に「3j」で4行目の行頭にカーソルを移動します。そしてcursor_bytesを確認。
:echo wordcount().cursor_bytes
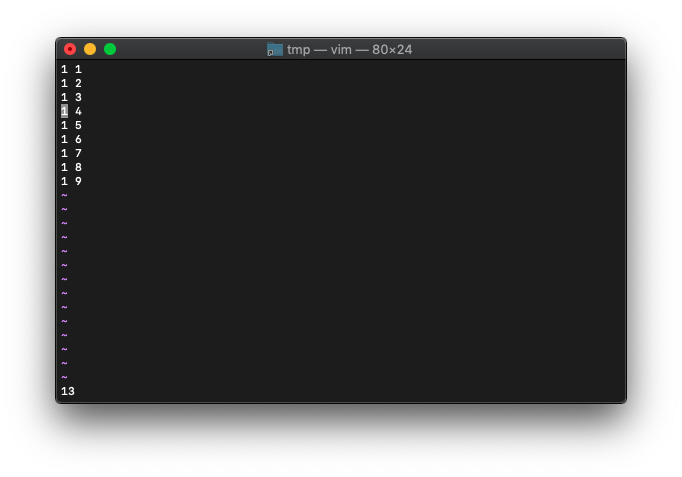
13と表示されました。
1行が4byteで、カーソルの前に3行あるので、4 x 3 = 12Byte。
カーソルの下の文字を含めて+1。13Byteです。
「l」キーでカーソルを1文字右に移動して、再度cursor_bytesを確認。
:echo wordcount().cursor_bytes

14になりました。
arg関連
VimScript argc
argc関数使います。
ヘルプから。
argc([{winid}])
    The result is the number of files in the argument list.  See
    |arglist|.
    If {winid} is not supplied, the argument list of the current
    window is used.
    If {winid} is -1, the global argument list is used.
    Otherwise {winid} specifies the window of which the argument
    list is used: either the window number or the window ID.
    Returns -1 if the {winid} argument is invalid.
引数で指定したファイル数が分かるんですね。
早速ファイル名を指定して起動。
/tmp $ vim file1.txt
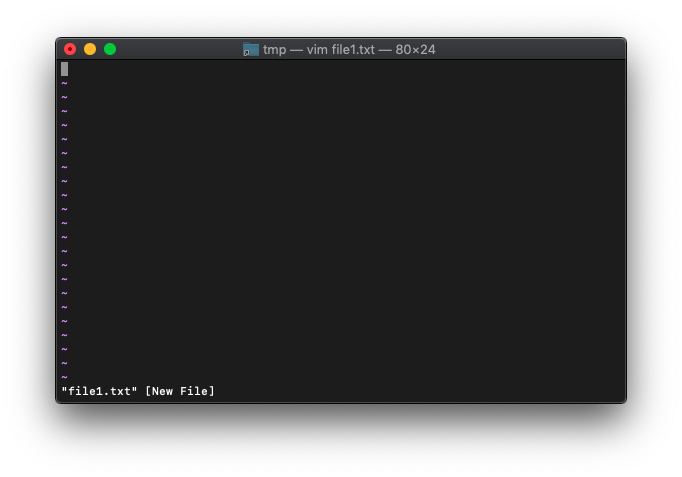
argcを実行してみます。
:echo argc()
引数で指定したファイルは1個だったので、1が返ってきました。
Vimを終了して、今度は複数ファイルで起動してみます。
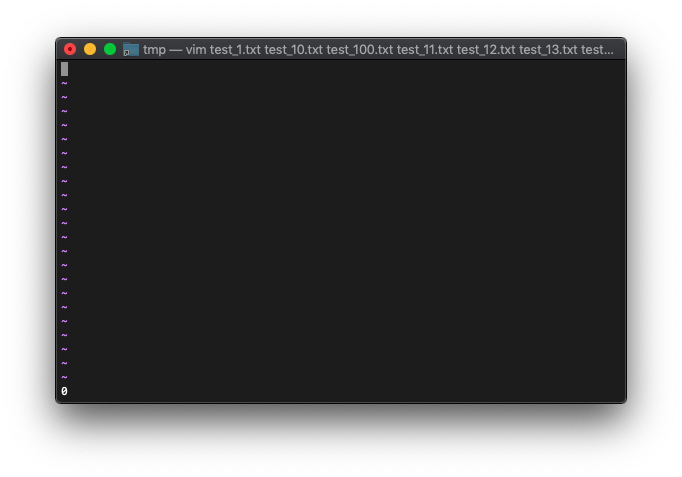
/tmp $ touch test_{1..100}.txt
/tmp $ vim test_*.txt

Vimの最下段の通知を見ると、ファイルが1つしか開いてないように見えますが、
タイトルバーにファイルがたくさん並んでるので、ファイルを全部開いているのでしょう。
argcを実行する前に、lsを見てみます。
:ls
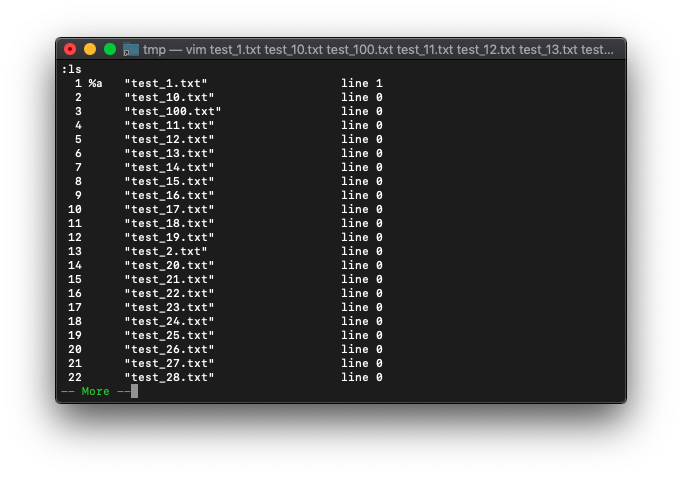
多すぎて表示し切れてないですね。
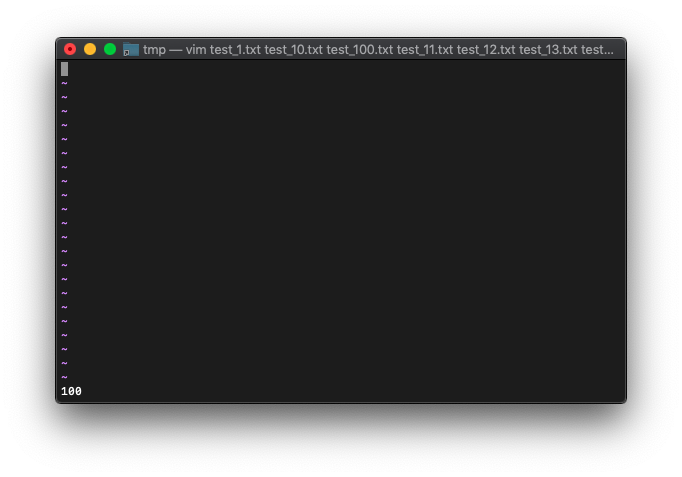
では、argc実行。
:echo argc

argcが起動した時の引数なら、bdeleteした後も、数は変わらないハズですが、確認してみましょう。
:echo argc()
1番のバッファをbdeleteします。
:bd 1

argcを確認。
:echo argc()
100のままですね。
次は、bwipeoutしてみます。
:bw 2
argcを確認。
:echo argc()

想定通り、100のままでした。
タイトルバーの表示も起動時から変わってないですね。
VimScript argidx
argidx関数を使ってみます。
ヘルプから。
argidx()        The result is the current index in the argument list.  0 is
                the first file.  argc() - 1 is the last one.  See |arglist|.
現在開いているファイルのインデックス番号ですね。
最初のファイルなら0。最後のファイルは、argc-1になるようです。 ファイルを100個開いて確認してみます。
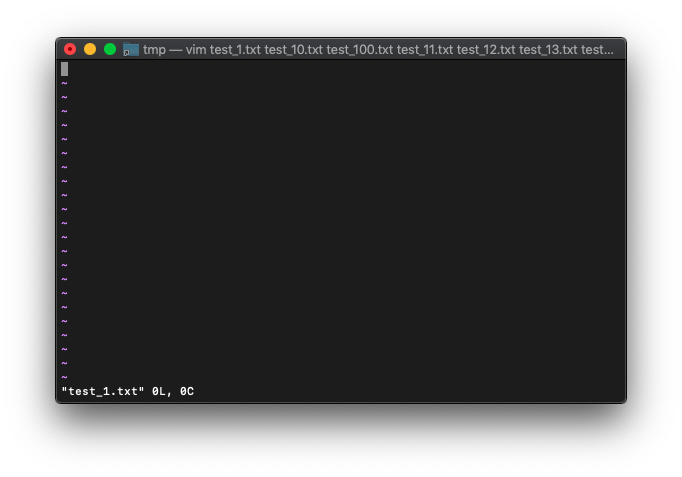
/tmp $ touch test_{1..100}.txt
/tmp $ vim test_*.txt

起動直後なので、インデックス0のファイルを開いているハズです。
:echo argidx()

0ですね。
次のバッファへ切り替えます。
:next

バッファとファイルが紐ついているので、次のファイルに切り替わりました。
では、argidxを確認します。
:echo argidx()

インデックスは1が返ってきました。
argidxは起動時に指定したファイルのインデックスであることは分かりました。
やはりこれもバッファ削除するとどうなるか気になるので確認しておきます。
起動方法は同じ。
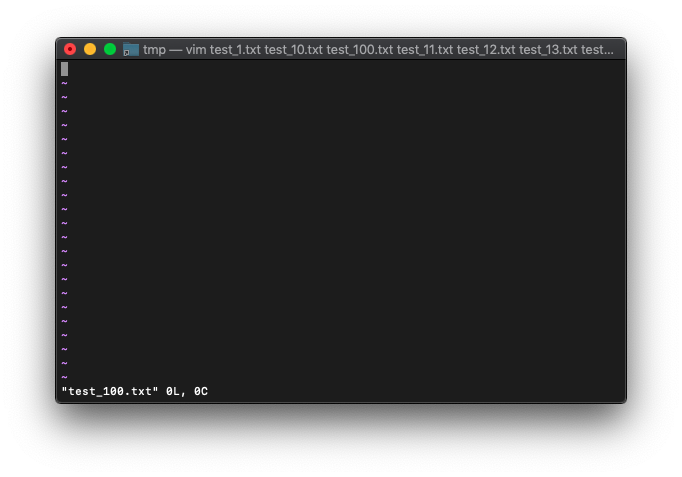
/tmp $ touch test_{1..100}.txt
/tmp $ vim test_*.txt
1から10のバッファをbdelete。
:bdelete 1 2 3 4 5 6 7 8 9 10
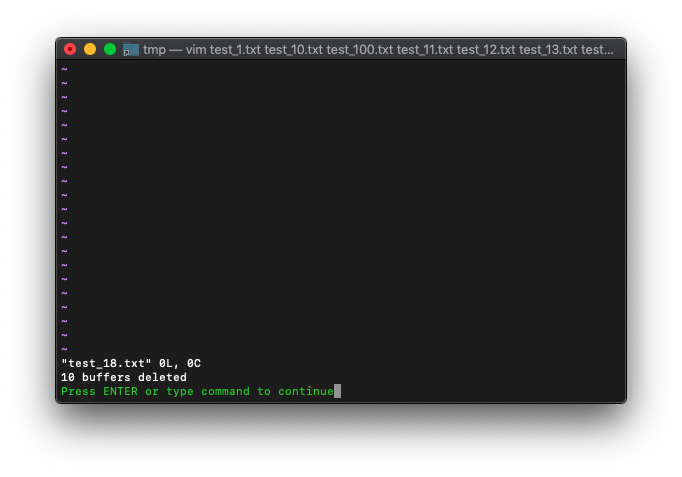
10バッファ削除したので、argidxを確認してみましょう。
:echo argidx()

え!?
0のままです。どういうことでしょう? lsを確認。
:ls

11番のバッファ(test_18.txt)がカレントバッファになってます。
想定ではargidxの結果は10になって欲しいところです。
バッファリストと引数リストは別物なんですね。
この状態で、次のバッファにしてみます。
:next

test_10.txtになったってことを、おそらくargidxは1が戻ります。
:echo argidx()
まあよくよく考えると、前々回に、バッファ削除後のargcを確認しましたが、引数の数は
変化しなかったので、当然の結果ですが、バッファ削除を使うのが怖くなりました。
VimScript :args
lsでバッファリストの確認ができますが、
:ls

バッファリストだけでなく、引数リストも確認してみましょう。
argsです。
:args

[]次のファイルが、カレントファイルということですね。
画面スプリットするとどうなるでしょうか。
:split
:next

このようにスプリットした状態で、argc確認。
:args

カレントバッファのみが[]が付くようです。
arglistを選択し直すには、args ファイルリスト を使います。
特定のファイルを指定してVimを起動してみます。
/tmp $ touch test_{1..5}.txt
/tmp $ vim test_2.txt
arglistを確認。
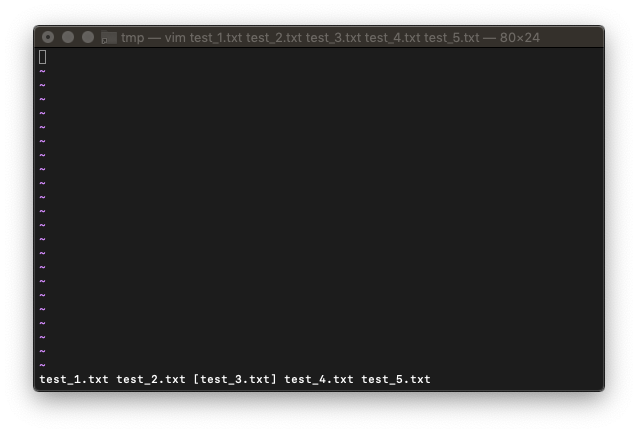
:args
当然一つだけですね。では、arglistを再度設定します。
:args test_*.txt
arglistを確認。
:args
argsを使いこなしてVim編集能力を向上したいです。
VimScript :argdelete
バッファ削除があるなら、引数削除もありますね。
argdeleteを使ってみます。
現在のargsの状態。
:args
ここからtest_1.txtを削除してみます。
:argdelete test_1.txt

argdeleteしても、画面ではtest_1.txtが、見えてますね。
argsを確認。
:args
引数リストからは削除されました。
バッファリストと引数リストがリンクしていないので、ものすごくややこしいです。
リンクさせない理由があるんでしょうけど。
/tmp $ touch test_{1..100}.txt
/tmp $ vim test_*.txt
最初にargs確認。
:args
全てのパターンを指定してargdeleteを実行します。
:argdelete *
特に何も変わってないように見えます。
argsを見てみます。
:args

全部消えてますね。
argcの数も0になっているでしょうか。
:echo argc()
 パターンを指定して
バッチリ0になってます。少しずつですが、引数リストについて分かってきました。
VimScript arglist
bufferとargについてもう少し学習します。
引数のリスト、arglistを表示にするには、:argsを使います。
:argsで表示されるリストは、vim起動時の引数、つまり編集しているファイルのリストが表示されます。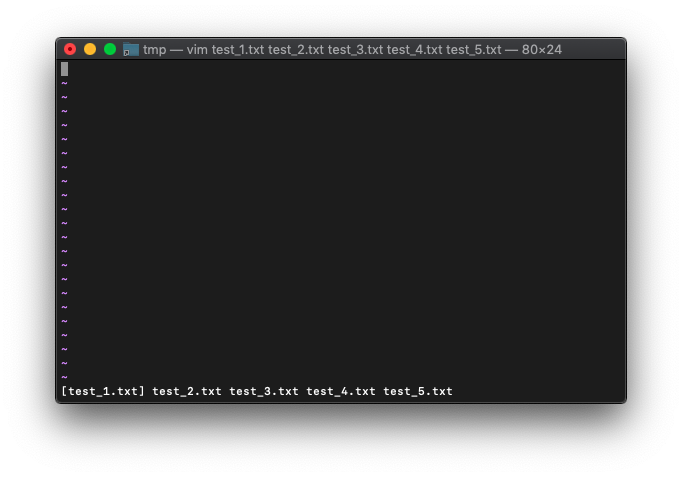
/tmp $ touch test_{1..5}.txt
/tmp $ vim test_*.txt
bufferのリストは:lsで表示します。
:ls
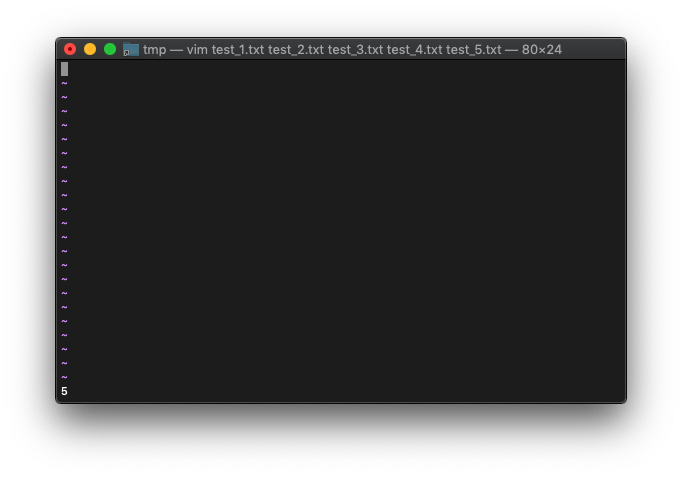
argリストとbufferリスト同じ数ですね。
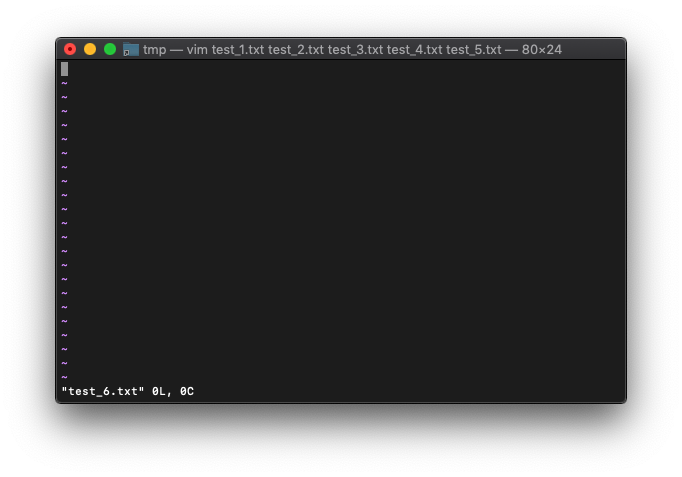
では、新規バッファを作成してみます。バッファの名前はtest_6.txtにします。
:new test_6.txt
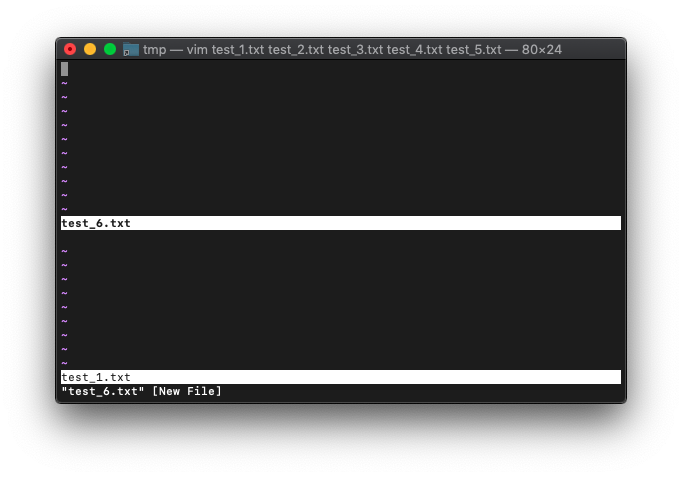
スプリットされた上に配置されました。
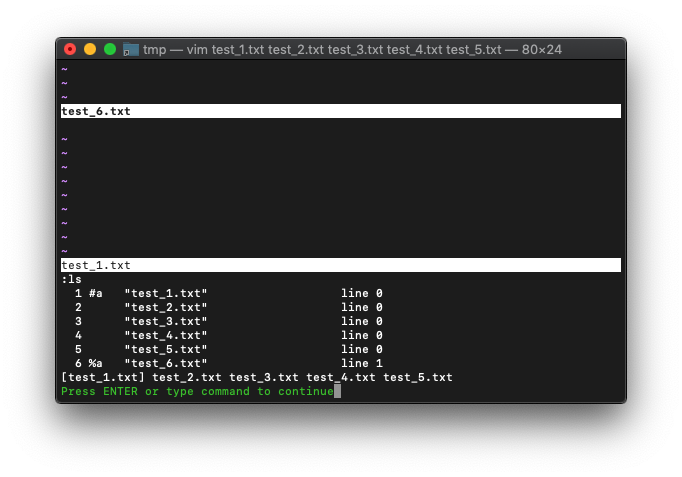
bufferリストを確認してみます。
:ls
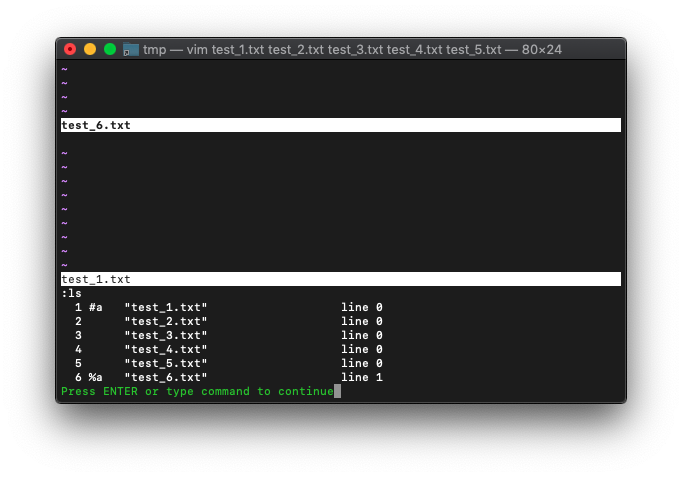
bufferリストは、5つから1つ増えて6つになってます。
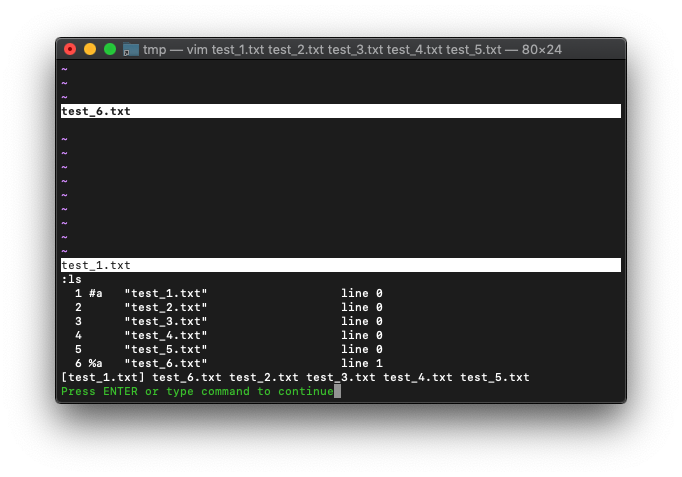
次は、arglist。
:args

arglistの方は、5つのままです。
では、新規に追加したtest_6.txtを保存するとどうなるでしょう。
:write
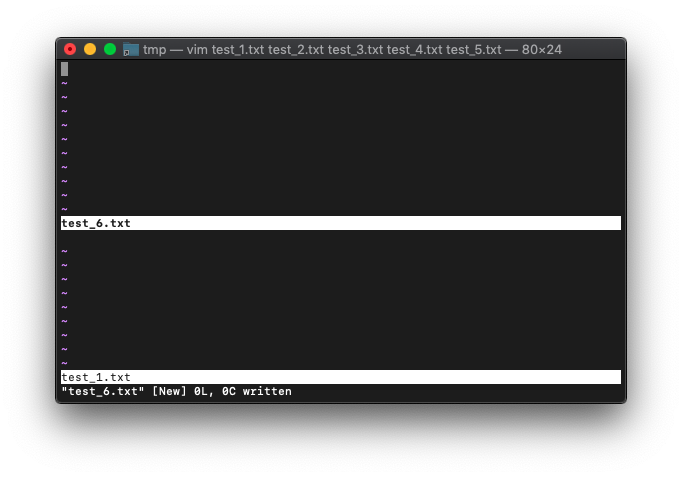
保存後のarglistを確認。
:args
変化なしですね。
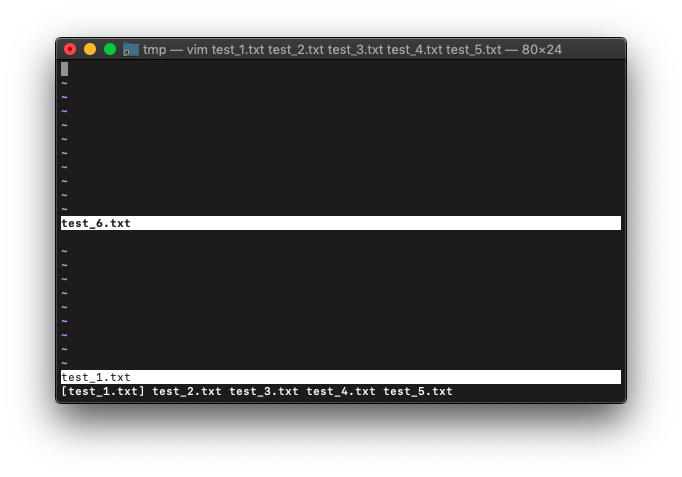
さきほど5つのファイルを引数に指定してVimを起動した後、新たにbufferを追加しました。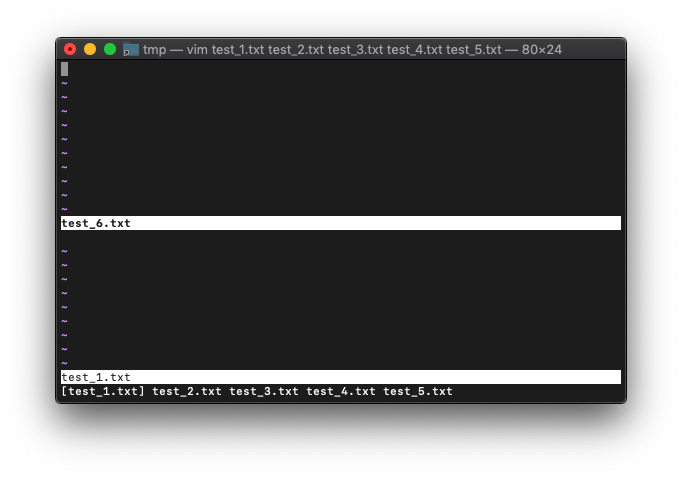
test_6.txtは、保存済みなので、このまま閉じます。
ZZ
画面が一つになったところで、現在のbufferを確認します。
:ls

%がtest_1.txtになってます。argsを見てみます。
:args
test_1.txtが括弧で括られているので、lsで選択されているbuffer名と同じですね。
:nextを実行してみます。
:next
:args

括弧が次のファイルに移動しました。
test_5.txtまで進めてみます。
:3next
:args

括弧がtest_5.txtに移動しました。
では現在のlsを確認。
:ls

%がtest_5.txtを指しているので、argsでの選択ファイルと一致しています。
では次。さらにnextするとどうなるか。
:next
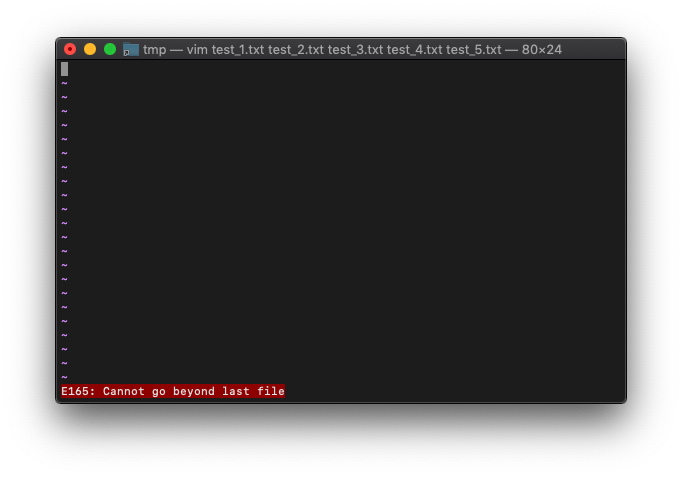
エラーになりました。最後のファイルを超えて進めないようです。
arglistのヘルプを見てみます。
:h arglist
3. The argument list                            *argument-list* *arglist*

If you give more than one file name when starting Vim, this list is remembered
as the argument list.  You can jump to each file in this list.

Do not confuse this with the buffer list, which you can see with the
|:buffers| command.  The argument list was already present in Vi, the buffer
list is new in Vim.  Every file name in the argument list will also be present
in the buffer list (unless it was deleted with |:bdel| or |:bwipe|).  But it's
common that names in the buffer list are not in the argument list.

This subject is introduced in section |07.2| of the user manual.

There is one global argument list, which is used for all windows by default.
It is possible to create a new argument list local to a window, see
|:arglocal|.

You can use the argument list with the following commands, and with the
expression functions |argc()| and |argv()|.  These all work on the argument
list of the current window.
以前も使いましたが、arglistはargc()や、argv()といった関数が使えるんですね。
では適当にファイルを引数に指定してVim起動。
/tmp $ touch test_{1..5}.txt
/tmp $ vim test_*.txt
arglist確認。
:args
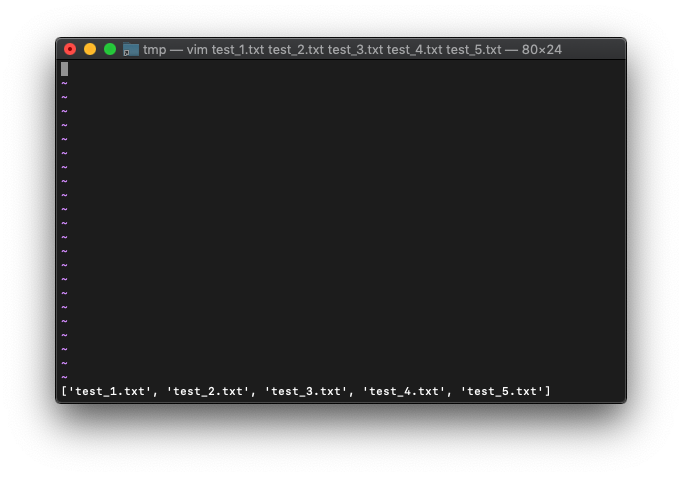
関数でarglistを取得してみます。
:echo argv()
この時のarglistの数は、
:echo argc()
VimScript :next
:nextコマンドのヘルプを見てみます。
:h next
:n[ext] [++opt] [+cmd] {arglist}                        *:next_f*
                        Same as |:args_f|.

:n[ext]! [++opt] [+cmd] {arglist}
                        Same as |:args_f!|.
arglistが対象であることがわかるので、バッファが存在していても、arglistに存在して
いないファイルへは移動できないようです。
では、argsになくて、lsに存在しているbufferへはどう移動すれば良いのでしょうか。
答えは簡単。bnextを使えば良いです。ただのnextだとarglist内の移動、bnextだとbufferlist内の移動ができます。
:bnext
bufferリストを確認。
:ls

では、この時のargsはどうなっているのか。
:args

なんと、test_5.txtが選択されたままです。ややこしいです。
argsとlsがずれたままVimを使うのは頭こんがらがります。
VimScript :argadd
arglistとbuffer-listが一致しないままVimを使用するのはまだ不安なので、両者を一致>させる方法を考えてみます。
今起動しているVimは、このように両リストは不一致しています。
:ls
:args
arglistに、test_6.txtが不足しているので、arglistにtest_6.txtを追加するだけですね
。 おそらくargをaddするコマンドがあると思います。ヘルプで見てみます。
:h argadd
:[count]arga[dd] {name} ..                      *:arga* *:argadd* *E479*
:[count]arga[dd]
                        Add the {name}s to the argument list.  When {name} is
                        omitted add the current buffer name to the argument
                        list.
                        If [count] is omitted, the {name}s are added just
                        after the current entry in the argument list.
                        Otherwise they are added after the [count]'th file.
                        If the argument list is "a b c", and "b" is the
                        current argument, then these commands result in:
                                command         new argument list
                                :argadd x       a b x c
                                :0argadd x      x a b c
                                :1argadd x      a x b c
                                :$argadd x      a b c x
                        And after the last one:
                                :+2argadd y     a b c x y
                        There is no check for duplicates, it is possible to
                        add a file to the argument list twice.
                        The currently edited file is not changed.
                        Note: you can also use this method:
                                :args ## x
                        This will add the "x" item and sort the new list.
使ってみます。
:argadd test_6.txt
順番は違いますが、リストの数は一致しました。
VimScript :first
arglistの先頭のファイルを選択するときに使います。
いつものように、適当に複数ファイルを起動。
/tmp $ touch test_{1..5}.txt
/tmp $ vim test_*.txt
arglist中の他のファイルを選択します。先頭以外ならどれでも良いです。
:3next
現在のarglistを確認。
:args

では:firstを実行してみます。
:first

先頭のファイルに切り替わったようです。arglistを確認してみます。
:args

:rewindってコマンドも:firstと同じです。
先頭以外のファイルに切り替えてから、
:2next
:args

:rewindを実行。
:rewind
:args

先頭ファイルになりました。
VimScript :last
複数ファイルを起動。
/tmp $ touch test_{1..5}.txt
/tmp $ vim test_*.txt
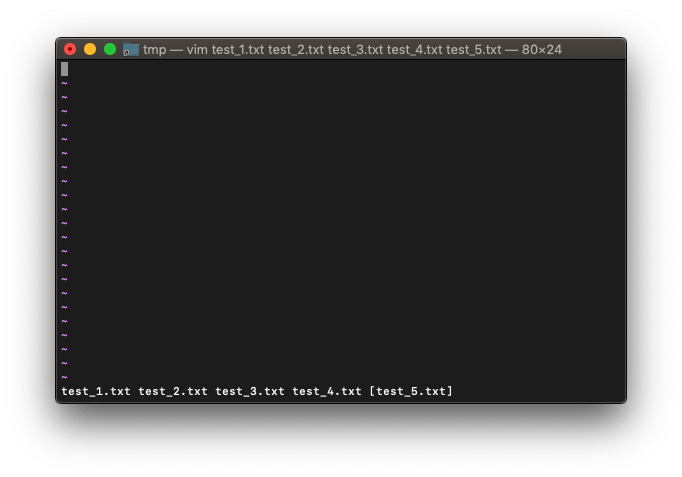
適当に最後以外のファイルに切り替えて、
(最初のファイルが選択されているのでいるので良いです)
:2next
:args
:last起動。
:last

arglistも最後のファイルが選択されています。
:args
VimScript :wnext
:nextコマンドで、arglistの次のファイルにバッファを切り替えすることができましたが、:wnextを使うと、保存してから切り替えることができます。
/tmp $ touch test_{1..5}.txt
/tmp $ vim test_*.txt
いつものように複数起動。
:args
現在のバッファには、最初のファイルが選択されています。
テキストに適当に書き込みます。
:wnextを実行。
:wnext
arglistを確認。
:args

保存してから、前のファイルに切り替えるには、:wNext(:wN)です。
:wNext

:wNextは、:wprevious(:wp)と同じです。Shift押さないで済むので、私は、こちらの方が
使いやすいです。
:last
:wprevious
VimScript :argdo
:bufdoを実行した直後に、:argdoを実行してみます。
前回:2,3bufo s/HELLO/HELL/ を実行したところからの続きです。
ではargdo実行。
:3,4argdo! s/LL/OO/
Enterを押してメッセージを消すと。
さらに:ball
:ball
bufdoで置換した後、バッファの保存は実行していませんが、argdoでバッファが初期状態に戻ることなく置換されました。
タブ関連
Vim起動時にタブ
vimの起動時オプション-pで、タブを開いた状態で起動できます。
-pに指定する数字は、最大タブ数です。
/tmp $ vim -p3 test_*.txt
タブが3つだけ表示されました。
このとき、:lsを見ればわかるように、タブ数とバッファ数は一致しません。
:ls

VimScript :tabnew
:tabnew使ってみます。
Vimを起動します。
/tmp $ vim
tabnew実行。
:tabnew
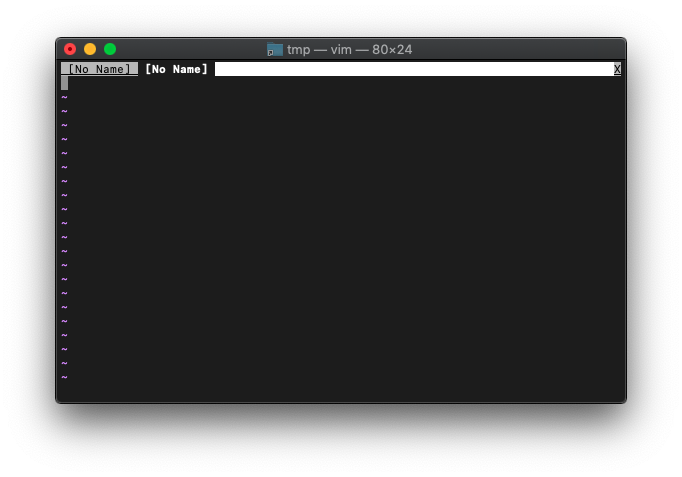
もう一度tabnew実行。
:tabnew
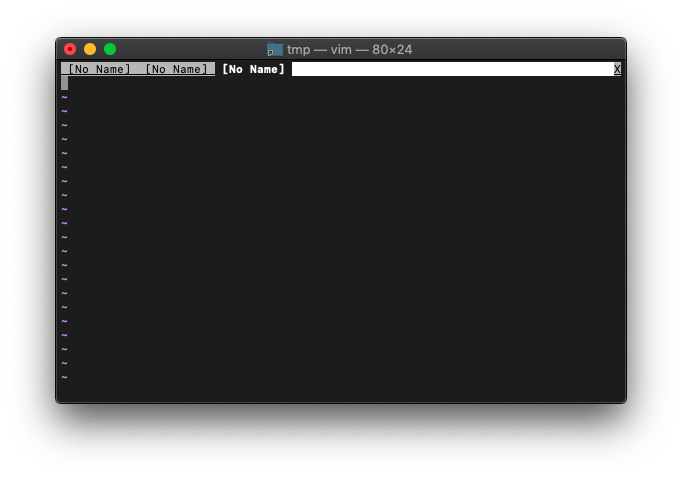
画面上部にNo Nameが3つ表示されて、一番右のNo Nameが黒背景に白文字になっていますが、これが現在選択中のタブ>を表しているようです。
次のタブへ切り替えるには、:tabn(ext)を使います。
:tabn
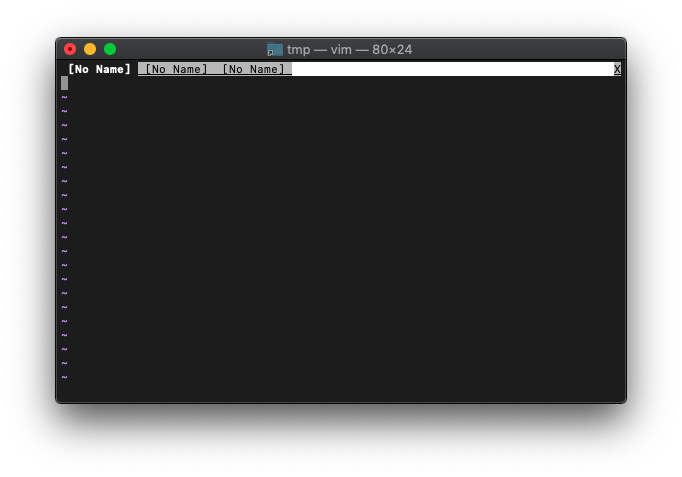
前のタブへ戻すには、:tabNです。
:tabN

/tmp $ for i in {1..5};do echo HELLO$i>test_$i.txt;done
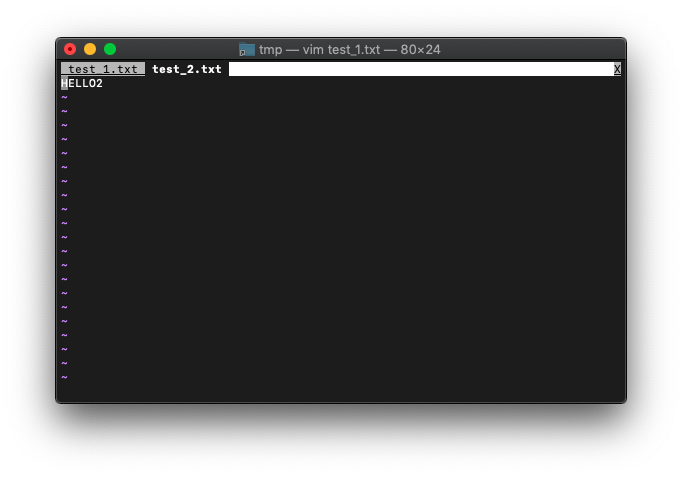
/tmp $ vim test_1.txt
ファイルを指定してtabnewします。
:tabnew test_2.txt
さらにもう一回。
:tabnew test_3.txt
3つのファイルがそれぞれタブに割り当たりました。
buffer-listを確認してみます。
:ls
タブを追加したタイミングでバッファを追加されているようです。
/tmp $ for i in {1..5};do echo HELLO$i>test_$i.txt;done
/tmp $ vim test_*.txt
buffer-list確認。
:ls
全部バッファをタブで開きます。
:bufdo tabnew

Enterを押します。
いちばん最後に追加したNo Nameのタブを削除します。
:quit
出来上がり。
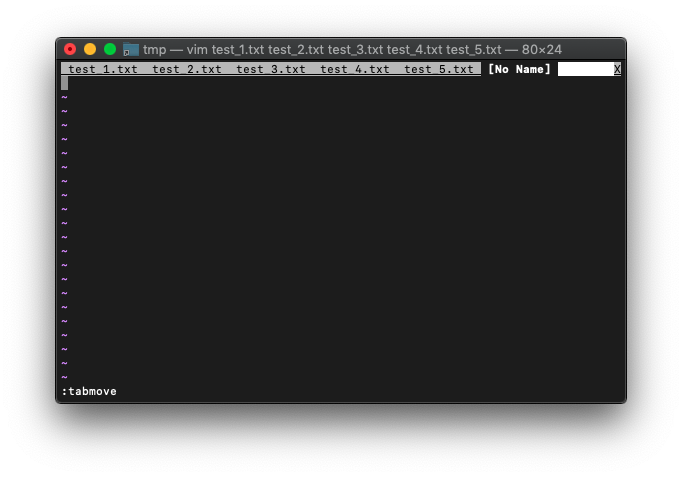
VimScript :tabmove
:tabmoveを使ってみます。
ヘルプを確認。
:h tabmove
:tabm[ove] [N]                                          *:tabm* *:tabmove*
:[N]tabm[ove]
                Move the current tab page to after tab page N.  Use zero to
                make the current tab page the first one.  N is counted before
                the move, thus if the second tab is the current one,
                `:tabmove 1` and `:tabmove 2`  have no effect.
                Without N the tab page is made the last one.
                    :.tabmove   " do nothing
                    :-tabmove   " move the tab page to the left
                    :+tabmove   " move the tab page to the right
                    :0tabmove   " move the tab page to the beginning of the tab
                                " list
                    :tabmove 0  " as above
                    :tabmove    " move the tab page to the last
                    :$tabmove   " as above
                    :tabmove $  " as above
移動したいタブ番号を指定すれば良いようです。
ではいつもの起動。
/tmp $ for i in {1..5};do echo HELLO$i>test_$i.txt;done
/tmp $ vim test_*.txt
そして、それぞれのバッファでタブを追加。
:bufdo tabnew
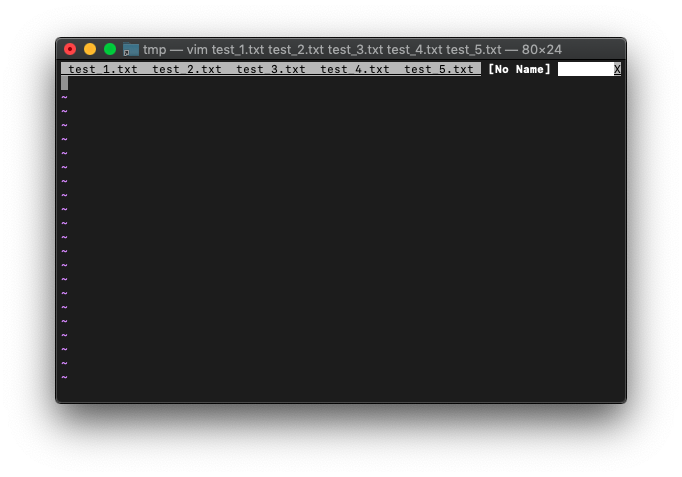
No Nameのタブを移動してみます。
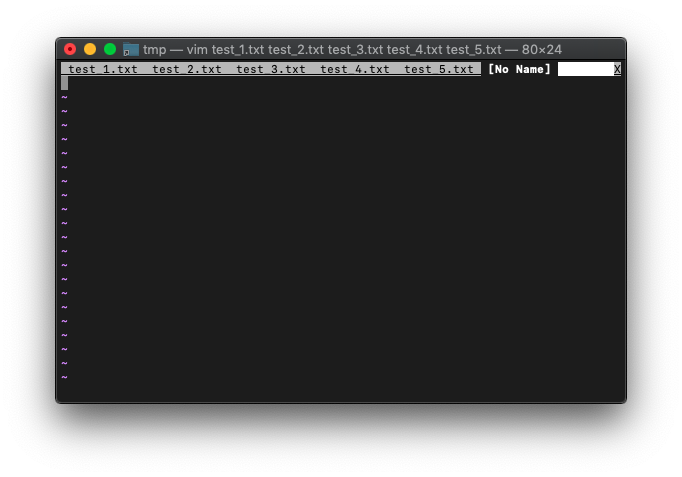
:tabmove 1
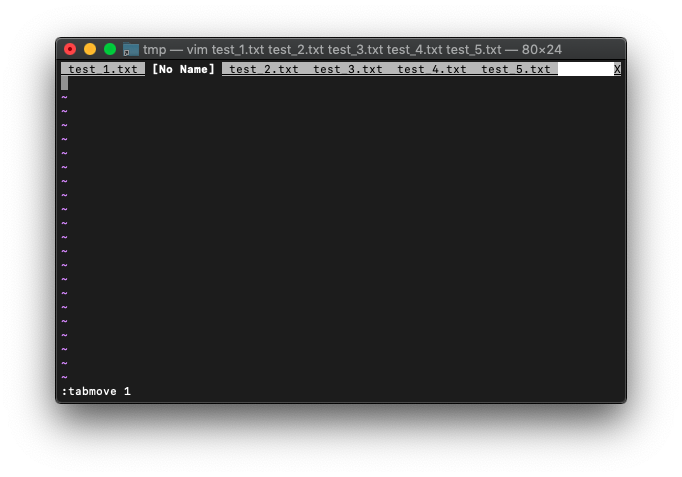
2番目に移動しました。
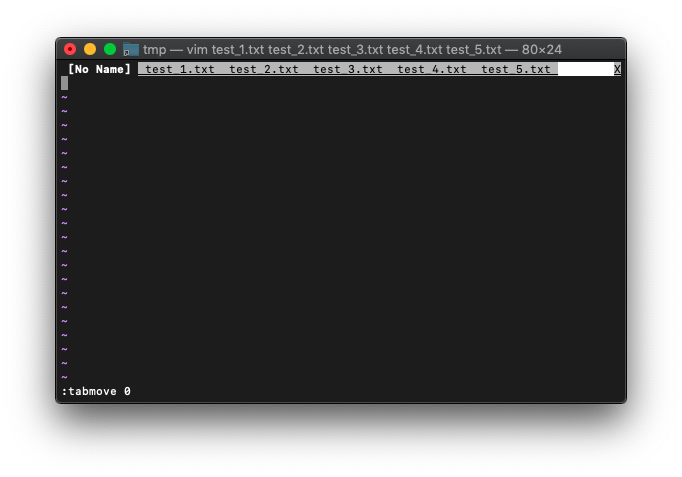
ってことは、先頭に移動したい場合は、0を指定するんですね。
:tabmove 0
最後に移動するには、単にtabmoveだけですね。
:tabmove
VimScript :tabclose
タブを閉じる:tabcloseを使ってみます。
ヘルプを確認。
                                                        *:tabc* *:tabclose*
:tabc[lose][!]  Close current tab page.
                This command fails when:
                - There is only one tab page on the screen.             *E784*
                - When 'hidden' is not set, [!] is not used, a buffer has
                  changes, and there is no other window on this buffer.
                Changes to the buffer are not written and won't get lost, so
                this is a "safe" command.
                    :tabclose       " close the current tab page
カレントタブを消すだけですね。
ファイルを複数起動して:tabcloseを使ってみます。
/tmp $ for i in {1..5};do echo HELLO$i>test_$i.txt;done
/tmp $ vim test_*.txt
全バッファをタブで開きます。
:bufdo tabnew
カレントタブはNo Nameです。このタブで、tabclose使ってみます。
:tabclose
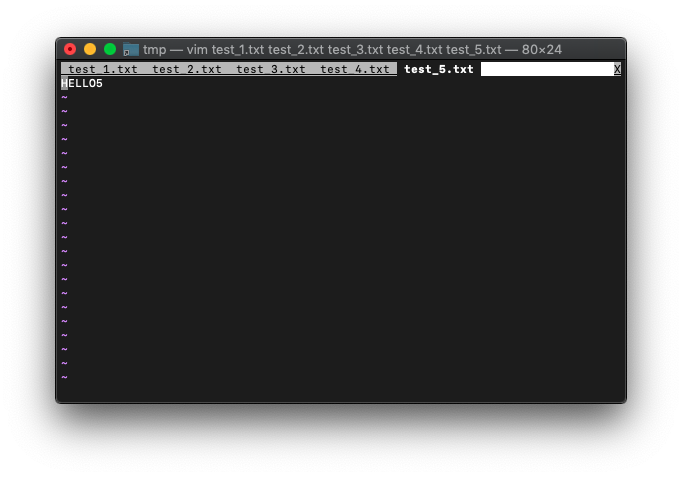
No Nameのタブは消えて、test_5.txtのタブが、カレントタブになりました。
:ls
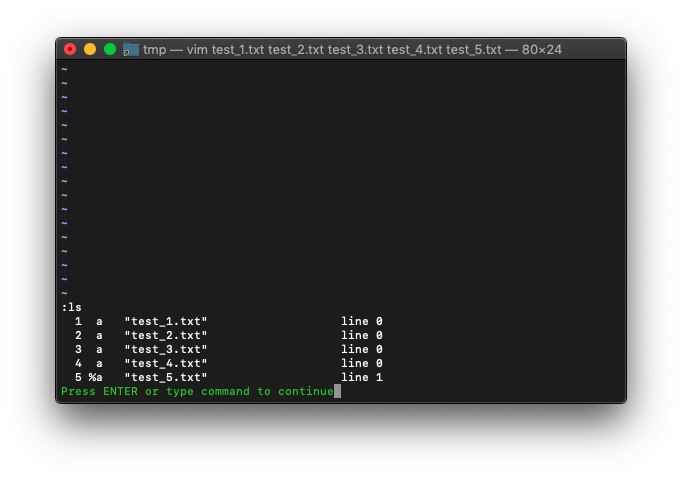
次は、:tabcloseではなく、:quitで閉じてみます。
:quit
test_5.txtのタブは消えて、test_4.txtのタブが、カレントタブになりました。
buffer-listを確認。
:ls
:quitで同じことができるなら、:quitでいい気がします。
VimScript :tabdo
各タブでコマンド実行します。

:tabdo s/HELLO/HELL /
VimScript :tab
:tab help
VimScript :tabonly
:tabonly使ってみます。
ヘルプを確認。
                                                        *:tabo* *:tabonly*
:tabo[nly][!]   Close all other tab pages.
                When the 'hidden' option is set, all buffers in closed windows
                become hidden.
                When 'hidden' is not set, and the 'autowrite' option is set,
                modified buffers are written.  Otherwise, windows that have
                buffers that are modified are not removed, unless the [!] is
                given, then they become hidden.  But modified buffers are
                never abandoned, so changes cannot get lost.
                    :tabonly        " close all tab pages except the current
                                    " one
複数ファイルを開きます。
/tmp $ for i in {1..5};do echo HELLO$i>test_$i.txt;done
/tmp $ vim test_*.txt
:bufdo tabnew
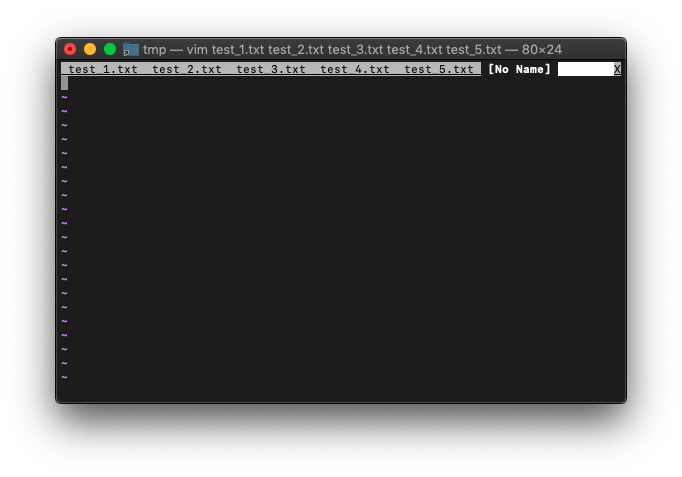
カレントタブは、No Nameです。ここで:tabonlyを実行してみます。
:tabonly
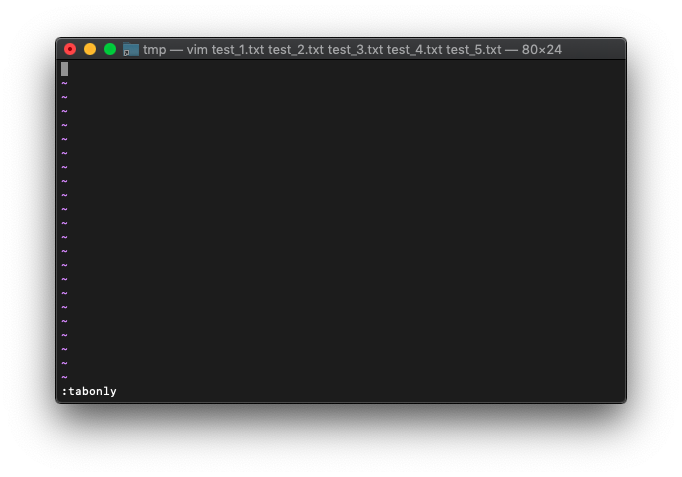
タブが全て消えました。
buffer-listを確認。
:ls

カレントバッファは、No Nameのままですね。
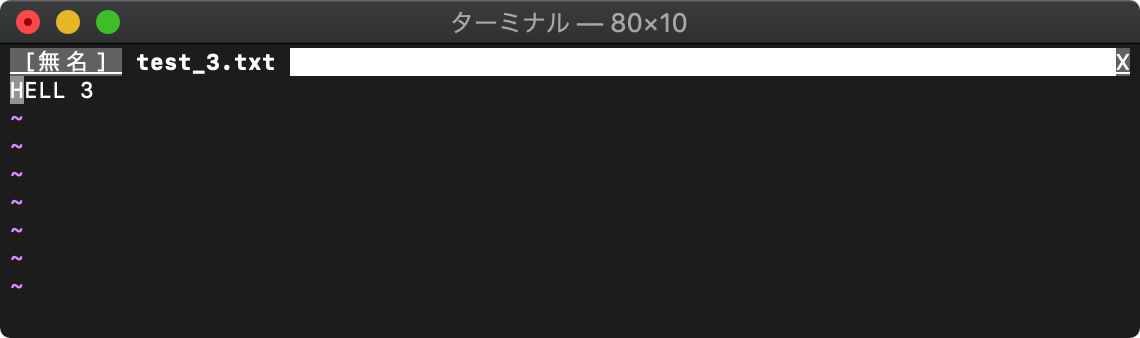
VimScript :tabfind
:tabfind ファイル名
指定したファイルをタブで開きます。
/tmp $ for i in {1..5};do echo HELLO$i>test_$i.txt;done
/tmp $ vim
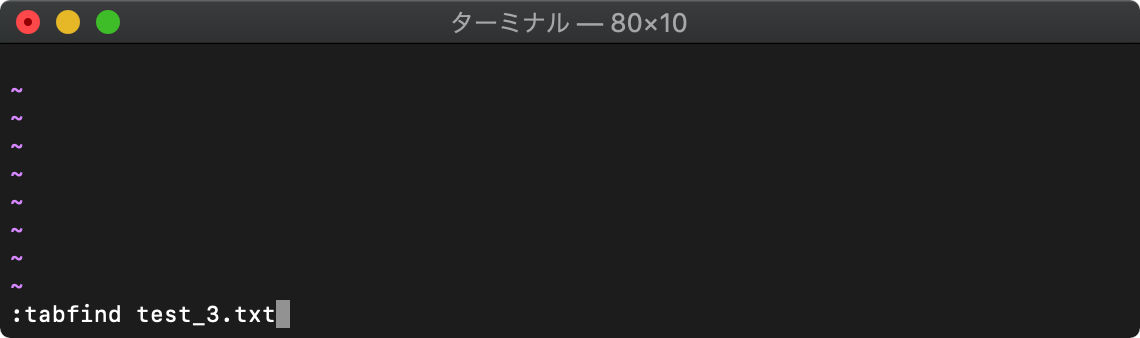
:tabfind test_3.txt
検索
:vimgrep (:vim) グローバル検索
:vimgrep /正規表現/ ファイル
:vimgrep /HELLO/ *.txt
最初に見つかった文字列が存在するファイルが開きます。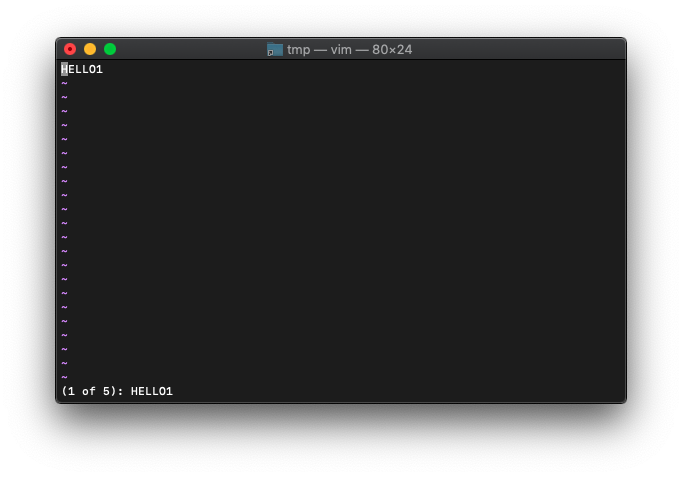
:copen (:cope) 結果一覧表示
検索結果一覧を表示します。
:copen

下の画面の検索結果からファイルを選択してEnterを押すと、上画面に選択したファイルが開きます。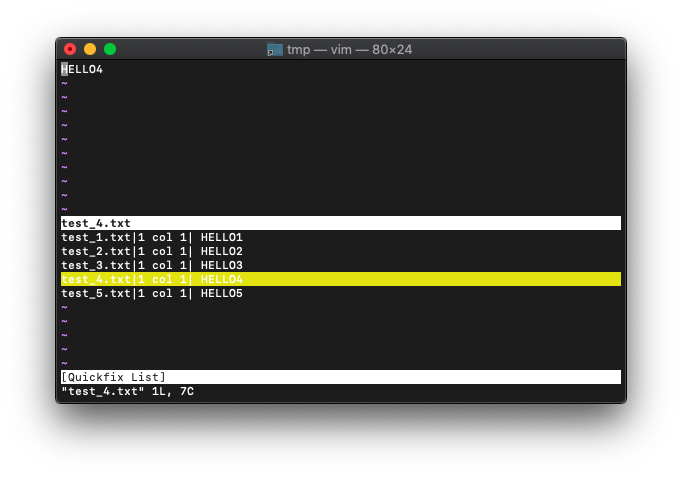
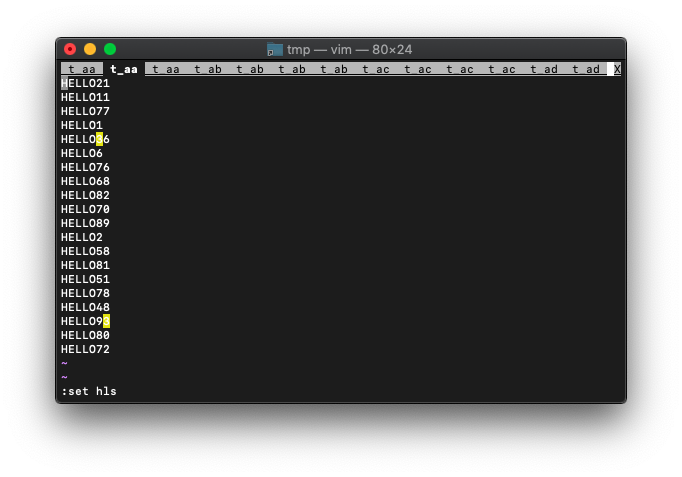
:set hlsearch
検索文字列のハイライトON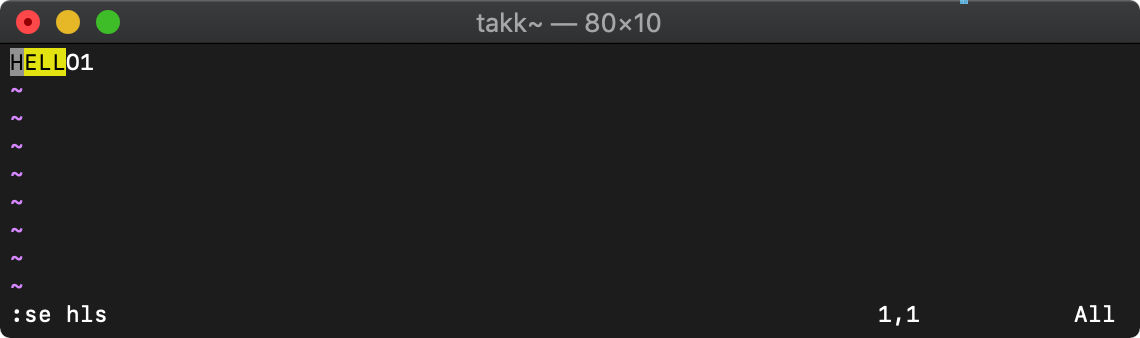
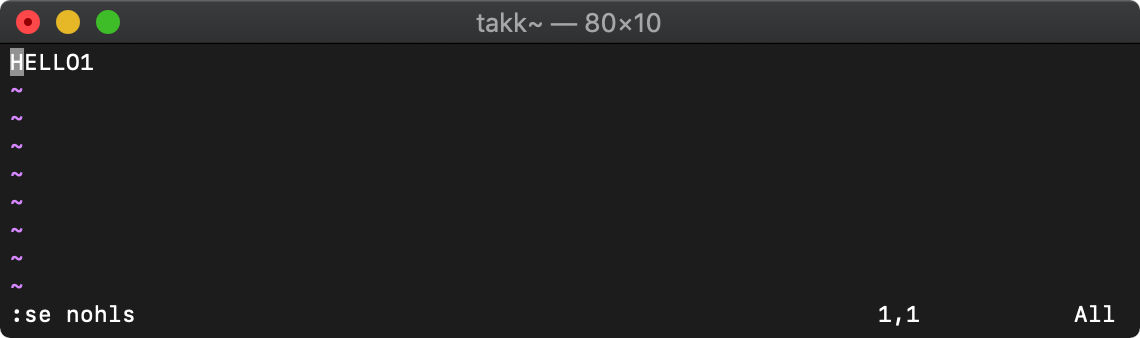
:set nohlsearch
検索文字列のハイライトOFF
:nohでもOKです。
:find (:fin) ファイルを探して開く
複数ファイルを開いて:findを使ってみます。
/tmp $ for i in {1..5};do echo HELLO$i>test_$i.txt;done
/tmp $ vim test_*.txt

test_3.txtを探して開いてみます。
:find test_3.txt
test_3.txtが開いたようです。
buffer-listはどうなってるでしょう。
:ls
カレントバッファが、test_3.txtになってますね。
次は、バッファに存在しないファイルを指定するとどうなるか確認してみます。
/tmp $ vim
test_3.txtを探してみます。
:find test_3.txt

ファイルを見つけて開くことができました。
:lvimgrep (:lv) グローバル検索
vimgrepではquickfixリストを使いましたが、lvimgrepはロケーションリストを使います。
ロケーションリストはウィンドウ別に保持されます。
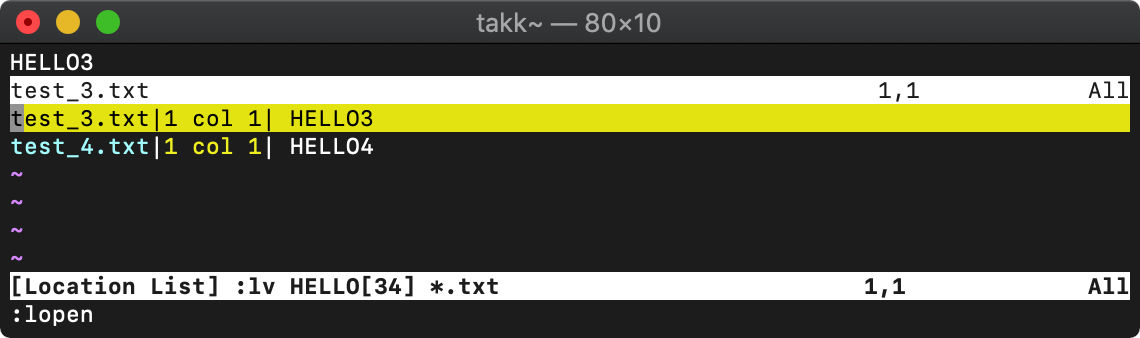
:vimgrepadd (:vimgrepa) 検索結果の追加

:vimgrepadd '[34]' test*
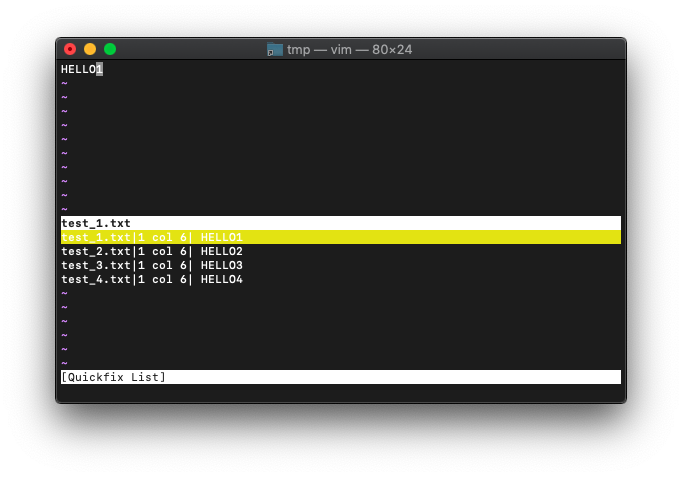
検索結果の一覧に追加されました。過去に行った同一検索の場合も一覧に追加されます。
その他の関数
type 型を返す
type(値)
戻り値は以下のとおり。
0:数値
1:文字列
2:Funcref
3:リスト
4:辞書
5:浮動小数点数
6:真偽値
7"特殊値
8"ジョブ
9:チャネル
10:Blob
数値
:let a=123
:echo type(a)

文字列
:let a="123"
:echo type(a)
リスト
:let a=[1,2,3]
:echo type(a)
辞書
:let a={1:'ONE', 2:'TWO', 3:'THREE'}
:echo type(a)
Blob
:let a=0z010203
:echo type(a)

sort ソート
sort(リスト)
:let a = [5,3,7,2,9,0]
:echo a
sort関数でソートしてみます。
:echo sort(a)
バッファ上のテキストの数列もソートしてみます。
いつものようにサンプル作成。
:0r!wsl seq 100 | wsl shuf | wsl pr -t5J
1から100までをランダムに並べてみました。
前回まで学習したmapとextendを組み合わせて、変数に取り込んだ後、sortします。
:let a = getline("w0","w$")
:call map(a,'split(v:val,"\t")')
:let b=[]
:call map(a,'extend(g:b,v:val)')
:echo b
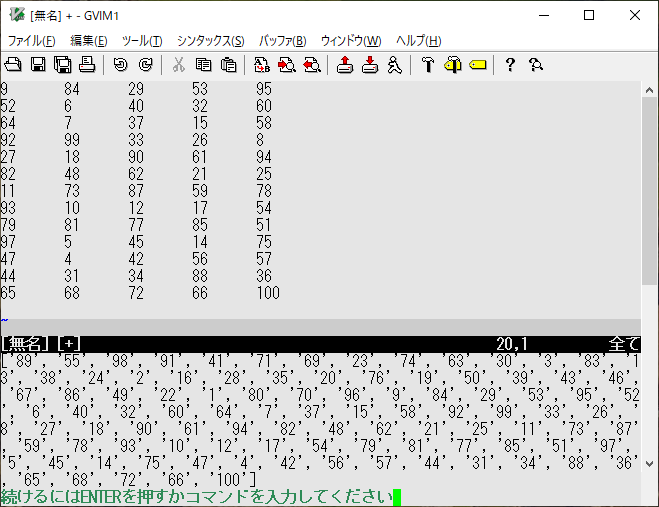
変数に取り込めたので、sortしてみます。
:echo sort(b)
uniq 重複要素削除
uniq(リスト)
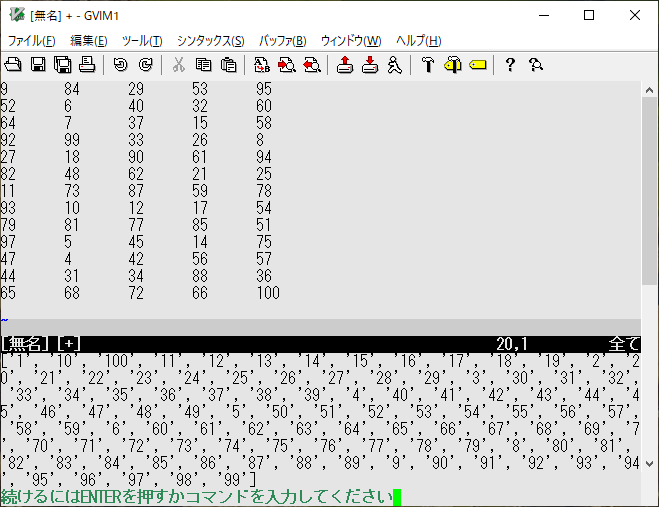
:let a = [5,3,7,2,9,0,3,5,2]
:echo sort(a)
2,3,5が重複していますね。uniq関数を実行してみます。
:echo uniq(sort(a))
Vimバッファ上のテキストでやってみます。
0~9のランダムの数値を100個ならべて、
:0r!wsl for i in `seq 100`;do expr $RANDOM \% 10;done | wsl pr -t5J
これをVimスクリプトで、sortしてuniqします。
まずは、取り込み。
:let a=getline("w0","w$")
:let out=[]
:call map(a,'extend(g:out,split(v:val,"\t"))')
:echo out

uniqは親切にも破壊的置換をしてくれるので、コピーしたリストの方をuniqします。
:let b = copy(out)
:call uniq(sort(b))
:echo b
VimScript filter
filterを使います。
前回は:lsの結果をmapを2回繰り返して、buffer-listのファイル名を取得しましたが、
もう少し簡単に抽出してみます。
/tmp $ touch test_{1..5}.txt
/tmp $ vim test_*.txt
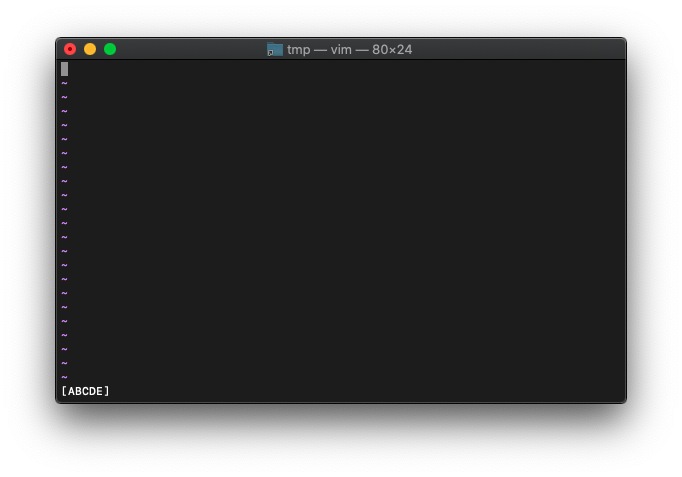
:let arr=split(execute('ls'),'"')
:echo arr
あとは、配列の奇数番目を抽出すれば良いですね。
:let i=0
:while i < len(arr)
:  if i % 2 == 1
:    echo arr[i]
:    endif
:  let i=i+1
:  endwhile
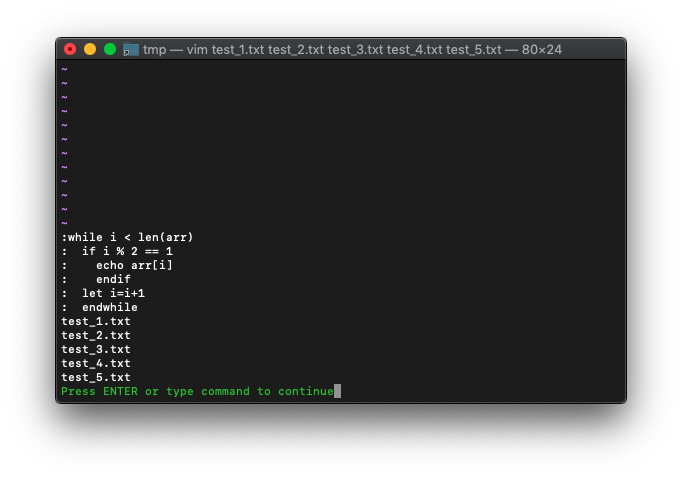
これをfilterを使って、もっとシンプルにしてみます。
filterのヘルプを確認。
:h filter(
filter({expr1}, {expr2})                                *filter()*
                {expr1} must be a |List| or a |Dictionary|.
                For each item in {expr1} evaluate {expr2} and when the result
                is zero remove the item from the |List| or |Dictionary|.
                {expr2} must be a |string| or |Funcref|.

〜省略〜

                Example that keeps the odd items of a list:
                        func Odd(idx, val)
                          return a:idx % 2 == 1
                        endfunc
                        call filter(mylist, function('Odd'))
                It is shorter when using a |lambda|:
                        call filter(myList, {idx, val -> idx * val <= 42})
                If you do not use "val" you can leave it out:
                        call filter(myList, {idx -> idx % 2 == 1})
ちょうど奇数抽出のことがExampleで述べられています。
これを使ってみます。
:let a=filter(arr,{idx -> idx % 2 == 1})
:echo a
filter続きです。
テキストのフィルタにも使えますね。
/tmp $ vim
:0r!seq 20
:let arr=getline("w0","w$")
:echo arr
3つおきに抽出。
:let a=filter(arr,{idx -> idx % 3 == 0})
:echo a
テキストを置き換えます。
:call setline("w0w$",a)
下の方が削除されてません。
どうやら、全部削除してからsetlineする必要がありそうです。
バッファを全削除します。
:0,$d
再度setline。3行おきに抽出したテキストに置き換えます。
:call setline("w0",a)
VimScript glob
glob関数で、ワイルドカードが指定できます。
:echo glob("test_*.txt")
VimScript uniq sort
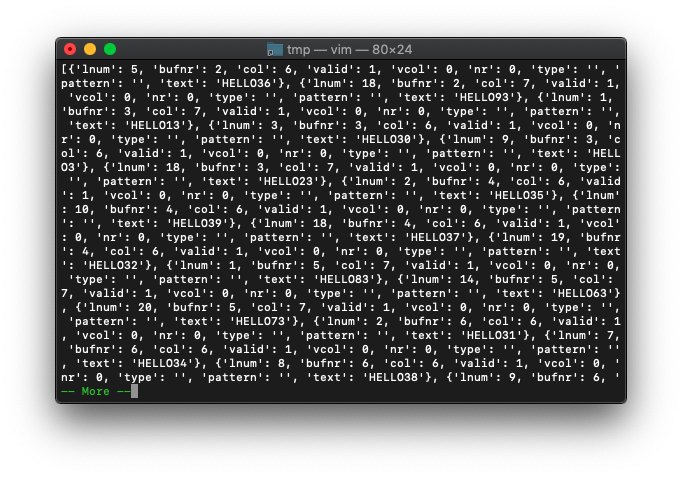
検索結果に対して、タブが多すぎですので、重複しているタブを削除するため、一旦、現在のタブを全て削除。
:tabnew
:tabonly
検索結果を今一度確認。
:echo a
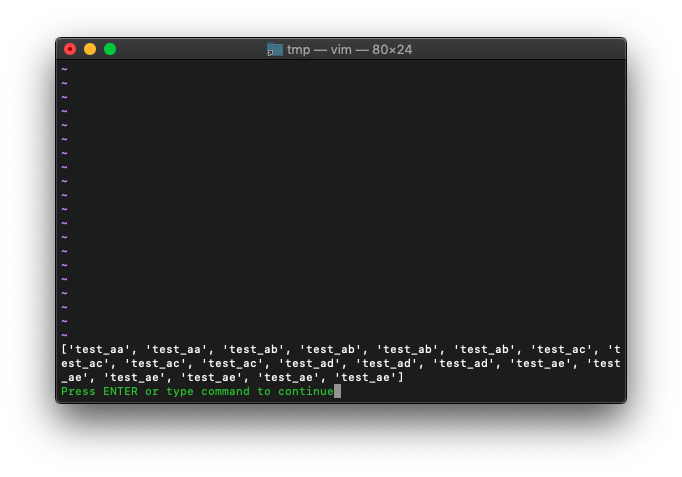
別の空リストを用意します。
:let b=[]
ファイル名のみをbリストに登録。
:for bname in a
:  call add(b,bufname(bname.bufnr))
:  endfor
:echo b
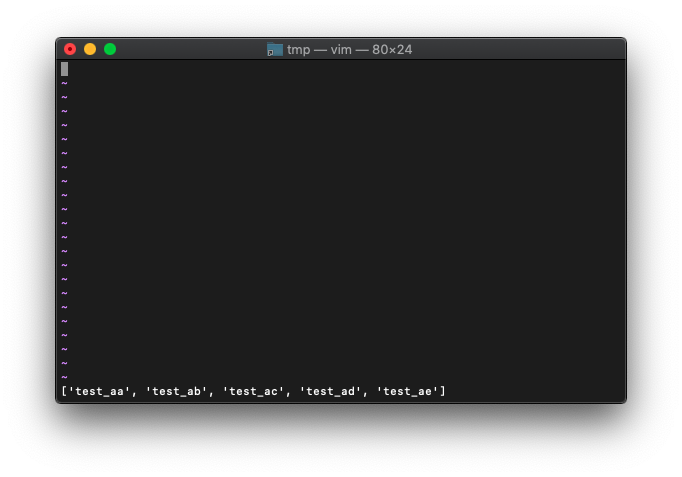
次に、重複しているファイルを削除するため、sortしてuniqします。
:let c=uniq(sort(b))
:echo c
ファイル名一覧ができたので、各ファイルにタブを割り当ててみます。
:for bname in c
:  execute "tabnew" bname
:  endfor
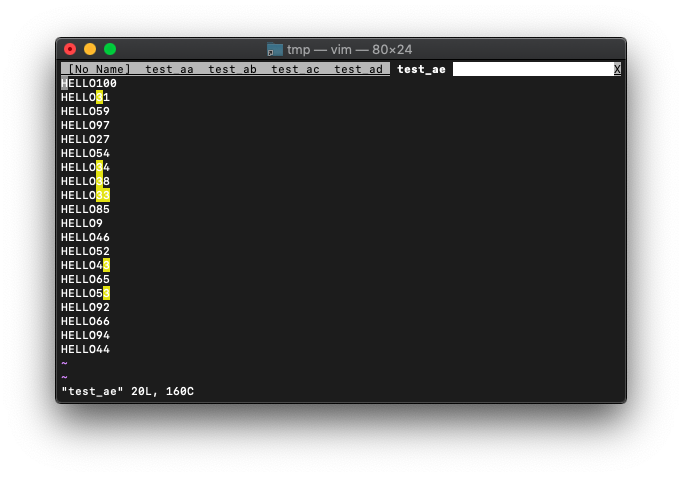
だいぶスッキリしました。
VimScript getftype
getftype使います。
ヘルプ。
getftype({fname})                                       *getftype()*
                The result is a String, which is a description of the kind of
                file of the given file {fname}.
                If {fname} does not exist an empty string is returned.
                Here is a table over different kinds of files and their
                results:
                        Normal file             "file"
                        Directory               "dir"
                        Symbolic link           "link"
                        Block device            "bdev"
                        Character device        "cdev"
                        Socket                  "socket"
                        FIFO                    "fifo"
                        All other               "other"
                Example:
                        getftype("/home")
                Note that a type such as "link" will only be returned on
                systems that support it.  On some systems only "dir" and
                "file" are returned.  On MS-Windows a symbolic link to a
                directory returns "dir" instead of "link".
ファイルの種類が返るだけですね。
使ってみます。
/tmp $ touch test1.txt
/tmp $ vim -c 'echo getftype("test1.txt")'
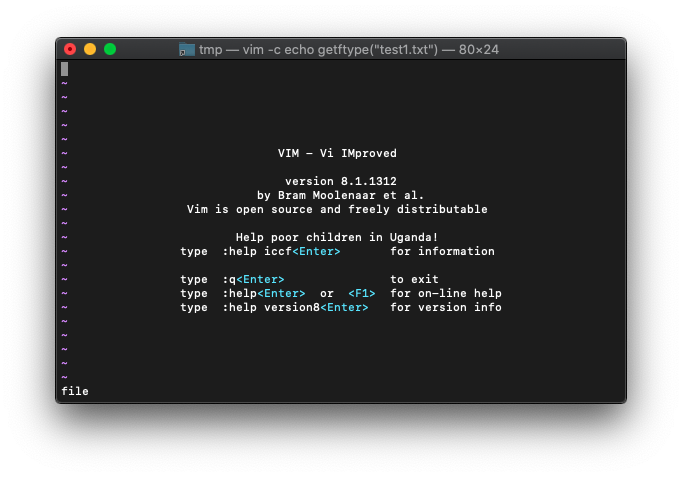
fileと表示されました。
ディレクトリも確認してみます。
:echo getftype("/tmp")
linkと表示されています。ディレクトリではないんでしょうか。
/tmp $ ls -l /tmp
lrwxr-xr-x@ 1 root  admin  11 10 13 12:48 /tmp -> private/tmp
/tmp $
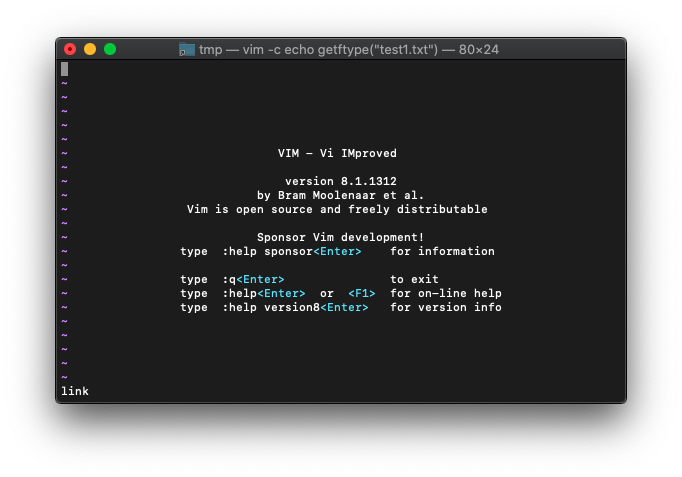
リンクのようです。
では、新規にディレクトリを作成して確認してみます。
/tmp $ mkdir test1
/tmp $ vim -c 'echo getftype("test1")'

dirと返ってきました。
VimScript getfsize
getfsize使います。
いつものヘルプ。
getfsize({fname})                                       *getfsize()*
                The result is a Number, which is the size in bytes of the
                given file {fname}.
                If {fname} is a directory, 0 is returned.
                If the file {fname} can't be found, -1 is returned.
                If the size of {fname} is too big to fit in a Number then -2
                is returned.
ふむふむ。ファイルサイズですね。
使ってみます。
/tmp $ echo -ne "12345" > test1.txt
/tmp $ wc -c test1.txt
       5 test1.txt
/tmp $

5が表示されました。
以前使ったwordcountではどうでしょう。
/tmp $ vim -c 'echo wordcount().bytes' test1.txt
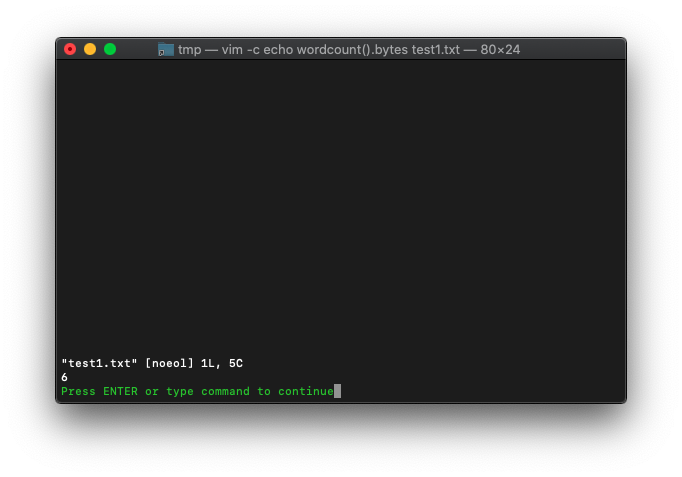
6が返りました。勝手に改行が入るようです。
xxdで確認してみます。
:%!xxd
改行0aが入ってますね。
vimを終了して、odコマンドで確認してみると、
/tmp $ od -tx1 test1.txt
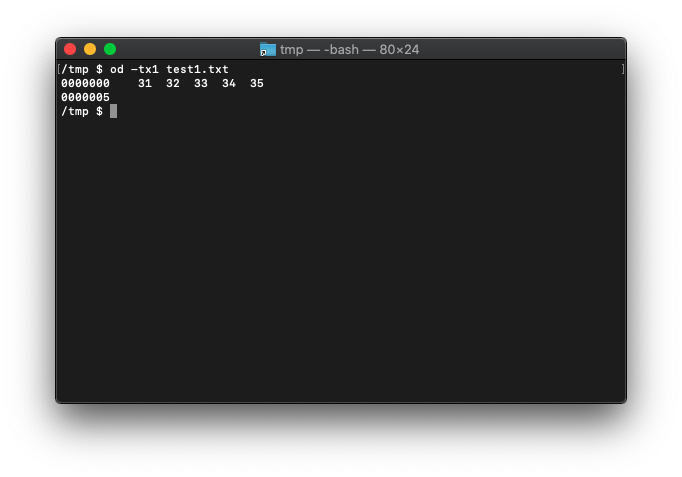
5バイトです。
VimScript getfperm
getfperm使います。
getfperm({fname})                                       *getfperm()*
                The result is a String, which is the read, write, and execute
                permissions of the given file {fname}.
                If {fname} does not exist or its directory cannot be read, an
                empty string is returned.
                The result is of the form "rwxrwxrwx", where each group of
                "rwx" flags represent, in turn, the permissions of the owner
                of the file, the group the file belongs to, and other users.
                If a user does not have a given permission the flag for this
                is replaced with the string "-".  Examples:
                        :echo getfperm("/etc/passwd")
                        :echo getfperm(expand("~/.vimrc"))
                This will hopefully (from a security point of view) display
                the string "rw-r--r--" or even "rw-------".

                For setting permissions use |setfperm()|.
/tmp $ ls -l test1.txt
-rw-r--r--  1 takk            wheel  5 10 19 20:23 test1.txt
/tmp $
一致しますね。
/tmp $ chmod 444 test1.txt
/tmp $ ls -l test1.txt
-r--r--r--  1 takk            wheel  5 10 19 20:23 test1.txt
/tmp $
リードオンリーに変更しました。
一致しました。
戻しておきます。
/tmp $ chmod 644 test1.txt
/tmp $ ls -l test1.txt
-rw-r--r--  1 takk            wheel  5 10 19 20:23 test1.txt
/tmp $
っていうか戻せるんですね。
VimScript empty
empty使います。
ヘルプの説明を読みます。
empty({expr})                                           *empty()*
                Return the Number 1 if {expr} is empty, zero otherwise.
                - A |List| or |Dictionary| is empty when it does not have any
                  items.
                - A |String| is empty when its length is zero.
                - A |Number| and |Float| are empty when their value is zero.
                - |v:false|, |v:none| and |v:null| are empty, |v:true| is not.
                - A |Job| is empty when it failed to start.
                - A |Channel| is empty when it is closed.
                - A |Blob| is empty when its length is zero.

                For a long |List| this is much faster than comparing the
                length with zero.
String、則ち文字列から確認します。
vimを起動して、
/tmp $ vim
:echo empty("HELLO")
0が返りました。
1が真なので、HELLOは空ではないから合ってますね。
空を指定してみます。
:echo empty("")
1になりました。空ってことですね。
変数を使って確認します。
:let a="HELLO"
:echo empty(a)

0が返りました。
空。
:let a=""
:echo empty(a)

1が返りました。
数字をemptyの引数に指定した時の結果を確認します。
:let a=100
:echo empty(a)

0なので空ではない意味です。
数字を0にすると、
:let a=0
:echo empty(a)

1が返りました。空と判定されたってことですね。
次は小数点付き。
:let a=100.5
:echo empty(a)
0なので空ではないですね。
次は1より小さい数。
:let a=0.5
:echo empty(a)

0ですね。空と判定されてません。
数字の0のみがemptyってことですね。
listのempty判定です。
起動から。
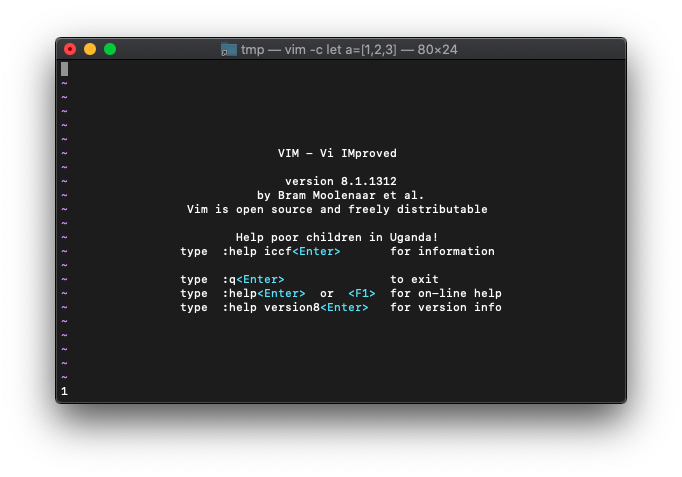
/tmp $ vim -c 'let a=[1,2,3]'
:echo a
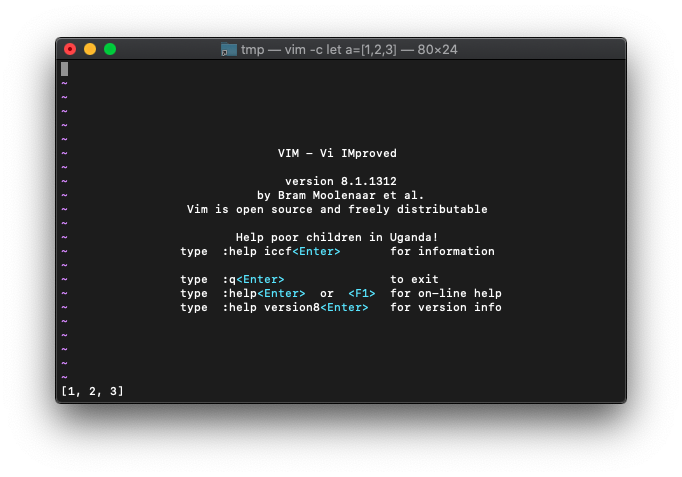
emptyの結果は、
:echo empty(a)

リストに要素が詰まっているので、emptyの結果は、False(0)ですね。
次は、リストを空にしてみます。
:let a=[]
:echo a

emptyの結果は、
:echo empty(a)
True(1)になりました。空ですね。
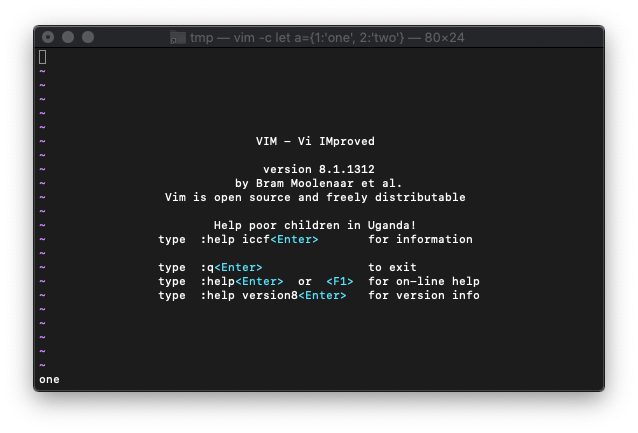
Dictionaryです。
Vimを起動します。
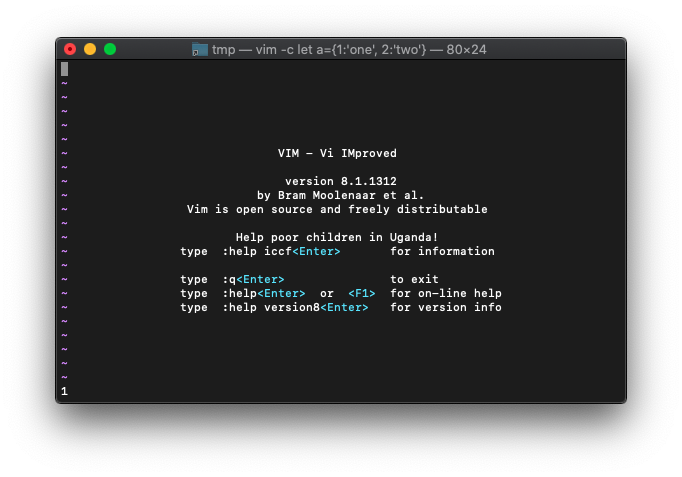
/tmp $ vim -c "let a={1:'one',2:'two'}"
起動後、Dictionaryを確認。
:echo a.1
emptyを使います。
:echo empty(a)
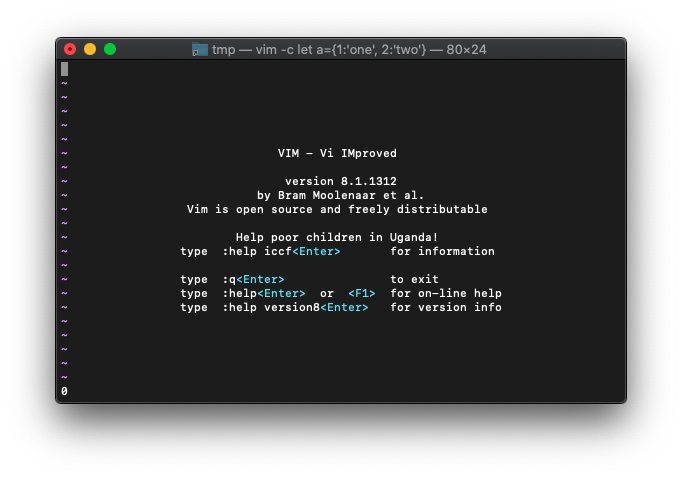
0なので、空ではないです。
次は、Dictionaryを空にしてみます。
:let a={}
:echo a.1
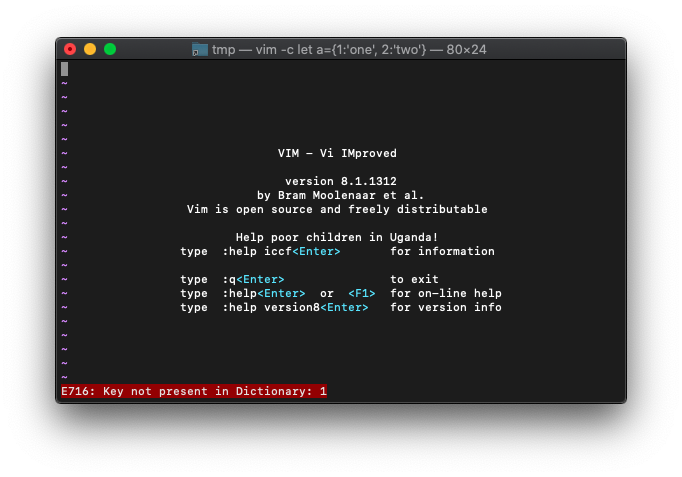
エラーも出ているし、空ですね。
emptyで確認します。
:echo empty(a)
VimScript filereadable
ファイルが読めるかチェック。
実験してみます。
まずファイルを作ります。
/tmp $ echo HELLO > file1.txt
/tmp $ ls -l file1.txt
-rw-r--r--  1 takk            wheel  6 11 15 02:01 file1.txt
/tmp $
/tmp $ vim -c 'echo filereadable("file1.txt")'
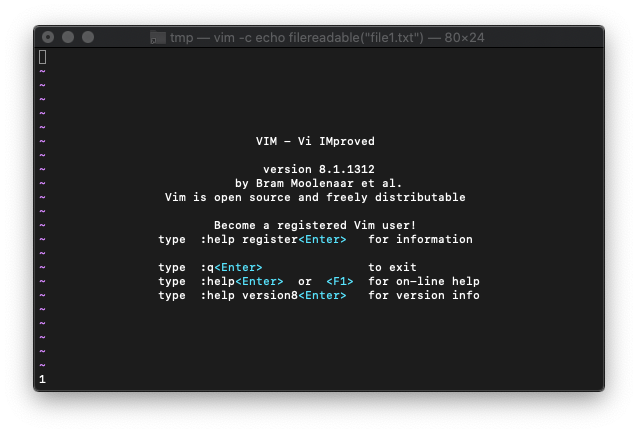
左下に1が表示されました。1はTRUEなので、ファイルが読み込み可能ってことです。
存在しないファイルを指定してみます。
:echo filereadable("aaa.txt")
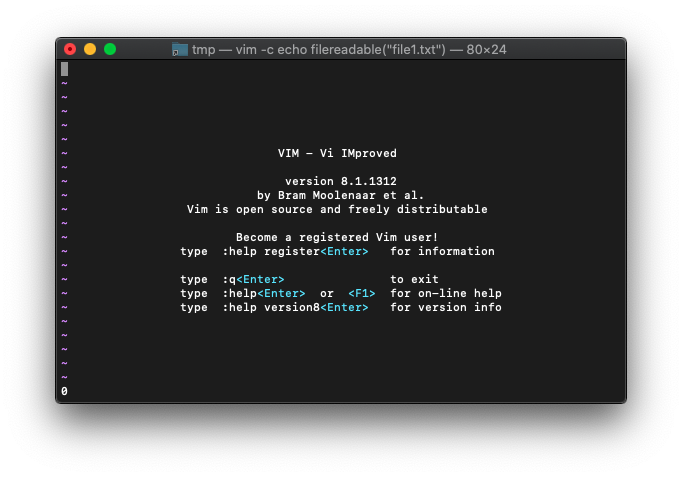
0が表示されました。
以前使ったgetfpermと似てますね。
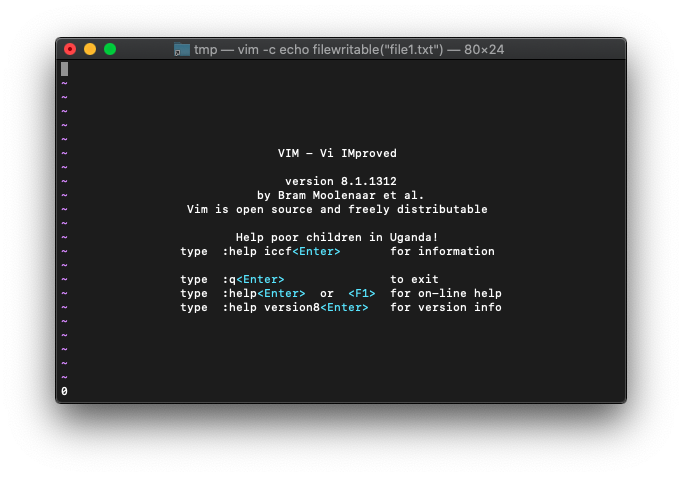
VimScript filewritable
ファイルが書き込めるかのチェック。
/tmp $ ls -l file1.txt
-rw-r--r--  1 takk            wheel  6 11 15 02:01 file1.txt
/tmp $
/tmp $ vim -c 'echo filewritable("file1.txt")'

1が表示されたのでTRUEですね。書き込み可能です。
次はもちろん。存在しないファイル。新規のファイルを作成することができるのかチェックなら、1が返るハズ。
:echo filewritable("aaa.txt")
0ですね。ファイル作成が可能かではなく、あくまでも存在するファイルが書き込み可能かどうかのチェックのようで>す。
次は存在している書き込み禁止のファイルを指定してみます。
/tmp $ ls -l /bin/ls
-rwxr-xr-x  1 root  wheel  51888 10 24 10:34 /bin/ls
/tmp $
これにします。
:echo filewritable("/bin/ls")

0が表示されました。
コメント