作成したテスト用のIntel HEXを実際にマイコンに書き込んで確認したいと思います。Raspberry PIをライターにして、AVR ATtiny85にavrdudeコマンドを使って書き込みます。
まずは、avrdudeのインストール。
# apt-get install avrdude
設定ファイルも修正しておきます。
# vi /etc/avrdude.conf
resetのGPIOを6番に書き換えます。
programmer
  id    = "linuxgpio";
  desc  = "Use the Linux sysfs interface to bitbang GPIO lines";
  type  = "linuxgpio";
  reset = 6;
  sck   = 11;
  mosi  = 10;
  miso  = 9;
;
Raspberry PIとAVRマイコンは、以下のように配線します。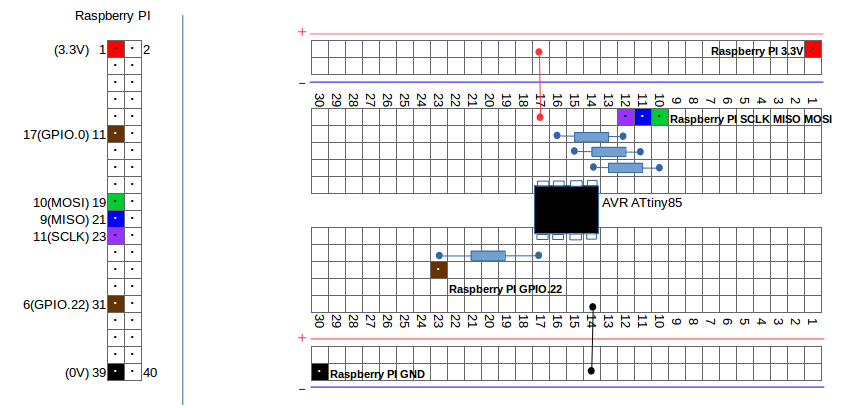
図と同じようにブレッドボードにレイアウトして出来上がり。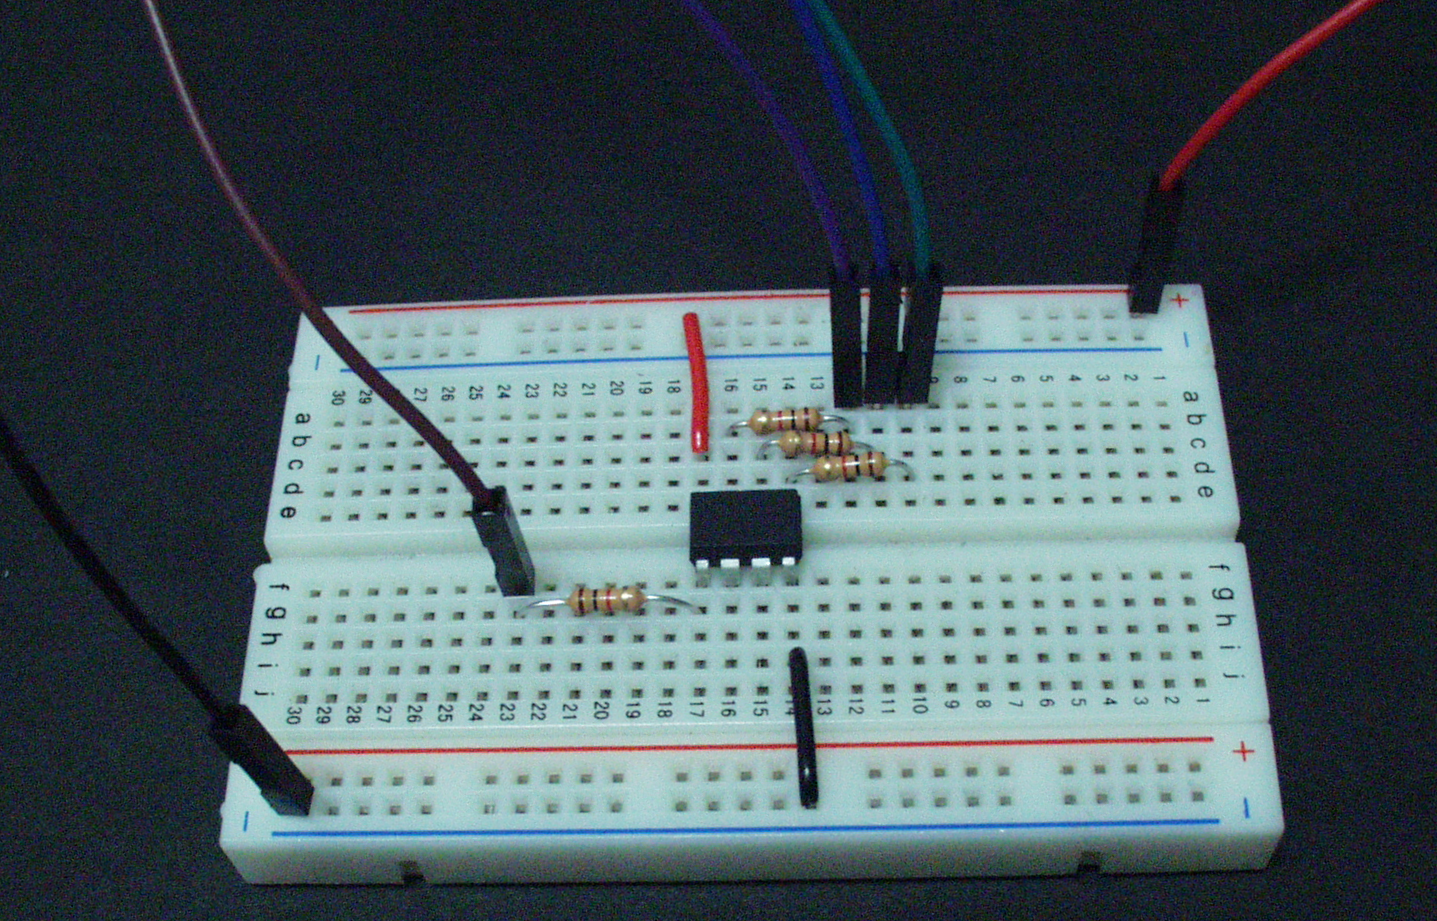
では、「ダミーのIntel HEXデータを作る」で作ったHEXを書き込みます。
root@raspberrypi:~# avrdude -c linuxgpio -p t85 -U flash:w:a.hex

avrdude: AVR device initialized and ready to accept instructions

Reading | ################################################## | 100% 0.00s

avrdude: Device signature = 0x1e930b
avrdude: NOTE: "flash" memory has been specified, an erase cycle will be performed
         To disable this feature, specify the -D option.
avrdude: erasing chip
avrdude: reading input file "a.hex"
avrdude: input file a.hex auto detected as Intel Hex
avrdude: writing flash (120 bytes):

Writing | ################################################## | 100% 0.10s

avrdude: 120 bytes of flash written
avrdude: verifying flash memory against a.hex:
avrdude: load data flash data from input file a.hex:
avrdude: input file a.hex auto detected as Intel Hex
avrdude: input file a.hex contains 120 bytes
avrdude: reading on-chip flash data:

Reading | ################################################## | 100% 0.10s

avrdude: verifying ...
avrdude: 120 bytes of flash verified

avrdude: safemode: Fuses OK (E:FF, H:DF, L:62)

avrdude done.  Thank you.

root@raspberrypi:~#
書き換えできたようです。ただし、意味のないデータを書き込んだので、マイコンは正しく動作しません。HEXが正しいかのチェックだけです。
マイコン動作させるHEXを書き込んで、書き換え自体が正しく動作していることも確認しておきます。以下は、LEDをONするだけのプログラムです。
root@raspberrypi:~# cat led-on.hex
:0800000088e087bb88bb00c04B
:00000001FF
root@raspberrypi:~#
root@raspberrypi:~# avrdude -c linuxgpio -p t85 -U flash:w:led-on.hex

avrdude: AVR device initialized and ready to accept instructions

Reading | ################################################## | 100% 0.00s

avrdude: Device signature = 0x1e930b
avrdude: NOTE: "flash" memory has been specified, an erase cycle will be performed
         To disable this feature, specify the -D option.
avrdude: erasing chip
avrdude: reading input file "led-on.hex"
avrdude: input file led-on.hex auto detected as Intel Hex
avrdude: writing flash (8 bytes):

Writing | ################################################## | 100% 0.01s

avrdude: 8 bytes of flash written
avrdude: verifying flash memory against led-on.hex:
avrdude: load data flash data from input file led-on.hex:
avrdude: input file led-on.hex auto detected as Intel Hex
avrdude: input file led-on.hex contains 8 bytes
avrdude: reading on-chip flash data:

Reading | ################################################## | 100% 0.02s

avrdude: verifying ...
avrdude: 8 bytes of flash verified

avrdude: safemode: Fuses OK (E:FF, H:DF, L:62)

avrdude done.  Thank you.

root@raspberrypi:~#
点灯しました。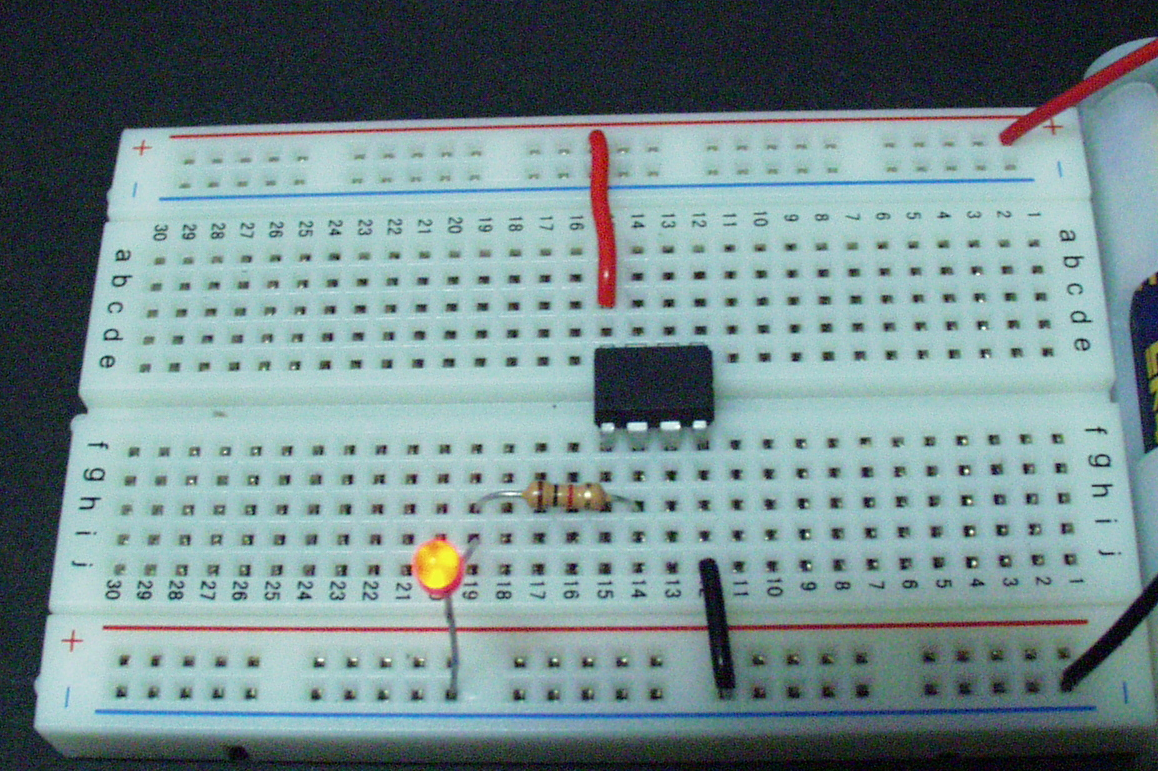


コメント
[…] まずは回路。「Raspberry PiからAVR ATtiny85にIntel HEXを書き込む」のLEDの点灯確認をした回路のLEDを圧電スピーカーにしただけの適当回路です。使用するのは、同様にAVRTiny85マイコンです。プログラムの書き込みはラズパイから行います。 […]